|
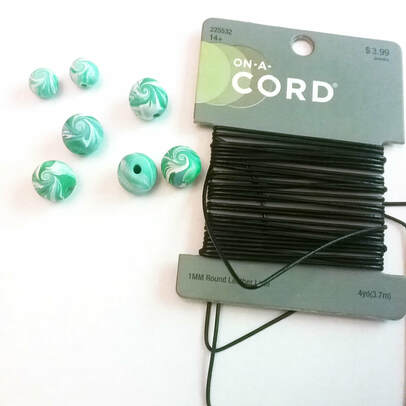
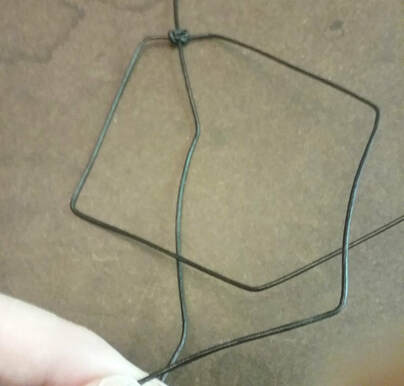
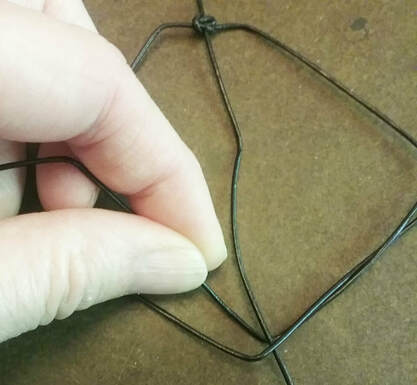
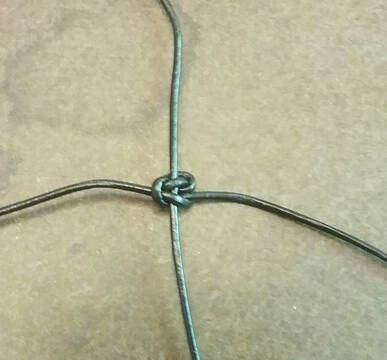
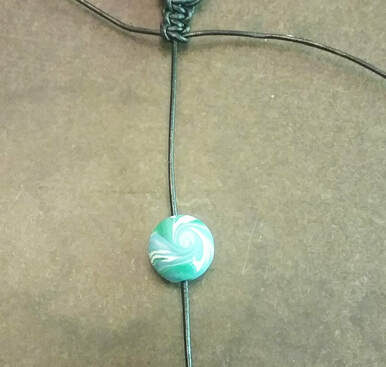
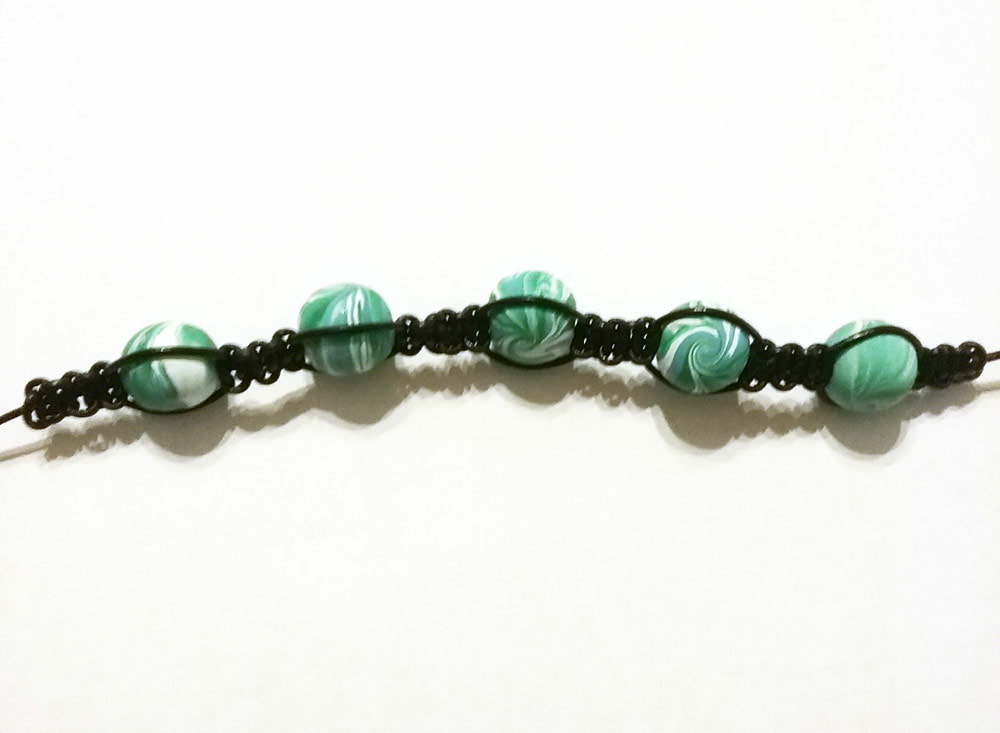
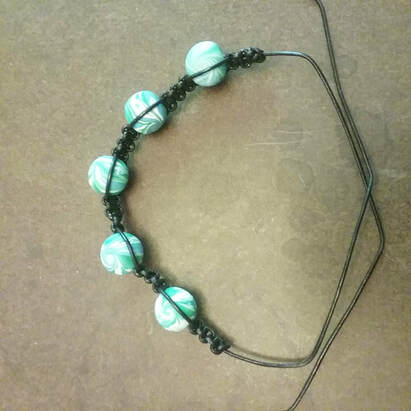
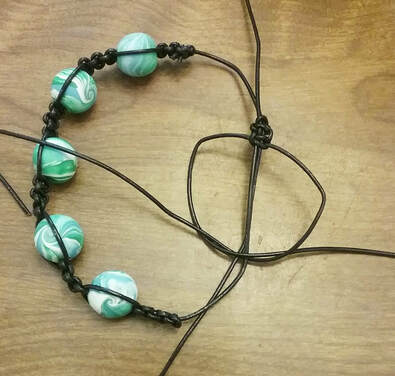
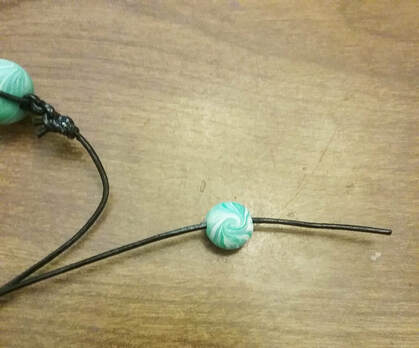
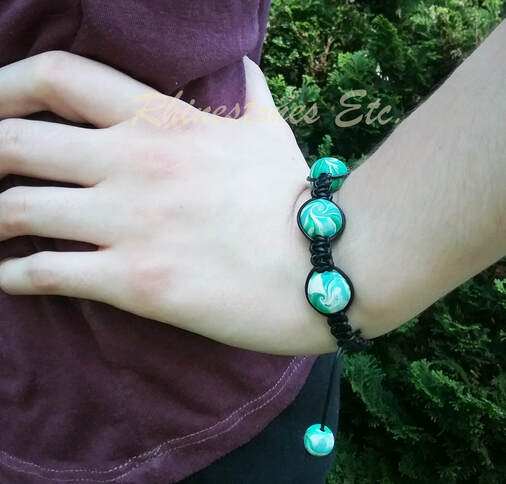
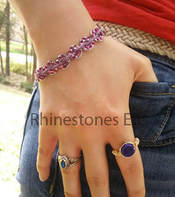
Macramé is that craft using knotting techniques and some type of cord. Chiefly, common types of cord include cotton, linen, jute, leather or yard. Moreover, the craft is ancient, probably dating back to around 500 BC where the Persians and Syrians used it. From there it spread to other Arab countries, and then finally Western Europe. Today, macramé has become fashionable in jewelry making, mainly bracelets. To make a macramé bracelet, the crafter mainly uses square knots, weaving beads in between. Fancier bracelets use pave beads, which are beads covered in rhinestones. This tutorial shows you how to make a macramé bracelet with beads that is quick and easy. How to Make a Macramé bracelet For this project you need: Cord in the following lengths: 2 ft, 4 ft, and 2 ft Beads - 5 size 12mm and 2 size 6mm Glue If you have a macramé board, insert one of the 2 ft pieces of cord in the slot. You'll want to leave about 8 inches hanging behind the board. Or you can use a clipboard as I did or simply tape the piece of cord to the table. Take the 4 ft cord and find the center by folding it in half. Place the center of this cord underneath the cord attached to your macramé board. If you are using a clipboard, or have taped the cord to the table, start about 8 inches down. Now you will begin making your square knots. Take the left piece and cross it over the center cord. Take the right piece and thread the end underneath both the left and center cords. Now, pull it up on through the left corner between the center cord and left cord. Pull to tighten. Repeat starting with the right cord crossing over the center cord. Then take the left cord, thread it underneath both right and center cords. Again, pulling it up, this time on the right corner between the center and right cord. You now have one square knot. How to Add Beads to Your Macramé Bracelet Continue making square knots until you have 3 square knots. Take a bead and thread it through the center cord. Slide to the bead so that it is up against the square knots. Make your next square knot around the bead. Again, continue knotting until you have made 3 knots. Slide another bead on and continue knotting. You can make your bracelet as long as you want, with most bracelets measuring 7 ½ inches. Seal the ends of the left and right cords using super glue, E6000 or some other super strong glue. Allow to dry. Snip the ends of the left and right cords close to the knots. Your bracelet should now look like this: Form a circle out of your bracelet. One end of the center cord should face up and the other down. You are now going to make the sliding clasp also using square knots. Take the remaining piece of 2 ft cord and fold it in half to find the center. Place the center underneath both center cords so that one end faces left and the other right. In the same manner as before, make 5 square knots. Once you’ve made your 5 square knots, seal the ends of the knotting cord with glue. When dry, snip the ends of the cord close to the knots. Thread one of the 6mm beads onto the top center cord. Next, tie a knot about 2-3 inches away from the sliding clasp. Do the same for the bottom center cord. Seal the ends of the cord with glue and let dry. Snip the ends of the cord close to the knot. Your finished Macramé Bracelet with Beads These bracelets are easy and fun to make and look fabulous! You can experiment with more beads and fewer knots or different size beads and different types of cord. Try adding pave beads for some sparkle! Each macramé bracelet with beads will be a unique and fashionable piece of jewelry. Do you need some beads to start your macramé bracelet? Rhinestones Etc. has been selling rhinestones online for over 10 years with discount pricing and quality customer service. In addition to our stock of rhinestones, pearls, and metal trim, we now carry pave and clay beads.
0 Comments
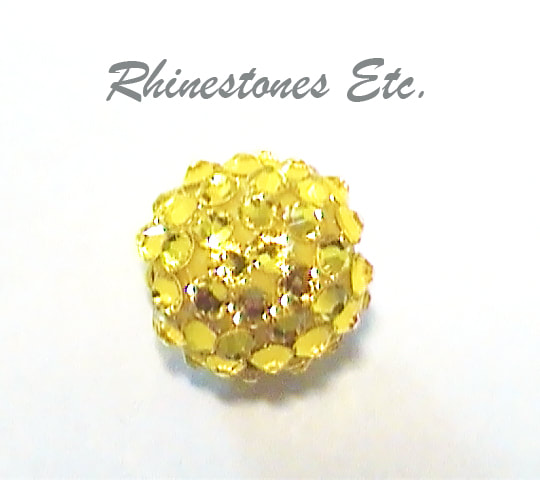
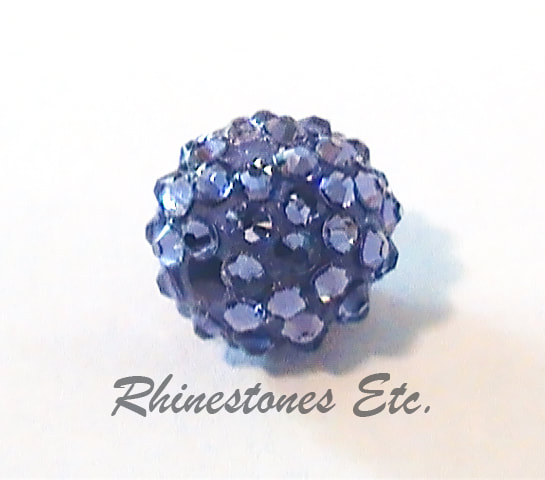
Pave beads, also called disco ball beads, are those wonderfully sparkly beads covered in small rhinestones. Just like a disco ball, with every turn the beads throw off a spectacular amount of sparkle. For such a small bead, pave beads are like the superhero of beading for sparkle. Notably, pave means to set as close together as possible to conceal a metal base. And originally, pave beads had a metal interior covered with tiny rhinestones. However today, some pave beads have oven baked clay interiors, bringing down the price considerably. Rhinestones Etc, seller of rhinestones for over 10 years, now has pave beads with oven baked clay interiors. Covered with over 60 small Swarovski Rhinestones, these beads pack a lot of sparkle. Pave Beads in Jewelry Design Presently, the macramé bracelet design is the one of the most popular way of using pave beads. Mads and Mikkel Kornerup made this style of bracelet very popular. The brothers first introduced their popular Shambala bracelet, the main type of macramé bracelet, in 2005. Not only a fashion statement, these bracelets have spiritual meaning as well. Correspondingly, each bead color of the bracelet has a different meaning. Perhaps you just like Shambala bracelet for its look. Even so, you can’t deny the eye-catching sparkle of a Shambala bracelet made with pave beads. Although macramé bracelets are the main way to use pave beads, it is not the only way. Another popular way to use pave beads in in earring design. Moreover, earrings are simple to make with a coordinating smaller bead, head pin and ear wires. Additionally, you can slip a pave bead onto a charm bracelet for added sparkle. Types of Beads
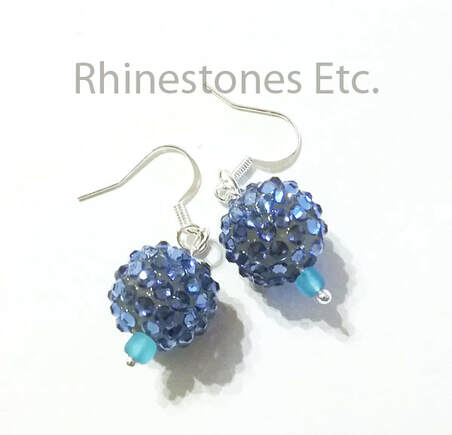
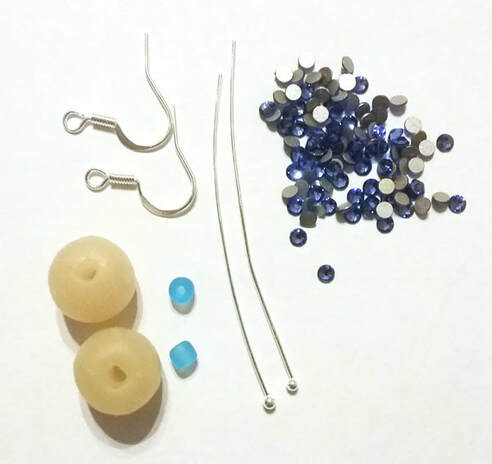
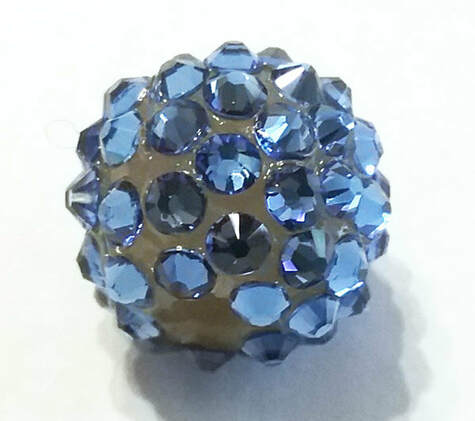
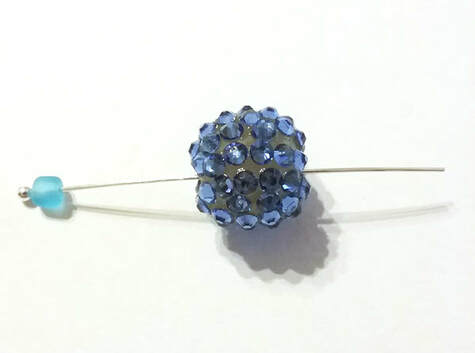
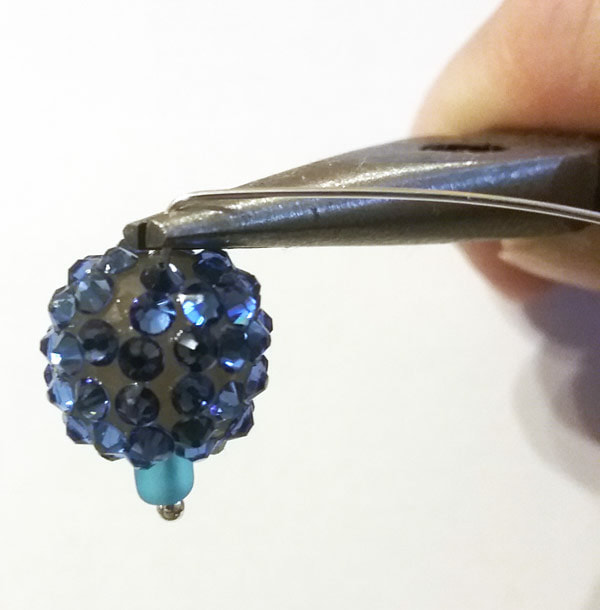
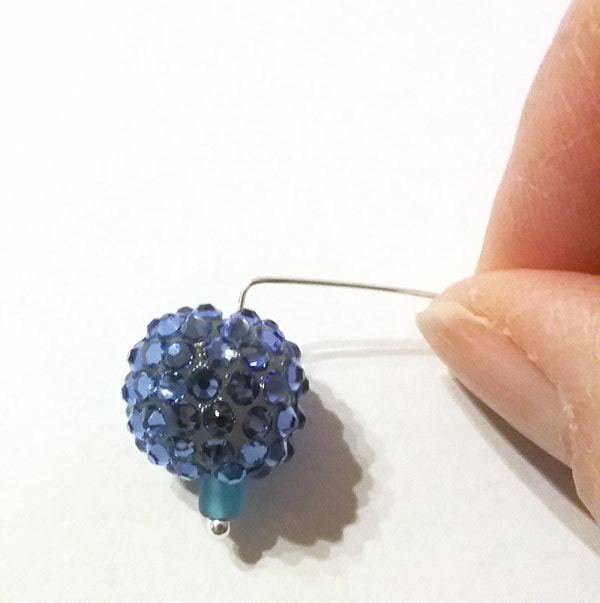
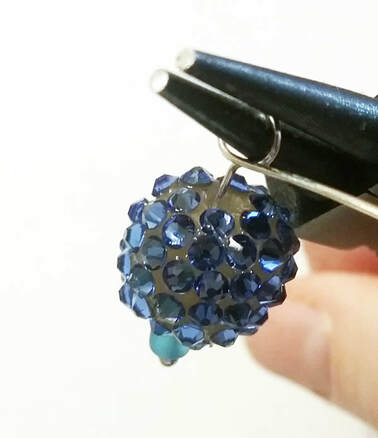
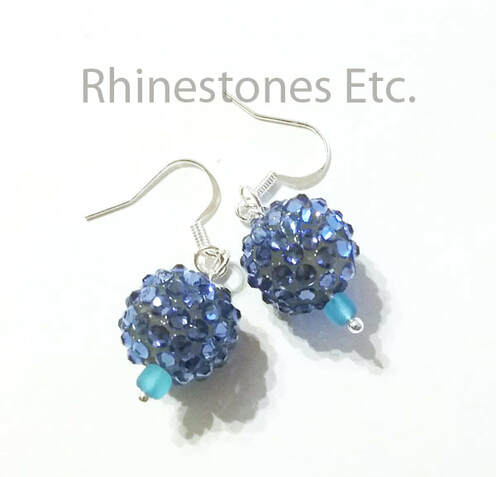
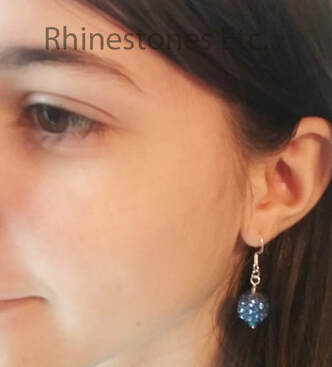
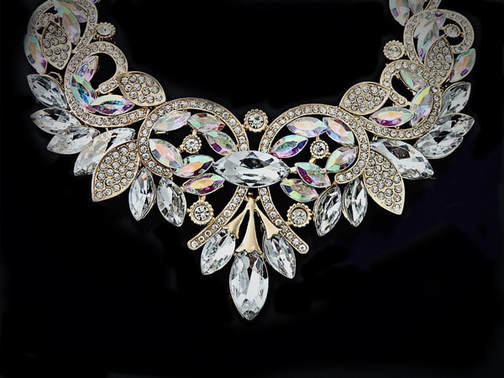
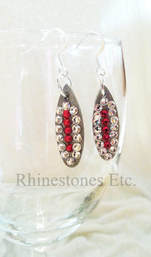
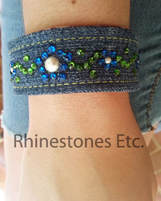
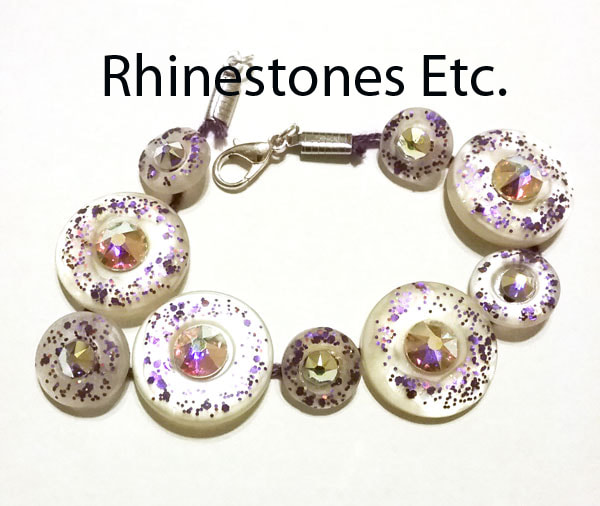
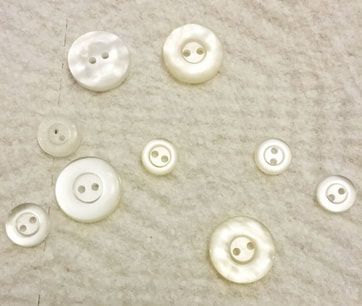
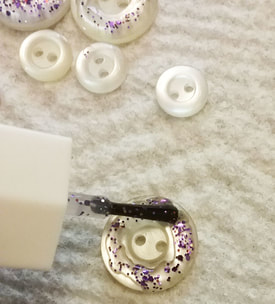
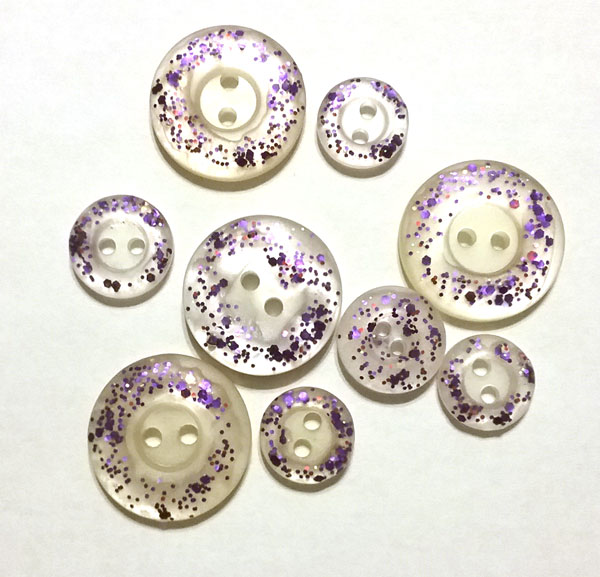
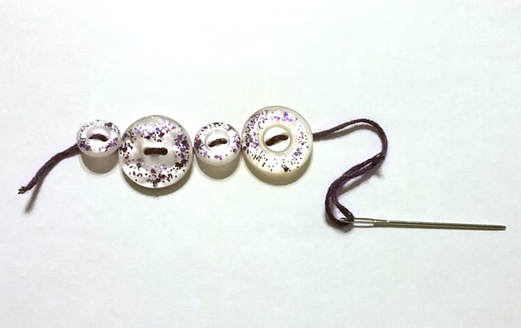
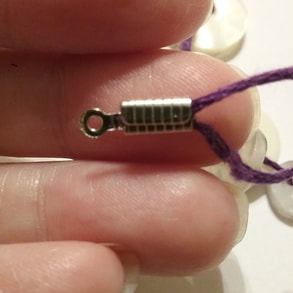
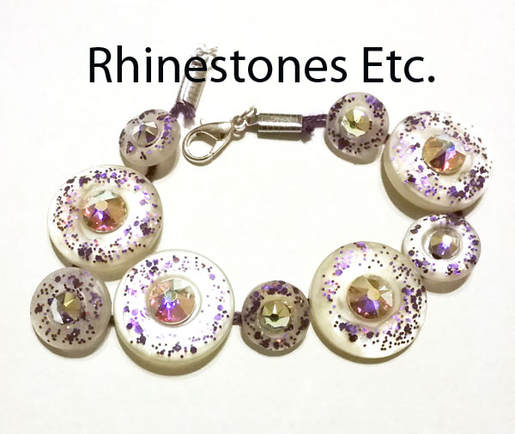
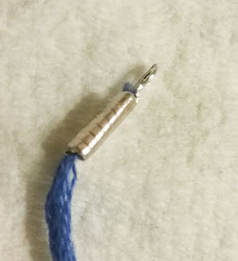
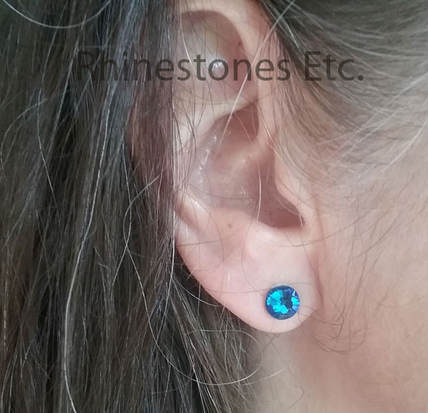
Swarovski manufactured pave beads have a stainless-steel shaft covered in rhinestones. With several shapes available from tube, round and oval shaped, Swarovski also offers many different colors. But Swarovski made pave beads are expensive. Priced at over $10 per bead, jewelry making with Swarovski made beads can be quite pricey. Currently offering round pave beads in several colors, Rhinestones Etc’s pave beads are competitively priced. Unlike Swarovski, we use an oven baked clay interior. Then we cover it with over 60 - 9ss rhinestones. Finally, our beads are 12mm in size with a hole through the middle. Our beads are perfect for making macramé bracelets or any other jewelry designs. Update: We no longer carry pave beads. I just love a sparkly pair of earrings. There is something magical that happens when you put in a pair that makes you feel so glamorous. However, many times sparkly earrings are expensive. So how can you feel glamorous without breaking the bank? Make your own with rhinestones! These earrings use easy to make homemade pave beads. Pave beads are round beads covered with small rhinestones. While there are many different types for sale online, you can make your own. Also, I used Swarovski Rhinestones for maximum sparkle. For this project I used: Oven backed polymer clay 9ss rhinestones about 65 E6000 2 head pins 2 Ear wires 2 small beads Jewelry pliers – chain/needle nose, round nose, flat nose and side cutters 2 - 4 mm jump rings How to Make Pave Beads To begin, make 2 balls out of polymer oven baked clay. Each ball should measure about 12mm. Using a straight pin or small nail, make a hole through the center, large enough to fit an eye pin through. Bake for 15 minutes at 275 degrees. When finished baking, remove from oven and let cool. Next, the rhinestones need to be glued to the clay balls. Although there are several suitable glues, I chose to use E6000 for this project for its strength of adherence. E6000 tends to be gloppy so I like to squeeze a small amount over a paper plate. Use a toothpick to scrape a small amount of glue. Apply this to the clay ball. Pick up a rhinestone with tweezers or a wax tipped tool and gently press it into the glue. Continue gluing until the bead is covered with rhinestones leaving the hole open. Let dry for 24 hours. How to Make DIY Earrings Slide a small bead onto the eye pin and then the pave bead on top. Using the chain nose pliers bend the eye to a 90 degree angle Then, using the round nose pliers, bend the wire around the pliers to make the loop. Hold the loop with the flat nose pliers and start to wrap the excess wire underneath the loop. Before you get to the bottom, cut the excess wire and then tuck in the end. Next, open a 4mm jump ring. Attach the ear wire to the loop in the pave bead using the jump ring. Close the jump ring and your earring is finished. Every movement of you head will produce a twinkle of light as each rhinestone on the pave beads sparkle. Glamourous and captivating, these earrings will accessorize any outfit. Easy to make and inexpensive, you’ll want to have several pairs of these DIY earrings on hand. Need rhinestones to get you started on making some pave beads? Rhinestones Etc. has competitive pricing and excellent customer service. Imagine a Christmas tree without decorations, or a wedding cake with no icing. Just as you expect ornaments at Christmas and fancy icing decorations at a wedding, jewelry is the finishing touch. Think of what the Oscars would be without all those glittering jewels. Unfortunately, real gemstone jewelry is quite pricey and unaffordable for most of us. Rhinestone jewelry is a lot less expensive and can really add the finishing touch to an outfit. But buying a new piece of jewelry each time you buy a new outfit can be expensive. Also, even buying multiple pieces of costume jewelry for each outfit can really put a dent in your budget. However, you can make your own rhinestone jewelry saving yourself a bundle of money. And using rhinestones to make jewelry is easy, fun and adds that touch of sparkly elegance. History of Rhinestone Jewelry Georg Friedrich Strass is credited with inventing the rhinestone. This new imitation gem could take the place of precious gems in jewelry making without sacrificing any sparkle, and it cost a lot less than diamonds. Whereas Strass made jewelry more affordable, Coco Chanel made it fun to wear costume jewelry. Until Chanel arrived on the fashion scene in the later 1920s, only the wealthy could afford jewelry. Jewelry was made nearly exclusively with precious stones and fine metals. Even still, the high cost of jewelry meant even wealthy women could only wear one to two pieces. Meanwhile, costume jewelry was a sort of style faux-pas. It was looked-down upon as being only for women who couldn’t afford the real thing. Chanel was an innovator in many aspects of fashion and she made it fashionable to wear fake jewels. Many of her signature pieces feature rhinestones. Some DIY Rhinestone Jewelry Pieces Definitely, rhinestones add that look of extravagance of precious gems without the steep price tag. Moreover, even if you are not experienced in jewelry making, there are some simple pieces you can make. Glue a large rhinestone (30ss) to an earring backing to make a pair of rhinestone studs. Punch a small hole in pieces of shaped balsa wood and glue rhinestones to it. Then, attach a jump ring and earring wires for a different style of earrings. Use different components in making bracelets. Fabrics, buttons or washers make great surfaces to glue rhinestones to. Wire wrapped jewelry is also quite popular. Rhinestones can be wrapped with jewelry wire to make pendants, bracelets and rings. There are so many possibilities for DIY rhinestones jewelry! All of these were inexpensively made and simple to do. See what you can create using rhinestones. Need rhinestones for your jewelry project? Rhinestones Etc. has competitive prices and excellent customer service. Sometimes, you can take simple components and make a truly stunning DIY creation. For example, take buttons: most people have some laying around and if not, they are inexpensive to buy. Simply, paint on glitter nail polish, string together with string or wire, glue on some rhinestones and just like that, you now have a very pretty bracelet perfect to add sparkle to your wrist. To do this project I used: Various size buttons Glitter nail polish Krylon acrylic coating Embroidery thread E6000 34ss and 20ss Crystal AB rhinestones 4 mm jump ring Lobster claps Cord end caps Jewelry pliers. Tweezers or wax tipped tool Instructions for a DIY button bracelet You can use all the same size buttons or vary the sizes, whichever style you prefer. I used purple glitter nail polish but there are many colors available at your local beauty supply store. Paint the tops of the buttons making sure you don’t paint over the button holes. Let the nail polish dry completely. To protect the nail polish from chipping off, spray a coating of Krylon Acrylic coating on the buttons. If you want, you can apply more than one coat, allowing to dry completely between coats. Cut a piece of complimentary embroidery thread about 12 inches long. Thread a sewing needle with all six strands. Starting underneath, sew the buttons together. Using a cord end cap, place one end of the thread in the cap leaving a one-inch tail. Fold over one side of the cap. Place the tail in the cap folding the thread and then folding over the other side of the cord end cap. Cut the excess tail thread. Measure your wrist to a comfortable fit. Cut the other end to this length and add the cord end cap to the other end. Add a jump ring and lobster clasp to one end and a jump ring to the other. Lay the bracelet flat. For the larger buttons, I used 34ss rhinestones and the smaller buttons I used size 20ss. Place a drop of glue smaller than the rhinestone on the middle of the button. Follow the glue manufacturer’s instructions. Using a wax tipped tool or tweezers, gently press the rhinestones into the glue drop. Continue gluing until all of the buttons have a rhinestone, then allow to dry flat for 24 hours. Buying new jewelry every season is expensive, but with this DIY button bracelet, you’ll have a sparkle bracelet perfect for the fall. Wear it for formal or casual occasions, either way, you’re sure to make a sparkly statement! Rhinestones Etc. want to be your source for bling supplies. Browse our selection to find your color.
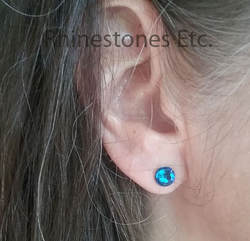
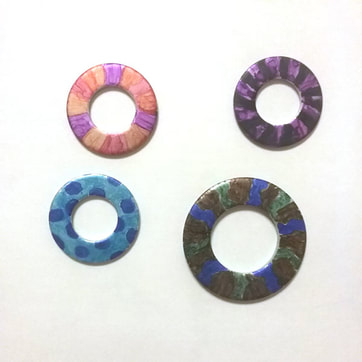
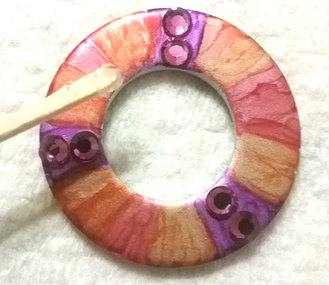
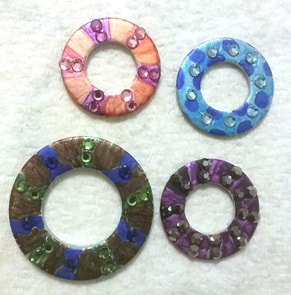
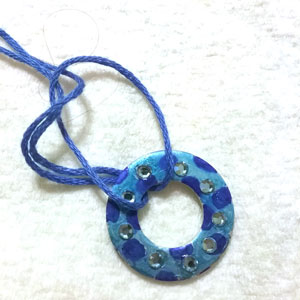
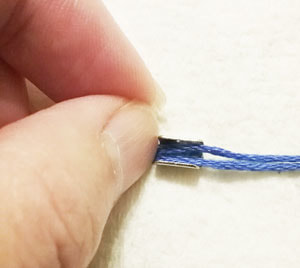
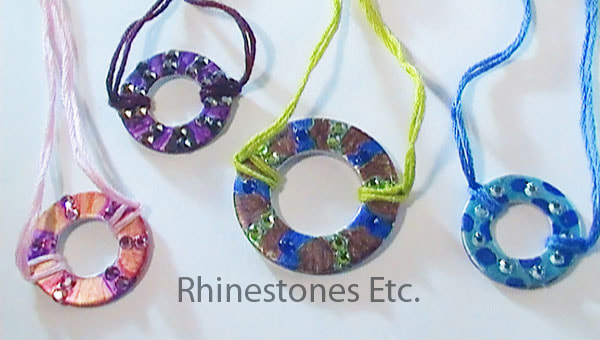
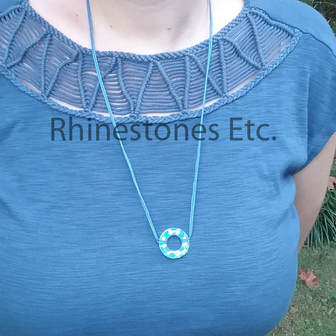
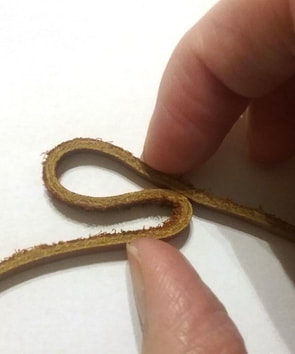
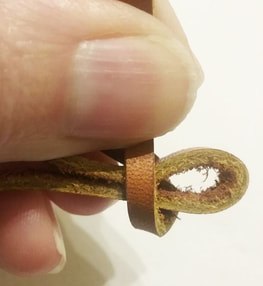
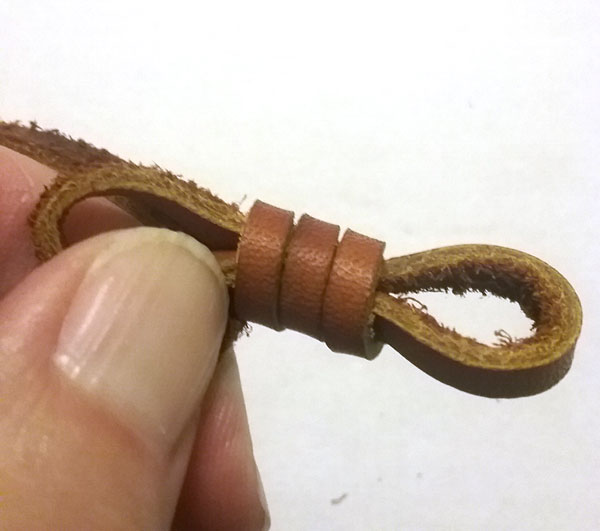
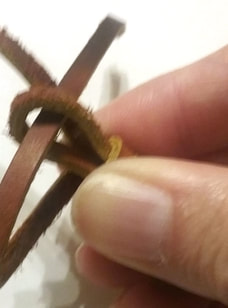
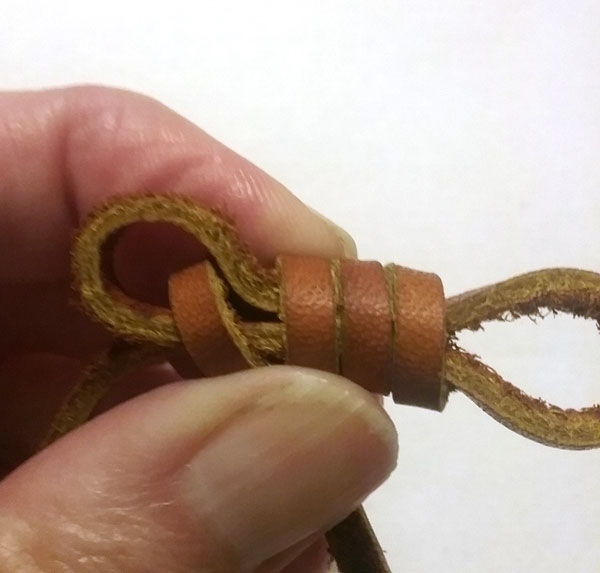
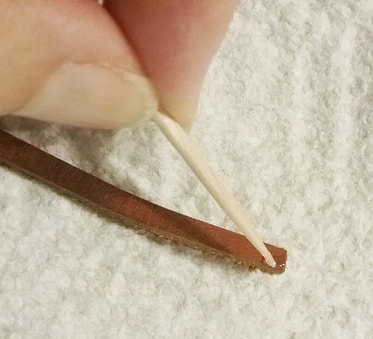
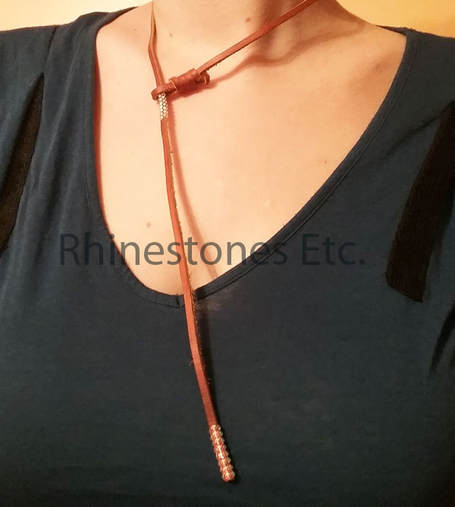
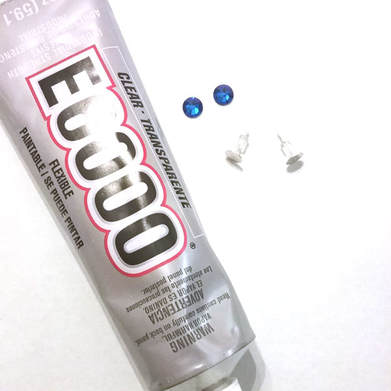
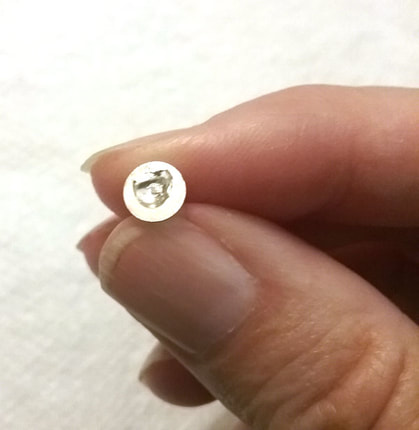
Alcohol ink washer necklaces are the latest fashion and I love the look of them. You take a simple item, a washer from the hardware store, color it with alcohol ink and you have a work of art. Simply attach a cord and you have a stunning necklace. Add rhinestones to make your necklace stand out even more. For this project I used: ½ and ¾ inch washers Alcohol ink markers Various rhinestone colors in size 12ss E6000 Wax tipped tool or tweezers Embroidery thread Cord end caps 4 mm jump rings Lobster clasp Krylon clear matte acrylic coating Jewelry pliers How to Make Washer Necklaces One of my daughters is a very good abstract artist. Some of her artwork is on Facebook as ArtisticallySweet and Instagram as @megcatdragon. She colored the washers with alcohol ink markers. Once the ink dries, you will want to put a clear protective coating on it. Krylon brand which is easy to apply and dries in 10-15 minutes. Follow the manufacturer’s instructions when applying. I picked some coordinating rhinestones colors in size 12ss to enhance the washers with. When gluing rhinestones to metal, I like to use E6000 because of the strong bond. Use in a well-ventilated area and always follow the manufacturer’s instructions. E6000 can be a bit gloppy, so I squeeze E6000 over a paper plate and use a toothpick to apply to glue. Then using tweezers or wax tipped tool, pick up a rhinestone and gently press it into the glue. Continue gluing rhinestones and then allow to dry for 24 hours. For the cord, I used embroidery floss. It comes in many colors, so you are sure to find one that will coordinate with your necklace. Measure your neck to see where you want the necklace to lay. You can use one long piece of floss, or as I did, two shorter pieces. I cut mine 27 inches long. Fold the floss in half to form a loop at the one end. Pull this loop from underneath the washer up through the hole. Take the two loose ends, put them through the loop and pull to tighten. Do the same for the other piece of floss. Trim the ends of the floss so they are even. Then taking a cord end clasp, lay the ends of the embroidery floss in the clasp and using jewelry pliers, bend the first side over then the other to secure the ends. On one end add a jump ring and lobster clasp and on the other just a jump ring. Stunning, aren’t they? And so simple to make. Unleash your creative side and make some washer necklaces for every outfit! Are you ready to make your own washer necklaces and need some rhinestones? Rhinestones and wax tipped tools are available from: www.RhinestonesEtc.com DIY: Leather Wrap Necklace Have you seen leather wrap necklaces, the newest jewelry trend? I set out to make one and worked on several different designs. Some ideas didn’t work and some ideas I didn’t like. The kind that wrapped around your neck several times, was too constricting for me. I tried making one with a washer, but the washer was too heavy, and the necklace kept slipping. I finally found a design with a noose knot that I loved. For this project I used: Leather strip 1/8 inch wide and about 30 inches long E6000 64 Crystal AB 10ss rhinestones Wax tipped tool or tweezers How to Make a Leather Wrap Necklace Cut the strip of leather to about 30 inches in length. To make a noose knot, leave about 6 inches on one end and shape the leather into an “S” shape. Try to make the shape small, only about 1 inch in length. Take the right end and go underneath the shape. Continue wrapping around the “S” shape 3 times, tightening the wrap as you go. Slip the end (the end you’ve been wrapping around with) into the left loop, pulling tight. Now take the right loop and pull tight so that the left loop will disappear. And there is your noose knot. You can put a drop of glue on it to secure it if you wish. Cut the short end off close to the knot. In gluing the rhinestones into place, I use E6000 on leather. It makes a super strong bond, and I don’t have to worry about the rhinestones falling off. Make sure to use it in a well-ventilated area and follow the manufacturer’s instructions. Because E6000 is a bit gloppy, I use a toothpick to apply it. After applying the glue, pick up a rhinestone and gently press in into place. I glued 8 rhinestones per side on the very end of the leather. Also, I measured where the knot would sit around my neck and glued 8 rhinestones per side there to keep the knot from slipping. This leather wrap necklace is super easy to make, and the rhinestones give it that extra eye-catching sparkle. Wear it with your favorite outfit to give it some extra jazz! Need some rhinestones to make your leather wrap necklace? Rhinestones and wax tipped tools are available from: www.RhinestonesEtc.com Accessorizing an outfit can really add that extra something and make it stand out. Adding just the right jewelry can really impact how you feel about yourself. You can go from pretty to beautiful just by adding the right touch. But it isn’t always easy to find the right jewelry to match an outfit. Once you see how simple it is to create your own rhinestone stud earrings, you’ll be making a pair to match every outfit. For this project I used: E6000 Flat post earrings and backings 30ss rhinestones Tweezers or wax tipped tool How to Make a Pair of Rhinestones Stud Earrings Most craft stores have a large jewelry supply section. So, you should have no trouble finding some flat post earrings and backings. I have a nickel allergy and was happy the ones I found were nickel free. When I glue rhinestones to metal, I like to use E6000. It provides a good adhesion to metal. Always make sure you use it in a well-ventilated area and follow the manufacturers instructions. Also, I found that you can use slightly less glue when using E6000 than other adhesives because it provides such a strong bond. Start by applying E6000 to the flat part of the earring stud. Using a toothpick when applying E6000 helps to make sure you have the right amount as E6000 tends to be gloppy. Then, pick up a rhinestone using tweezers, or a wax tipped tool. Gently press the rhinestone into the glue. Do the same for the other earring stud. Allow to dry for 24 hours. Super easy to make and as nice looking as those expensive department store earrings. Plus, you can make a different colored pair for every outfit you own without blowing your budget. Happy crafting!
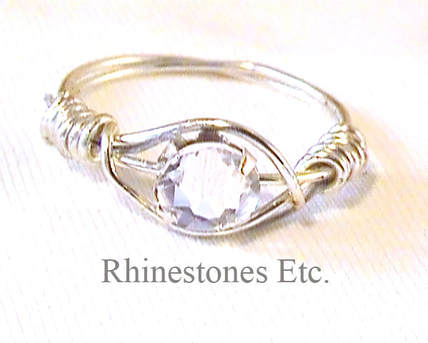
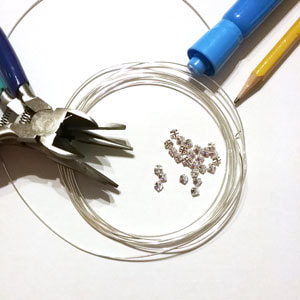
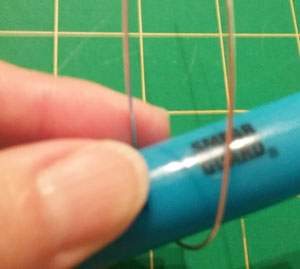
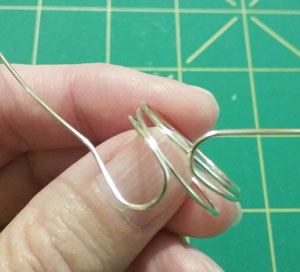
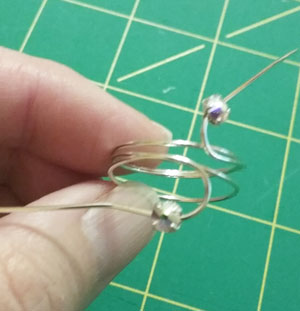
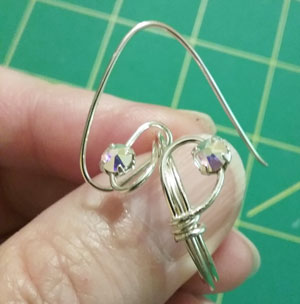
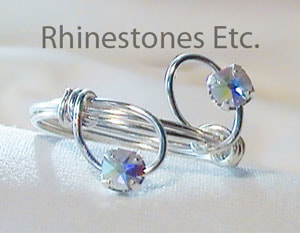
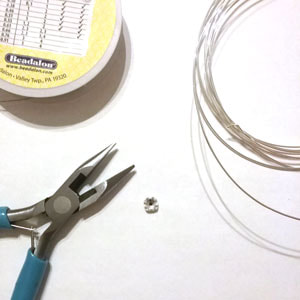
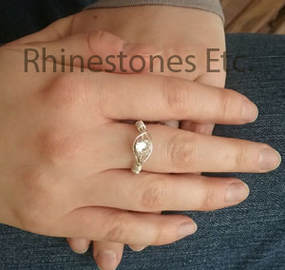
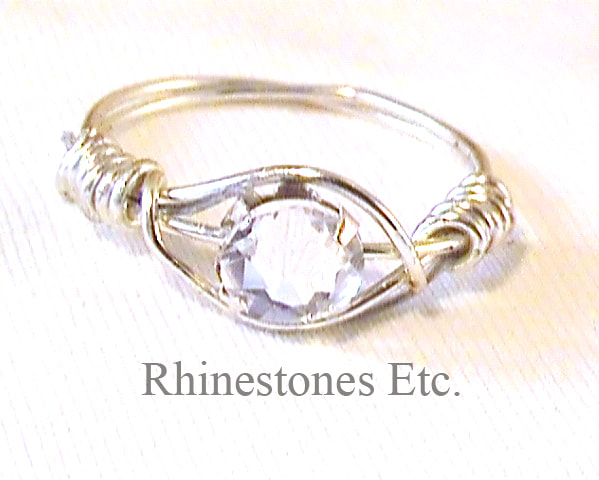
Rhinestones are available from: www.RhinestonesEtc.com. If you’ve been following my blogs, you know I love jewelry. However, I can’t afford to buy most of the pieces I love as there are way too many of them. Recently, I’ve unleashed a new love for rings and this DIY ring is a variation on a previous blog tutorial. Sometimes working with wire can take a little practice, so don’t get discouraged. I usually have to try the ring twice before I am happy with the finished project. For this project I used: 22 gauge silver wire Jewelry pliers (needle nose, wire cutters) Highlighter Pencil 2 Crystal AB 16ss Rose Montee How to Make a DIY Ring Begin by cutting a piece of 22 gauge wire 12 inches in length. Take your highlighter (or any other household item the equals the circumference on your finger). Wrap the wire around the highlighter twice. Once you’ve wrapped it twice, remove it from the highlighter. Then take a pencil and bend the wire into a loop. Slide a Crystal AB 16ss Rose Montee onto the end of each wire and slide to the curve in the wire. Using your jewelry pliers, bend the end of the wire to begin wrapping the ends around the base of the ring, without losing the loop shape holding the Rose Montees. Continue wrapping, tightening the coils as you go. Wrap the wire about 3 or 4 times around and cut the end if necessary. Squeeze the ends with the pliers, tucking them in. Repeat for the other side. Try different variations of size of the Rose Montees and wrapping techniques to create new and beautiful jewelry. Once you’ve made a few DIY rings, you’ll get the hang of it and see how easy and pretty they turn out.
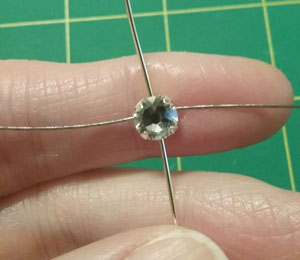
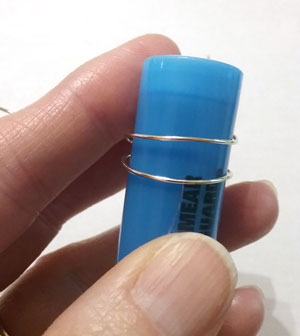
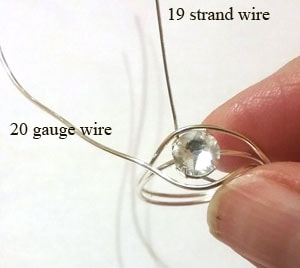
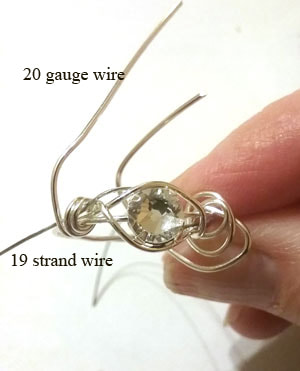
Rose Montees are available from: www.RhinestonesEtc.com Do It Yourself Rhinestone Jewelry As the mother of five children (yes, you read that right) there isn’t always money left over for luxuries like fancy clothing or jewelry. So, I am always excited when I discover new ways to make seemly exquisite jewelry at a low cost. This DIY rhinestone ring is easy to craft and perfect for those days when you want a little extra sparkle on your hands. Requiring no previous experience, this project is ideal for beginners wanting to learn the craft of jewelry making! For this project I used: 20-22 silver gauge wire 19 strand silver wire (flexible) Jewelry pliers 30ss Crystal Rose Montee Highlighter or any other household item that has the same circumference as your finger Cut a piece of the 20-gauge wire 12 inches long. Cut a piece of 19 strand 6 inches long. Thread each one through the cross setting on the back of the Rose Montee. For the ring size, I do not have a ring size stick so using a tape measure, I measured the circumference of my finger and found that a highlighter had the same circumference as my finger. Place the Rose Montee in the center of the 20-gauge wire stone side up then wrap the left side once around back to the Rose Montee and then do the same for the right side. Gently slide the wire off the highlighter. Slightly bend the left wire to go around the Rose Montee. Do the same for the other side. Bend the 20-gauge wire and begin to wrap it around the ring catching the 19 strand wire in the coils. I work on both sides at the same time but you can wrap one side first and then the other. Tighten the coils so that the 19-strand wire is secure then cut as close as possible to the 20-gauge wire. Continue wrapping once or twice more with the 20 gauge wire. Cut the wire and tuck the end in. Brighten your everyday look with this sparkly ring or combine it with your favorite evening dress for a flawless finish down to your fingertips!
Rose Montee rhinestones are available from: www.RhinestonesEtc.com |
KarenI have been adding bling for over 20 years. Through my projects, I hope you find inspiration. Categories
All
Archives
July 2024
|
Home About Policies Return Shipping
Contact Us Size Chart Privacy Products Reviews
Copyright 2024 Rhinestones Etc. All rights reserved.
Contact Us Size Chart Privacy Products Reviews
Copyright 2024 Rhinestones Etc. All rights reserved.

 RSS Feed