|
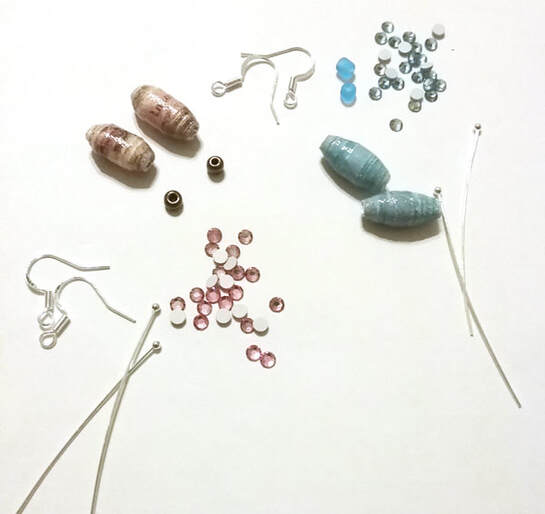
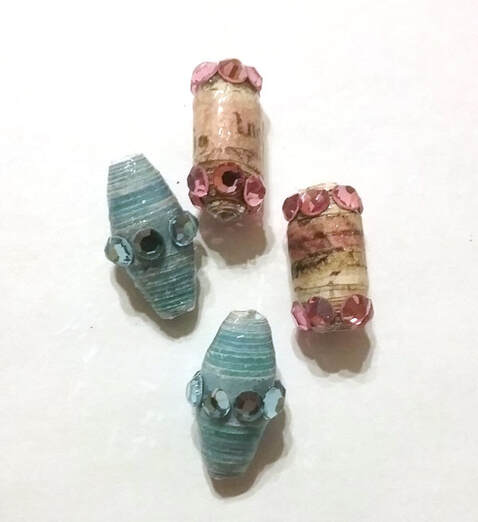
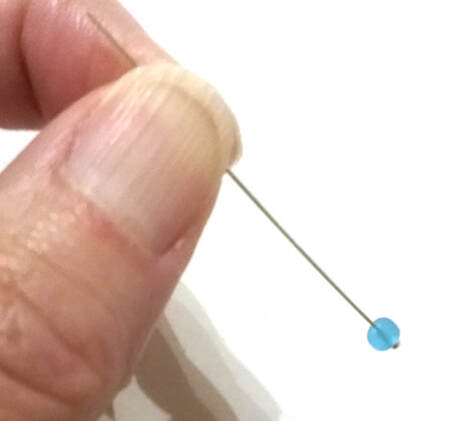
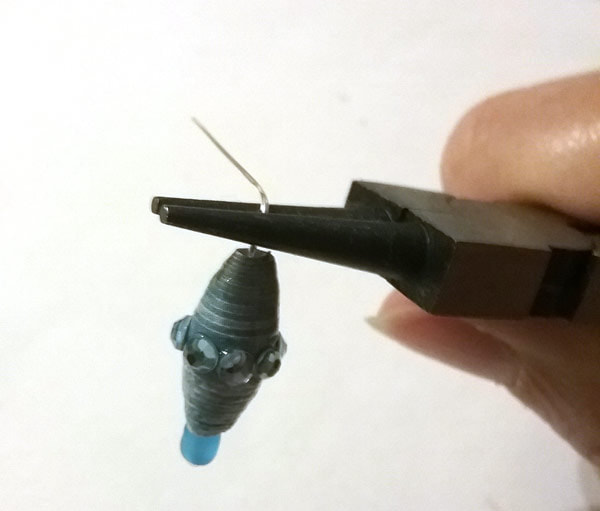
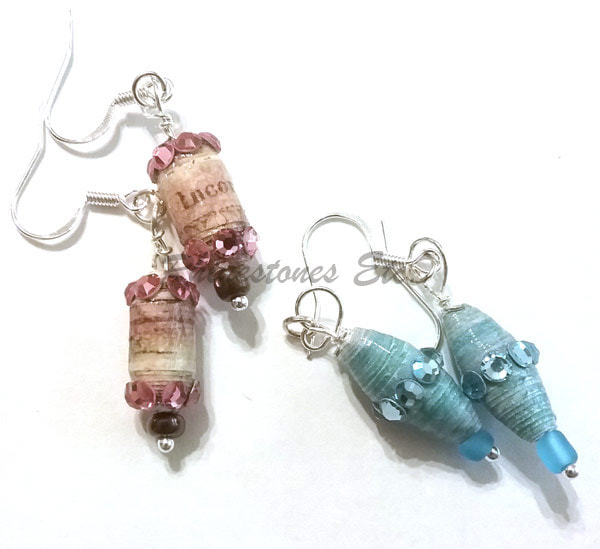
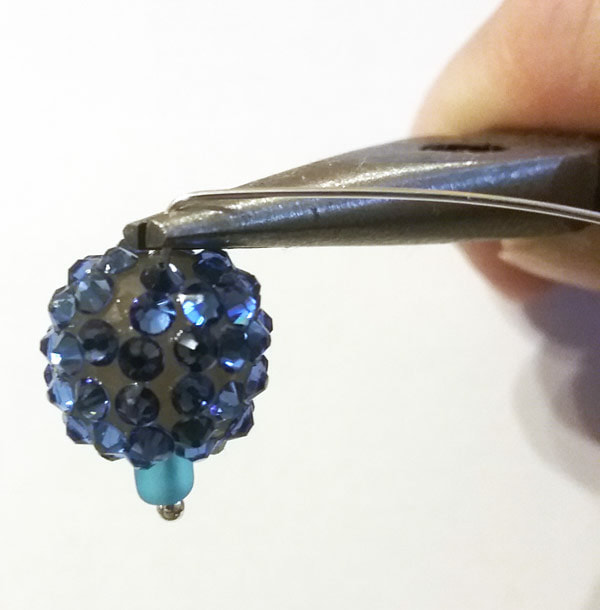
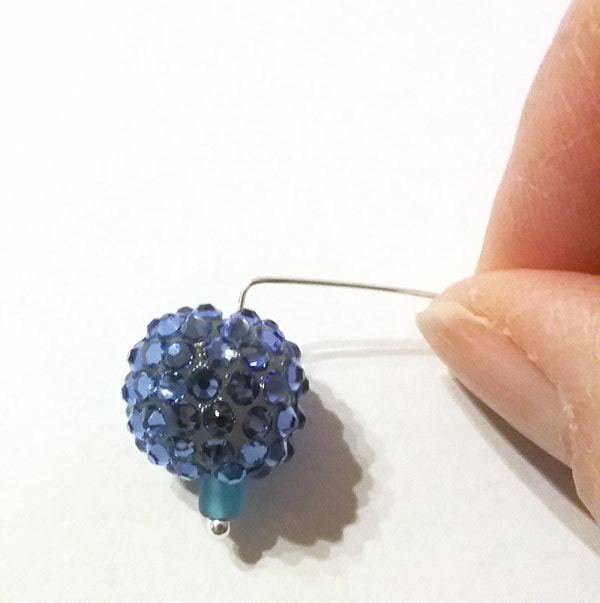
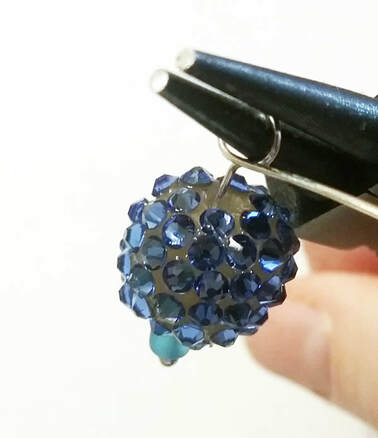
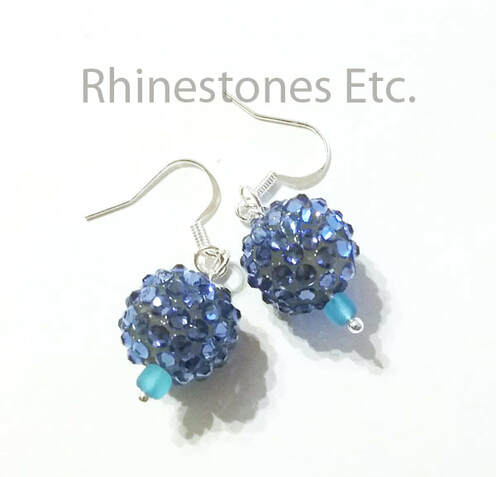
Sometimes the simplest materials can make the most beautiful things. For example, you can take discarded magazines and turn them into colorful paper beads. This craft of making paper beads is old, possibly dating back to Victorian England when women used scraps of wallpaper. Today, artisans continue the tradition with modern twists creating beautiful jewelry. You can make your own paper bead earrings with rhinestones following our simple directions. For This project I used: Scrap paper White glue Modge Podge 12ss rhinestones Small beads head pins 4 mm Jump ring Earring wire Wooden skewer/knitting needle Jewelry pliers: round and flat nose How to Make Paper Beads There are a few different bead shapes you can make which depend on the shape of the paper you cut. A rectangle piece of paper will make a tubular bead while a triangle will make a cone bead. Variations in these shapes will lead to interesting variation differences shape. I used a long triangle shape with a base of ¾ of an inch and sides 8 inches long. Cut out the desired shape from your paper. Place the printed side (the side you want facing outward) face down. Starting about ¼ of an inch from the base, spread your glue thinly starting at the wider end. Set your skewer/knitting needle on the unglued base. Begin to roll your skewer rolling the paper with it to form the bead. When you reach the end, slide the bead off and allow to dry. Next, you’ll need to seal your bead to protect it from the elements. I sealed my beads with several coats of Modge Podge, letting each coat dry thoroughly. How to Make the Paper Bead Earrings Once the last coat of Modge Podge is thoroughly dry, your ready to glue rhinestones onto your paper bead. I do like to use E6000 on my jewelry projects because of the strength of the bond. Typically, I squeeze a small amount on a paper plate and apply with a toothpick. Always use in a well ventilated area and follow the manufacturer’s instructions. To begin, slide a small bead onto your head pin and then slide a on one of your a paper beads. The next step is to make a loop at the top of the head pin. This can be a little challenging and takes a little practice. You’ll need your round nose and flat nose pliers. Place the round nose just above the top of the paper bead. Then bend the head pin around the nose of the pliers. Continue bending until you have a circle. Remove the round nose pliers. Finally, holding the circle with the flat nose pliers, bend the remaining wire tightly under the loop. Repeat this process for the other beads. Open a 4mm jumg ring, inserting it in the loop you just made and an earring wire. Close the jump ring. Do this for all the beads. Unique and sparkly, our paper bead earrings with rhinestones are also super easy to make. Plus, the earrings look expensive and artisan made. Make yourself several in different colors to match outfits. And if you need some rhinestones, check out the inventory at Rhinestones Etc. Selling rhinestones online for 10 years, we have fast processing times and excellent customer service.
2 Comments
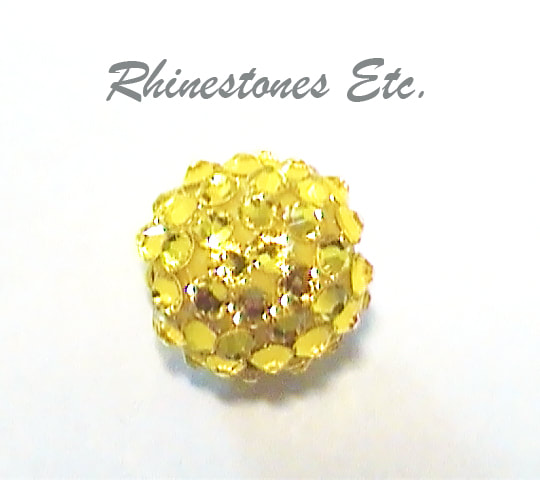
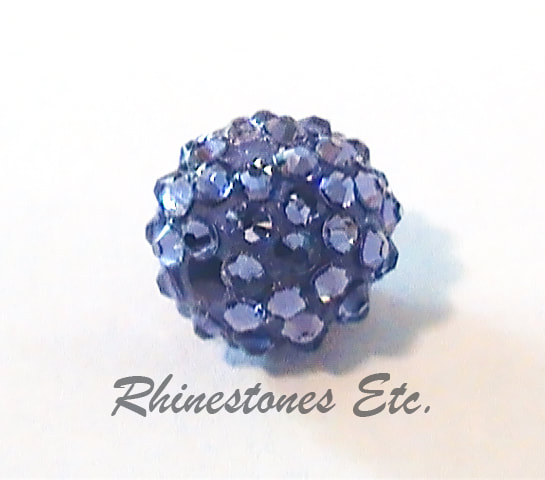
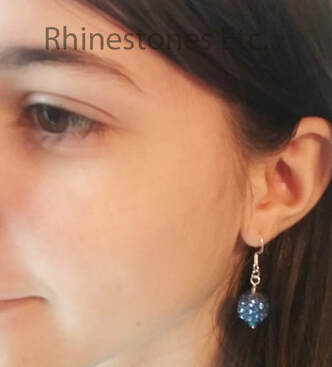
Pave beads, also called disco ball beads, are those wonderfully sparkly beads covered in small rhinestones. Just like a disco ball, with every turn the beads throw off a spectacular amount of sparkle. For such a small bead, pave beads are like the superhero of beading for sparkle. Notably, pave means to set as close together as possible to conceal a metal base. And originally, pave beads had a metal interior covered with tiny rhinestones. However today, some pave beads have oven baked clay interiors, bringing down the price considerably. Rhinestones Etc, seller of rhinestones for over 10 years, now has pave beads with oven baked clay interiors. Covered with over 60 small Swarovski Rhinestones, these beads pack a lot of sparkle. Pave Beads in Jewelry Design Presently, the macramé bracelet design is the one of the most popular way of using pave beads. Mads and Mikkel Kornerup made this style of bracelet very popular. The brothers first introduced their popular Shambala bracelet, the main type of macramé bracelet, in 2005. Not only a fashion statement, these bracelets have spiritual meaning as well. Correspondingly, each bead color of the bracelet has a different meaning. Perhaps you just like Shambala bracelet for its look. Even so, you can’t deny the eye-catching sparkle of a Shambala bracelet made with pave beads. Although macramé bracelets are the main way to use pave beads, it is not the only way. Another popular way to use pave beads in in earring design. Moreover, earrings are simple to make with a coordinating smaller bead, head pin and ear wires. Additionally, you can slip a pave bead onto a charm bracelet for added sparkle. Types of Beads
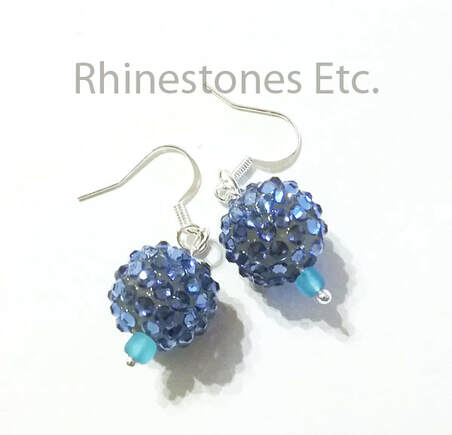
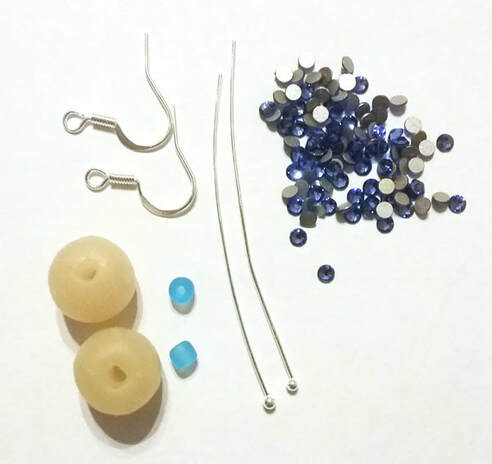
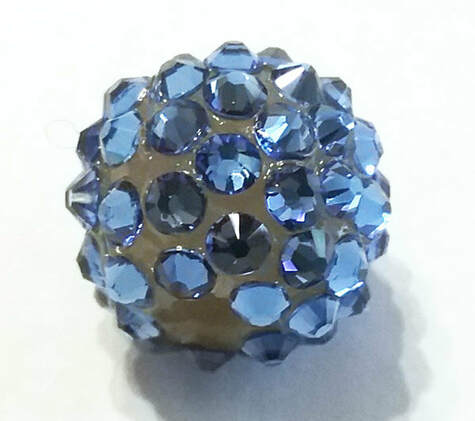
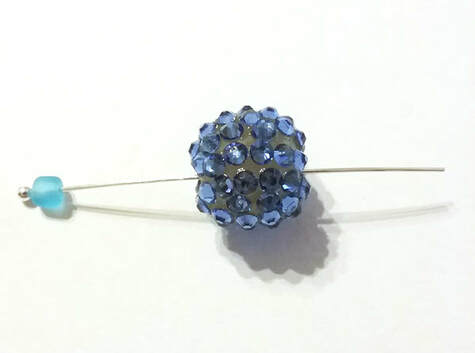
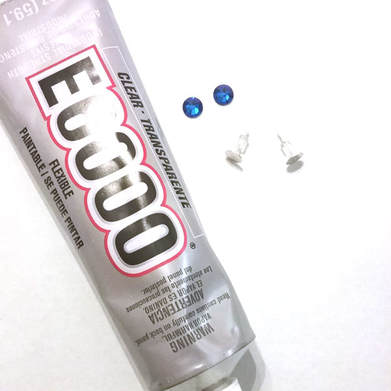
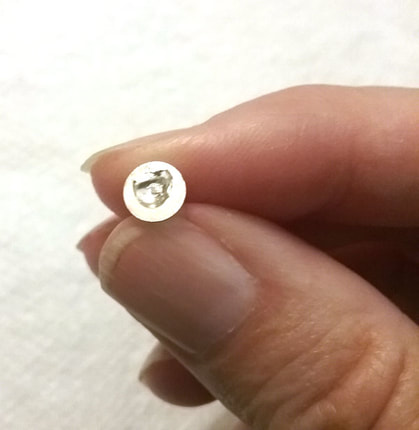
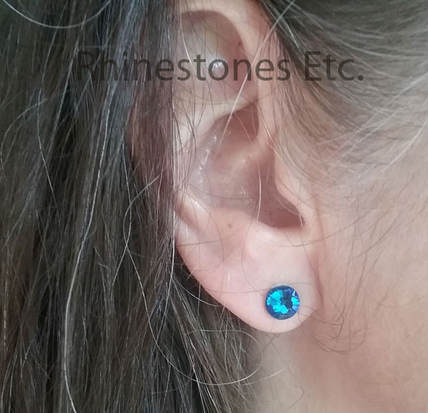
Swarovski manufactured pave beads have a stainless-steel shaft covered in rhinestones. With several shapes available from tube, round and oval shaped, Swarovski also offers many different colors. But Swarovski made pave beads are expensive. Priced at over $10 per bead, jewelry making with Swarovski made beads can be quite pricey. Currently offering round pave beads in several colors, Rhinestones Etc’s pave beads are competitively priced. Unlike Swarovski, we use an oven baked clay interior. Then we cover it with over 60 - 9ss rhinestones. Finally, our beads are 12mm in size with a hole through the middle. Our beads are perfect for making macramé bracelets or any other jewelry designs. Update: We no longer carry pave beads. I just love a sparkly pair of earrings. There is something magical that happens when you put in a pair that makes you feel so glamorous. However, many times sparkly earrings are expensive. So how can you feel glamorous without breaking the bank? Make your own with rhinestones! These earrings use easy to make homemade pave beads. Pave beads are round beads covered with small rhinestones. While there are many different types for sale online, you can make your own. Also, I used Swarovski Rhinestones for maximum sparkle. For this project I used: Oven backed polymer clay 9ss rhinestones about 65 E6000 2 head pins 2 Ear wires 2 small beads Jewelry pliers – chain/needle nose, round nose, flat nose and side cutters 2 - 4 mm jump rings How to Make Pave Beads To begin, make 2 balls out of polymer oven baked clay. Each ball should measure about 12mm. Using a straight pin or small nail, make a hole through the center, large enough to fit an eye pin through. Bake for 15 minutes at 275 degrees. When finished baking, remove from oven and let cool. Next, the rhinestones need to be glued to the clay balls. Although there are several suitable glues, I chose to use E6000 for this project for its strength of adherence. E6000 tends to be gloppy so I like to squeeze a small amount over a paper plate. Use a toothpick to scrape a small amount of glue. Apply this to the clay ball. Pick up a rhinestone with tweezers or a wax tipped tool and gently press it into the glue. Continue gluing until the bead is covered with rhinestones leaving the hole open. Let dry for 24 hours. How to Make DIY Earrings Slide a small bead onto the eye pin and then the pave bead on top. Using the chain nose pliers bend the eye to a 90 degree angle Then, using the round nose pliers, bend the wire around the pliers to make the loop. Hold the loop with the flat nose pliers and start to wrap the excess wire underneath the loop. Before you get to the bottom, cut the excess wire and then tuck in the end. Next, open a 4mm jump ring. Attach the ear wire to the loop in the pave bead using the jump ring. Close the jump ring and your earring is finished. Every movement of you head will produce a twinkle of light as each rhinestone on the pave beads sparkle. Glamourous and captivating, these earrings will accessorize any outfit. Easy to make and inexpensive, you’ll want to have several pairs of these DIY earrings on hand. Need rhinestones to get you started on making some pave beads? Rhinestones Etc. has competitive pricing and excellent customer service. Accessorizing an outfit can really add that extra something and make it stand out. Adding just the right jewelry can really impact how you feel about yourself. You can go from pretty to beautiful just by adding the right touch. But it isn’t always easy to find the right jewelry to match an outfit. Once you see how simple it is to create your own rhinestone stud earrings, you’ll be making a pair to match every outfit. For this project I used: E6000 Flat post earrings and backings 30ss rhinestones Tweezers or wax tipped tool How to Make a Pair of Rhinestones Stud Earrings Most craft stores have a large jewelry supply section. So, you should have no trouble finding some flat post earrings and backings. I have a nickel allergy and was happy the ones I found were nickel free. When I glue rhinestones to metal, I like to use E6000. It provides a good adhesion to metal. Always make sure you use it in a well-ventilated area and follow the manufacturers instructions. Also, I found that you can use slightly less glue when using E6000 than other adhesives because it provides such a strong bond. Start by applying E6000 to the flat part of the earring stud. Using a toothpick when applying E6000 helps to make sure you have the right amount as E6000 tends to be gloppy. Then, pick up a rhinestone using tweezers, or a wax tipped tool. Gently press the rhinestone into the glue. Do the same for the other earring stud. Allow to dry for 24 hours. Super easy to make and as nice looking as those expensive department store earrings. Plus, you can make a different colored pair for every outfit you own without blowing your budget. Happy crafting!
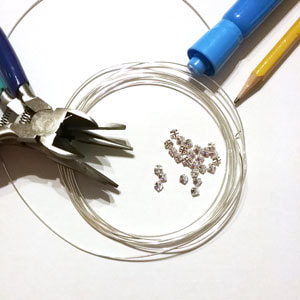
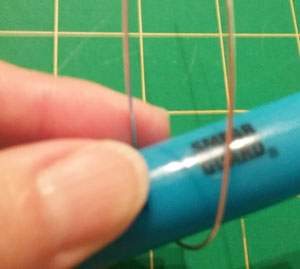
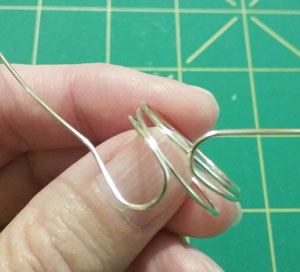
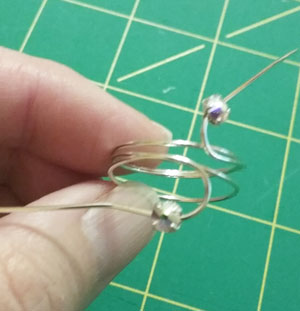
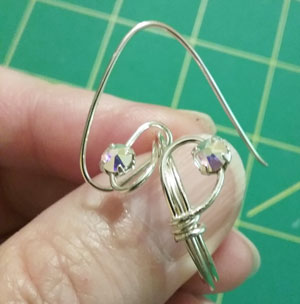
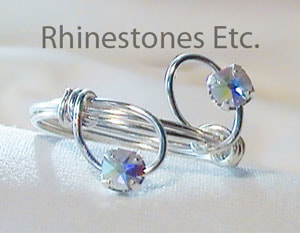
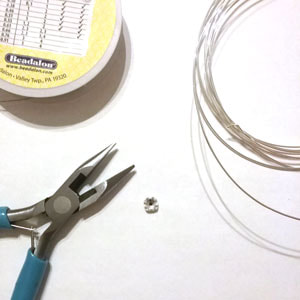
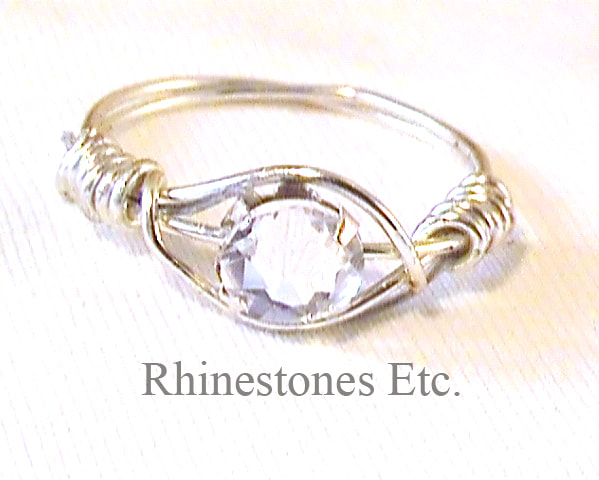
Rhinestones are available from: www.RhinestonesEtc.com. If you’ve been following my blogs, you know I love jewelry. However, I can’t afford to buy most of the pieces I love as there are way too many of them. Recently, I’ve unleashed a new love for rings and this DIY ring is a variation on a previous blog tutorial. Sometimes working with wire can take a little practice, so don’t get discouraged. I usually have to try the ring twice before I am happy with the finished project. For this project I used: 22 gauge silver wire Jewelry pliers (needle nose, wire cutters) Highlighter Pencil 2 Crystal AB 16ss Rose Montee How to Make a DIY Ring Begin by cutting a piece of 22 gauge wire 12 inches in length. Take your highlighter (or any other household item the equals the circumference on your finger). Wrap the wire around the highlighter twice. Once you’ve wrapped it twice, remove it from the highlighter. Then take a pencil and bend the wire into a loop. Slide a Crystal AB 16ss Rose Montee onto the end of each wire and slide to the curve in the wire. Using your jewelry pliers, bend the end of the wire to begin wrapping the ends around the base of the ring, without losing the loop shape holding the Rose Montees. Continue wrapping, tightening the coils as you go. Wrap the wire about 3 or 4 times around and cut the end if necessary. Squeeze the ends with the pliers, tucking them in. Repeat for the other side. Try different variations of size of the Rose Montees and wrapping techniques to create new and beautiful jewelry. Once you’ve made a few DIY rings, you’ll get the hang of it and see how easy and pretty they turn out.
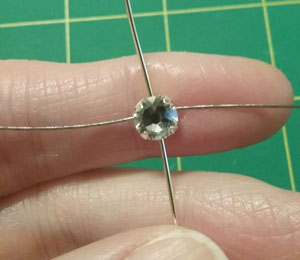
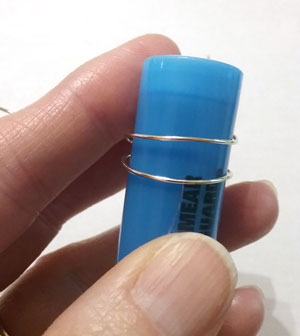
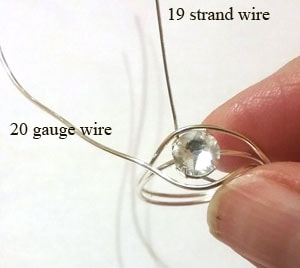
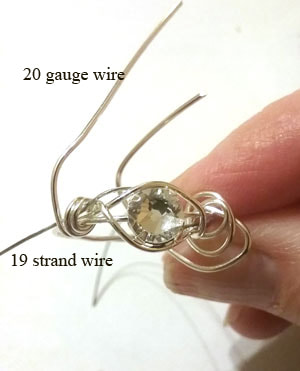
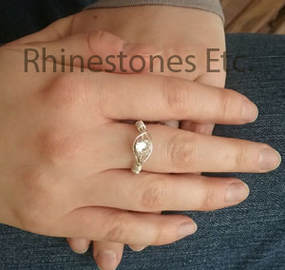
Rose Montees are available from: www.RhinestonesEtc.com Do It Yourself Rhinestone Jewelry As the mother of five children (yes, you read that right) there isn’t always money left over for luxuries like fancy clothing or jewelry. So, I am always excited when I discover new ways to make seemly exquisite jewelry at a low cost. This DIY rhinestone ring is easy to craft and perfect for those days when you want a little extra sparkle on your hands. Requiring no previous experience, this project is ideal for beginners wanting to learn the craft of jewelry making! For this project I used: 20-22 silver gauge wire 19 strand silver wire (flexible) Jewelry pliers 30ss Crystal Rose Montee Highlighter or any other household item that has the same circumference as your finger Cut a piece of the 20-gauge wire 12 inches long. Cut a piece of 19 strand 6 inches long. Thread each one through the cross setting on the back of the Rose Montee. For the ring size, I do not have a ring size stick so using a tape measure, I measured the circumference of my finger and found that a highlighter had the same circumference as my finger. Place the Rose Montee in the center of the 20-gauge wire stone side up then wrap the left side once around back to the Rose Montee and then do the same for the right side. Gently slide the wire off the highlighter. Slightly bend the left wire to go around the Rose Montee. Do the same for the other side. Bend the 20-gauge wire and begin to wrap it around the ring catching the 19 strand wire in the coils. I work on both sides at the same time but you can wrap one side first and then the other. Tighten the coils so that the 19-strand wire is secure then cut as close as possible to the 20-gauge wire. Continue wrapping once or twice more with the 20 gauge wire. Cut the wire and tuck the end in. Brighten your everyday look with this sparkly ring or combine it with your favorite evening dress for a flawless finish down to your fingertips!
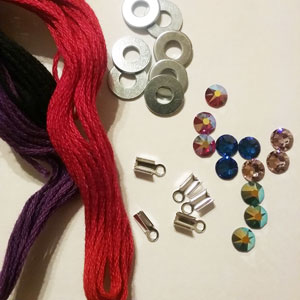
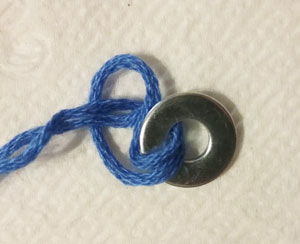
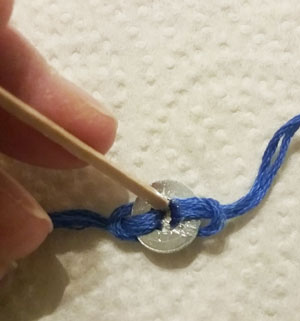
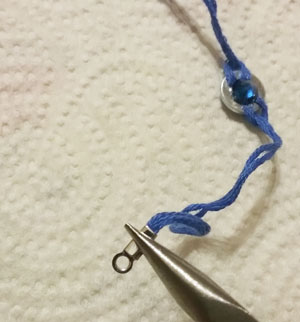
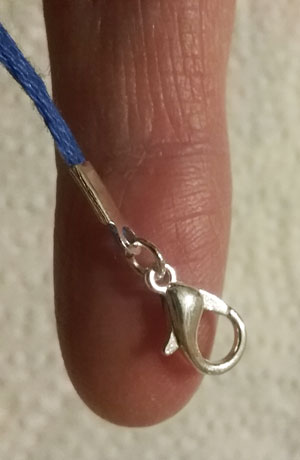
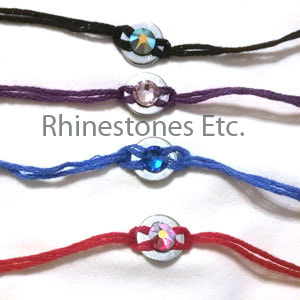
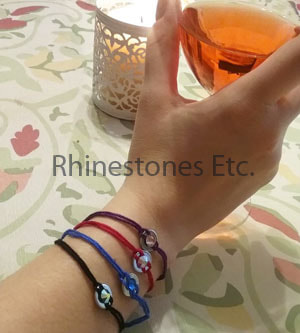
Rose Montee rhinestones are available from: www.RhinestonesEtc.com How to Make a Rhinestone Washer Bracelet Christmas has passed, you’ve rung in the new year and now it’s January, freezing and icy. Need a little bling to put some sparkle back in your day? This rhinestone bracelet takes on the jewelry washer craze in a new and sparkly way. For this project I used: Washer size 8 (12 mm) E6000 Embroidery thread (any color to match rhinestones) 30ss rhinestones (any color to match embroider thread) Silver fold over crimp ends 6 mm jump rings Silver lobster clasps Jewelry pliers Cut 2 pieces of embroidery thread 8 inches long. Use all six strands of the embroidery thread. Fold the thread in half to make a loop. Thread the loop through the hole in the washer and then thread the ends through the loop to secure to washer (a cow hitch knot). Repeat on the other side. With a toothpick, spread E6000 on the backside of a 30ss rhinestones and glue to the front of the washer. Allow a few minutes for the glue to set, then flip the washer over and apply a generous amount of E6000 in the hole of the washer/bottom of the rhinestone to secure. Let dry for 24 hours. Trim the ends of the embroidery thread. My bracelets fit comfortably at 7 inches, so I trimmed the ends so that my bracelets measured 7 inches including the length of the findings. Place the end of the thread in the fold over crimp ends. Be sure all the threads are underneath the first fold and then using the pliers, bend the first end over your thread end. Fold the second end over to secure your embroidery thread. Repeat on the other side. Attach a lobster clasp at one end of the bracelet with a jump ring. Look at how cute these diy washer bracelets are! You can now sparkle your way through the year with your own unique washer bracelet.
Rhinestones are available from: www.RhinestonesEtc.com |
KarenI have been adding bling for over 20 years. Through my projects, I hope you find inspiration. Categories
All
Archives
July 2024
|
Home About Policies Return Shipping
Contact Us Size Chart Privacy Products Reviews
Copyright 2024 Rhinestones Etc. All rights reserved.
Contact Us Size Chart Privacy Products Reviews
Copyright 2024 Rhinestones Etc. All rights reserved.

 RSS Feed