|
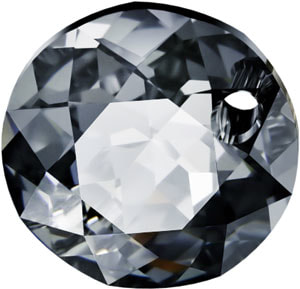
Guest blog by Sarah Kepins Rhinestones are manufactured gemstones knew for their brilliant sparkle. Perfect for adding sparkle to clothes, accessories, and even nails, Swarovski rhinestone crystals are the highest quality when it comes to manufactured crystals. While you’ve heard of them and may even own several items with rhinestone crystals on, you probably aren’t familiar with the origins of them. Rhinestone crystals date back to the late 1800’s and the Rhine River. The Rhine River is one of Europe’s greatest rivers as it runs through six countries: Switzerland, Principality of Liechtenstein, Austria, Germany, France and the Netherlands. During the late 1800’s, small dazzling quartz pebbles were discovered along the Rhine River’s bank. It was these pebbles that inspired Daniel Swarovski to intimate them to create Swarovski Rhinestones. In 1882, he developed the first glass cutter and 3 years later, he opened a factory. His business expanded and his 3 sons, Wilhelm, Friedrich and Alfred, eventually joined the family business. Over 100 years later, Swarovski rhinestones are still popular. They are unique in color and sparkle and became famous for their resemblance to diamonds. The company is always innovating and as of September 2012, 100% of Swarovski’s line is being manufactured completely lead-free. New colors and shapes are always being added to their line offering many choices. While today’s rhinestones are not created the same as they were in the 1880’s, their brilliance lives on.
If you would like to browse our collection of rhinestones click here.
0 Comments
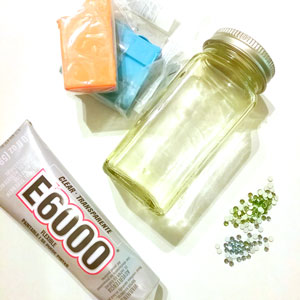
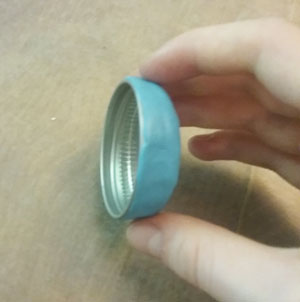
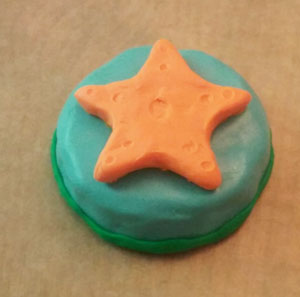
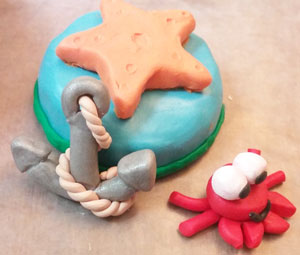
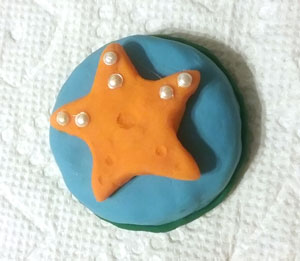
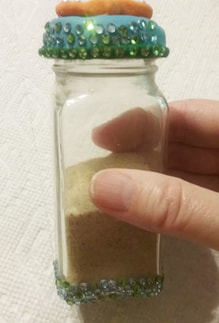
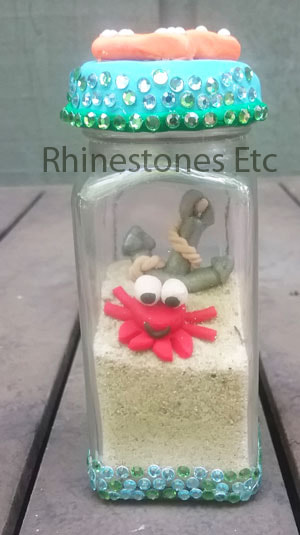
This project was inspired by my Mother in Law who loved to travel and collected sand in small bottles from the many places she visited. Instead of putting the sand in an ordinary bottle, you can upcycle and embellish a small bottle to reflect the theme of your vacation. The theme of my bottle is my favorite destination spot: the beach. For this project I used: 1 small old bottle (mine is an old spice bottle) Sculpey clay 10ss flat back pearls 12ss peridot and aquamarine flat back rhinestones Wax tipped tool or tweezers E6000 Sand from your vacation spot How to upcycle an old bottle Thoroughly clean and dry your bottle that you will upcycle. I enlisted the help of my daughter with the clay components as she is much more talented than I am. First, cover the lid with clay. Since our theme was the beach, she created a star fish to put on top. Then she created some beach themed components to place inside the bottle: a little crab and anchor. Place your components and lid on cookie sheet lined with white paper. Bake in the oven according to the clay manufacturer’s instructions (we did 275 degrees for 15 minutes). When done baking, remove from the oven and allow to cool. Glue a 16ss flat back pearl to the middle of the starfish and 2 10ss flat back pearls on each of the arms. Place a drop of glue slightly smaller than the pearl and using a wax tipped tool or tweezer, pick up a pearl and gently press it into the glue drop. I used both green and blue rhinestones mixed to give the bottle an ocean feel. I glued rhinestones along the bottom of the bottle and then along the side of the cap. The adhesive I like to use when gluing rhinestones to glass is E6000. Many people don’t like to use it because of the warnings; however, it is a very strong adhesive and recommended for use in gluing rhinestones to glass. Use in a well-ventilated area and always follow the manufacturer’s instructions. Allow to dry for 24 hours. Add the sand from your favorite vacation spot and then place the crab and anchor on the sand. Your vacation is now immortalized in a one of a kind upcycle bottle! Why not create one each time you go on vacation and start a collection? Use it to decorate any space and each time you walk by you’ll see it and remember the fun time you had.
Rhinestones and wax tipped tool are available from: www.RhinestonesEt.com |
KarenI have been adding bling for over 20 years. Through my projects, I hope you find inspiration. Categories
All
Archives
July 2024
|
Home About Policies Return Shipping
Contact Us Size Chart Privacy Products Reviews
Copyright 2024 Rhinestones Etc. All rights reserved.
Contact Us Size Chart Privacy Products Reviews
Copyright 2024 Rhinestones Etc. All rights reserved.


 RSS Feed