|
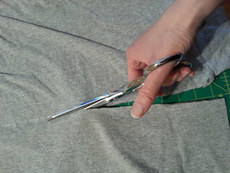
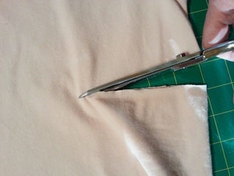
DIY Fashion Shirt You are out shopping for new clothes but the prices overwhelm you, when suddenly you find a good deal for a t-shirt. The only problem is the shirt is way too plain. With the help of another shirt and some metal studs, you can transform the shirt into something fabulous. For this project I used: 2 tee shirts (the gray one purchase at local craft store) Scissors pins sewing machine hot fix wand or iron 4 mm silver round hot fix metal studs 6 mm silver round hot fix metal studs 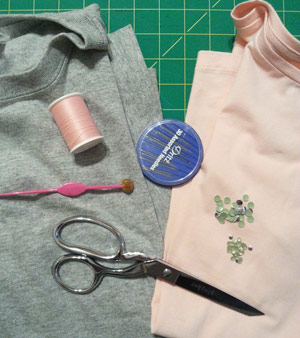 I used 2 tee shirts for this project. The pink one is the size I wear that I picked up on clearance, and the gray one is larger purchased at the local craft store. Prewash both shirts before starting. Lay the gray tee shirt on a flat surface and cut straight across just below the arm hole. Place the bottom piece aside and discard the top. Lay the pink tee shirt out flat and cut straight across about 3 1/2 inches below the arm hole. Place the top piece aside and discard the bottom.
Sew a gathering stitch ½ inch from the top edge of the gray piece. Gather to fit the width of the pink shirt. Pin right sides together spreading the gathers along the edge of the shirt. 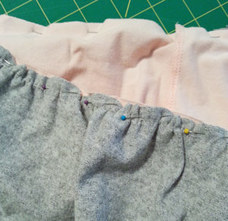 Using a ½ inch seam allowance, sew together using a medium zigzag stitch or serger. 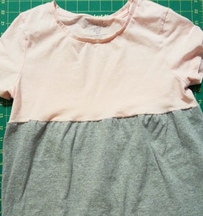 What I really like about using hot fix embellishments is that once you lay out your design, you can just press the hot fix wand on the embellishment to adhere. If the shirts are thin, you can place a piece of wax paper between layers to prevent gluing through the back. I spaced 4 mm silver round hot fix metal studs along the seam of the two shirts spacing about ½ inches apart. I spaced the 6 mm silver round hot fix metal studs above the line of 4 mm studs in between these smaller studs. If you are using a hot fix wand, use the flat head for metal studs. Heat the wand and when hot, gently press on the metal stud for 12-15 seconds. Repeat until all the studs are adhered. You can also use an iron. Heat iron to the highest setting without steam. Place a white piece of paper over design to prevent scorching and gently press down for 12-15 seconds. DO NOT slide iron as this may move your metal studs. 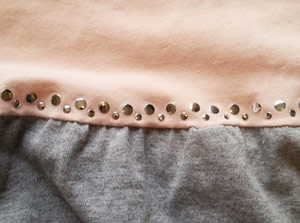 Casual yet chic, this will be your new favorite shirt. 
0 Comments
How to rhinestone a dress I had given up all hope of finding the perfect dress and that’s when it caught my eye. I liked this dress but I wanted to turn it into something that I would love. For this project I used: 1 black and gold dress 20ss Dorado rhinestones 20ss Jet rhinestones Gem tac Wax tipped tool Wax paper 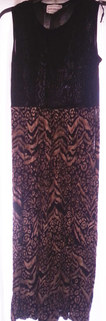 Prewash your garment before starting. Since the top of this dress was on the thin side, I placed a sheet of wax paper inside to prevent the back and front from gluing together. I also like to lay out the rhinestones before gluing to get an idea of how it will look. I wanted to incorporate the colors and designs of the bottom on the top so I chose to use the colors Dorado and Jet. The Jet blends in with the black top so that they are not as noticeable, but will give off shimmers of light when you move. I started by copying the circular pattern around the neckline. 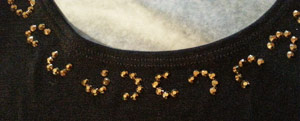 In the middle of these circular designs, I placed a Jet rhinestone. I also incorporated the wavy pattern so that my neckline looked like this: 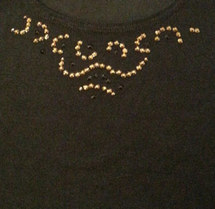 From this picture, you can barely see the Jet rhinestones placed in among the gold, but they add additional sparkle. Once you are happy with your design, remove a rhinestone at a time and place a drop of glue about the size of the rhinestone in its place. The glue should seep slightly out at the sides to create a seal to prevent the rhinestones from peeling off. If you accidentally use too much glue, the glue dries clear and cannot be seen at a distance. Continue gluing and allow to dry flat for 24 hours.  And just like that any ordinary dress can be turned into something special that you will wear for years to come.
Rhinestones and wax tipped tool are available from: www.RhinestonesEtc.com |
KarenI have been adding bling for over 20 years. Through my projects, I hope you find inspiration. Categories
All
Archives
July 2024
|

 RSS Feed
Home About Policies Return Shipping
Contact Us Size Chart Privacy Products Reviews
Copyright 2024 Rhinestones Etc. All rights reserved.
Contact Us Size Chart Privacy Products Reviews
Copyright 2024 Rhinestones Etc. All rights reserved.