|
DIY Valentine's Day Rhinestone Ceramic Tile Plaque Known as the holiday of love, Valentine’s day is the perfect time to tell someone you love them. However, Valentine’s day is often only considered to be a day for romantic love but there are plenty other relationships to celebrate. I like to celebrate with my children, friends, and family as well as my husband. Whatever the relationship, a handmade Valentine’s gift is the perfect way to show your family and friends how much you love to them! Creating a ceramic tile plaque is a beautiful way to express your love. For this project I used: 1 ceramic tile (a wooden plaque works just as well) Red acrylic craft paint Paint brush Stencil (you can download a free template here) Clear Acrylic coating (to seal) E6000 12ss Light Siam (red) rhinestones Wax embellishment tool Craft glue Clear glitter 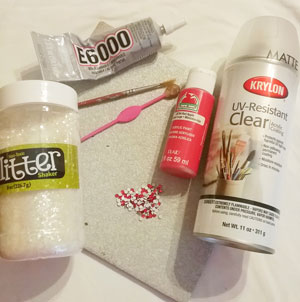 heart template opt inI always like to work with a template and you can download the one I used for this project here. Cut out the darkened areas on the template using an X acto knife and cutting mat or a pair of cheap embroidery scissors leaving small areas uncut to leave the inside of the heart intact. 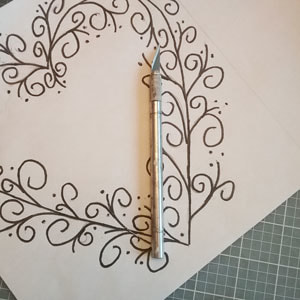 Tape this to your tile. 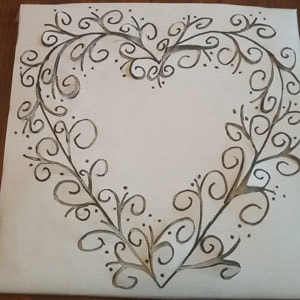 Paint in the cut areas with a paint brush and red acrylic craft paint. Gently remove the template and paint in the missing areas. Allow to dry. 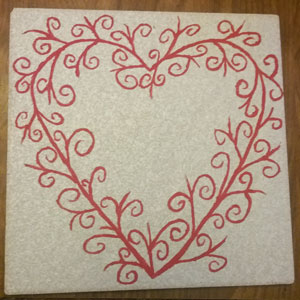 When dry, spray with a clear acrylic coating (I used Krylon brand). This keeps the paint from any damage. Allow to dry. I liked the idea of adding some clear glitter, so using a craft glue that dries clear, I mixed a generous amount of clear glitter with the glue. Paint on around the pattern using a paint brush. Allow to dry and then spray with another coat of clear acrylic coating. 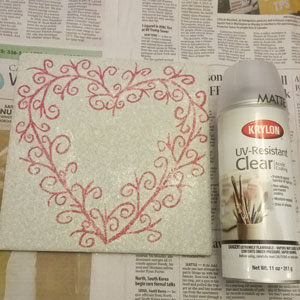 When completely dry, glue on rhinestones using E6000. You can use the template as a guide for placement of rhinestones. The dots on the template are the places I glued the rhinestones. Squeezing the E6000 over a paper plate, use a toothpick to apply an amount of E6000 to the tile just slightly smaller than the rhinestone. Using a wax tipped tool or tweezers, pick up a rhinestone and gently press it into the glue. Continue gluing until your pattern is complete and allow to dry flat for 24 hours. 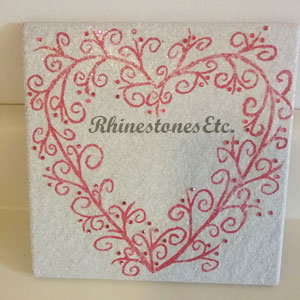 The clear glitter and rhinestones give this hand-painted ceramic tile the perfect amount of sparkle. Have a specific person in mind? Try personalizing this gift by adding their name or a date in the middle.
Rhinestones and wax tipped tool are available from: www.RhinestonesEtc.com
2 Comments
How to Make a Rhinestone Washer Bracelet Christmas has passed, you’ve rung in the new year and now it’s January, freezing and icy. Need a little bling to put some sparkle back in your day? This rhinestone bracelet takes on the jewelry washer craze in a new and sparkly way. For this project I used: Washer size 8 (12 mm) E6000 Embroidery thread (any color to match rhinestones) 30ss rhinestones (any color to match embroider thread) Silver fold over crimp ends 6 mm jump rings Silver lobster clasps Jewelry pliers  Cut 2 pieces of embroidery thread 8 inches long. Use all six strands of the embroidery thread. Fold the thread in half to make a loop. Thread the loop through the hole in the washer and then thread the ends through the loop to secure to washer (a cow hitch knot). 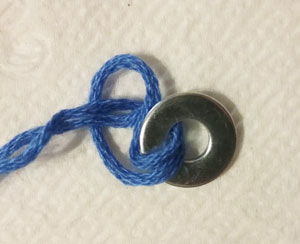 Repeat on the other side. With a toothpick, spread E6000 on the backside of a 30ss rhinestones and glue to the front of the washer. Allow a few minutes for the glue to set, then flip the washer over and apply a generous amount of E6000 in the hole of the washer/bottom of the rhinestone to secure. 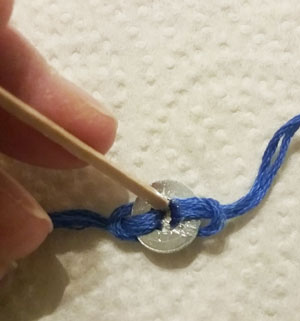 Let dry for 24 hours. Trim the ends of the embroidery thread. My bracelets fit comfortably at 7 inches, so I trimmed the ends so that my bracelets measured 7 inches including the length of the findings. Place the end of the thread in the fold over crimp ends. Be sure all the threads are underneath the first fold and then using the pliers, bend the first end over your thread end. Fold the second end over to secure your embroidery thread. 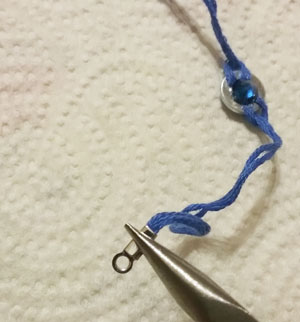 Repeat on the other side. Attach a lobster clasp at one end of the bracelet with a jump ring. 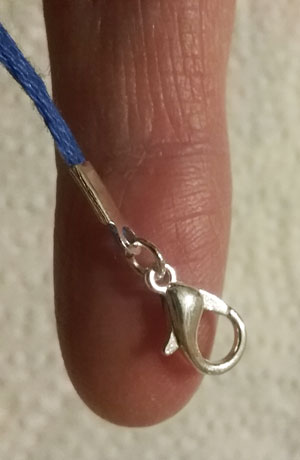 Look at how cute these diy washer bracelets are!  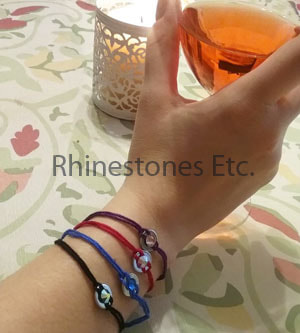 You can now sparkle your way through the year with your own unique washer bracelet.
Rhinestones are available from: www.RhinestonesEtc.com |
KarenI have been adding bling for over 20 years. Through my projects, I hope you find inspiration. Categories
All
Archives
July 2024
|

 RSS Feed
Home About Policies Return Shipping
Contact Us Size Chart Privacy Products Reviews
Copyright 2024 Rhinestones Etc. All rights reserved.
Contact Us Size Chart Privacy Products Reviews
Copyright 2024 Rhinestones Etc. All rights reserved.