|
Make your own rhinestone tree ornament Christmas is magical for kids and grownups alike and one of the things that make it so special is the Christmas tree. Decorating the tree together can be the highlight of the season and you can reminisce about the ornaments. These rhinestone encrusted ornaments are easy to make and will add to the magic of Christmas. For this project I used: One red Christmas ornament Gem Tac Wax tipped tool 12ss Red and Crystal Rhinestones White chalk 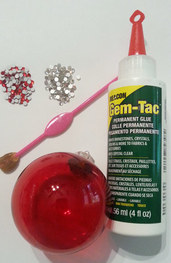 For this ornament, I chose a simple pattern. To keep it symmetrical, I measured the circumference of the ornament and divided it into equal sections and marked these sections with white chalk. 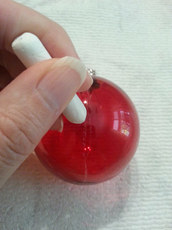 Using the chalk lines as guides, place a drop of glue about the size of the rhinestone on the ornament. Using the wax tipped tool, pick up a rhinestone and gently press it into the glue. 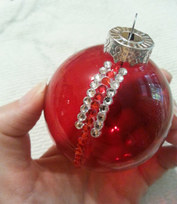 Continue gluing until your pattern is complete and then allow to dry for 24 hours. 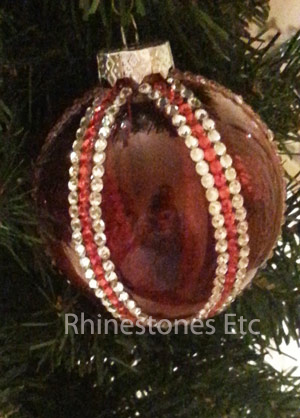 Traditional meets modern in these magical ornaments. They even make great gifts!
Rhinestones and wax tipped tool can be purchased at: www.RhinestonesEtc.com
0 Comments
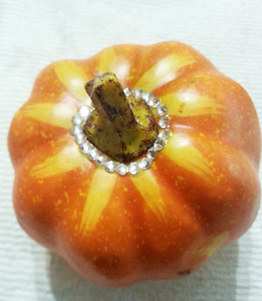
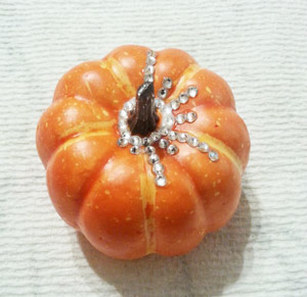
The aroma of delicious food wafts in from the kitchen and the table is set with fine china, silverware and wine goblets but something is missing. A beautiful centerpiece will add elegance to any table and this Autumn centerpiece is simple to make and will add that extra sparkle. For this project I used: 3 various sized craft pumpkins 12ss crystal rhinestones Gem Tac Wax tipped tool wire cutter 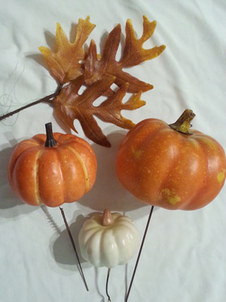 Using a wire cutter, cut the bottom wires off the pumpkins so that they will sit flat. There are many different designs you can do on these small pumpkins and I did them all the same to keep the look unified. Decide on the pattern you would like and when ready, place a drop of glue about the size of the rhinestone on the pumpkin and using the wax tipped tool, pick up a rhinestone and gently press it into the glue drop. 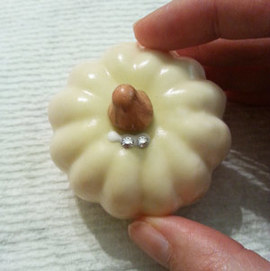 I glued rhinestones around the top of the pumpkins with the rhinestones coming down the sides. I will be showing you the different pumpkins in varying stages of gluing.
Continue gluing and let dry for 24 hours. 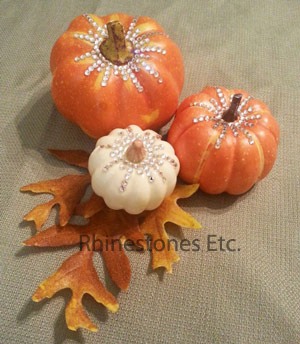 Your centerpiece will be the focal point of the celebration and you don’t have to tell your guests how easy it was to make. Perfect for Halloween, Thanksgiving or any other Autumn celebration!
Rhinestones and wax tipped tool are available from: www.RhinestonesEtc.com I picked this round pendant up for 25 cents on clearance. It has some interesting texture to it, but nothing that really grabs your attention. With some glue and rhinestones, this will become something spectacular! For this project I used: 1 round pendant E6000 Wax tipped tool 4 – 30ss Black Diamond Rhinestones 4- 20ss Comet Argent Light (silver) Rhinestones 16 – 12ss Crystal Rhinestones 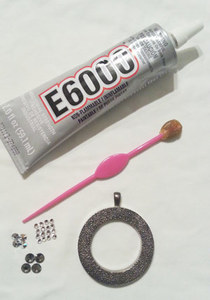 So believe it or not, this was my first attempt at using the adhesive E6000. I have tended to stay away from using it because you cannot get the same control out of the tube that you can with Gem Tac. Since most of my experience has been with fabrics, Gem Tac has always been my choice of adhesives. For this project, I am gluing to metal and E6000 it better at adhering than Gem Tac. I used a toothpick to help spread the glue and it was easier than I anticipated. Squeezing just a slightly at the bottom of the tube, I applied a drop of glue about the size of the rhinestone on the pendant. I place the Black Diamond rhinestones at the 12, 3, 6, and 9 o’clock positions. 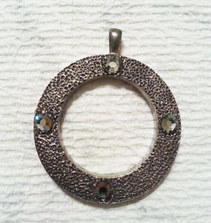 Next I applied the Comet Argent Light 20ss rhinestones halfway between the Black Diamond. 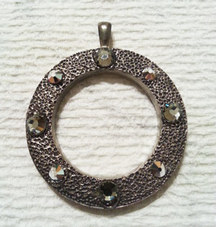 Finally, I added 2 crystal 12ss rhinestones, side by side between the Black Diamond and the Comet Argent Light Rhinestones. 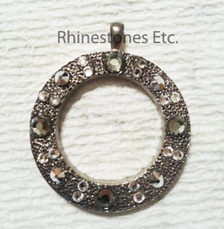 Gorgeous! Now you have something completely different than what you started with. This pendant is sure to get you noticed!  Do it yourself weddings are the current rage not only because you can save yourself money but also because your personality can shine through your handmade items. It is a way to make the wedding your own and fit your specific theme. For this project I used: 1 watercolor book White card stock Hole punch Embroidery thread Sewing needle 6ss Crystal Rhinestones Gem Tac Wax tipped tool or tweezers 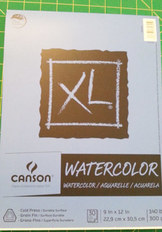 I purchased this 9 x 12 watercolor book at my local craft store. You can use this size, buy a smaller watercolor book or cut the pages down as I did. You will want to save both the cover and back for your book. Separate the pages. Using one of the sheets, fold in half lengthwise 3 times to make a template for your binding holes. Draw a line 1 inch from the short end and starting with the first fold make a mark and skip to every other fold marking your template like the picture below. You should have 4 dots drawn. 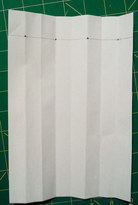 Using this template, punch holes in the covers and all pages. 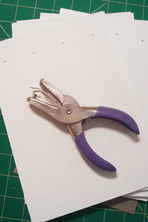 Next, cut a piece of card stock about 1 inch larger around all edges than your cover. Center the cover on the card stock and glue in place. Cut the corners on the diagonal, fold the corners to the inside and glue down. Then glue the sides down to the inside of the cover. 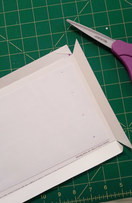 Cut a piece of white card stock slightly smaller than the cover and glue to the inside for the end paper. You are now ready to bind your book. There are several great videos on Youtube showing several different types of binding. I followed this one: https://youtu.be/j-r6c_trSxY. I used white embroidery thread. Measure the thread about 5 times the short length of the book. Thread a sewing needle (I used all 6 strands) and beginning in the middle of the book, sew from the inside to the front leaving a tail of about 5 inches. 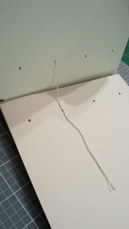 Sew up to the front of the book and then come around to the bottom and come up through the same hole. Sew to the hole on the bottom right down through the book, around the edge and back through the same hole. This time go around the long edge down through the front to the back. Sew across to the top left coming up the first hole you started in. Sew to the top left go around the edge and back into the hole. Sew to the left coming up to the front around the edge and up through the topmost hole. Go around the longest edge and sew down into the topmost hole. Come up through the bottom and sew across to the second hole from the top. Sew from the bottom up through the hole you started in bringing the needle to the middle to where your beginning end is. Make sure your binding is tight and then tie the two ends together. 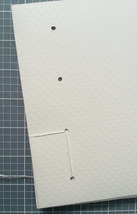 Using a ruler on the top and bottom as a guide, I glued 6ss crystal along the bottom front with a wedding date. Place a drop of Gem Tac about the size of the rhinestone on the cover and using the wax tipped tool, pick up a rhinestone and gently press it into the glue drop. You can also put your names, initials or hearts to personalize it. 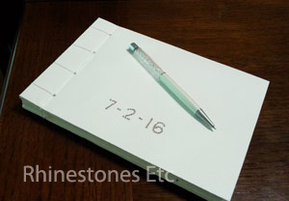 Now you have a unique, one of a kind memento to remember your special day.
Rhinestones are available from: www.RhinestonesEtc.com |
KarenI have been adding bling for over 20 years. Through my projects, I hope you find inspiration. Categories
All
Archives
July 2024
|

 RSS Feed
Home About Policies Return Shipping
Contact Us Size Chart Privacy Products Reviews
Copyright 2024 Rhinestones Etc. All rights reserved.
Contact Us Size Chart Privacy Products Reviews
Copyright 2024 Rhinestones Etc. All rights reserved.