|
Since ancient times, people have sought out gemstones. While early gems weren’t sparkling, people liked them for their color. Later on, jewelers developed techniques for cutting facets into gems creating sparkle. Glassmakers imitated these methods to producechatons and later on flatback rhinestones.
What Are Rhinestones? Originally, gem hunters gathered sparkling quartz found along the banks of the Rhine River. Over time, stone collectors depleted this natural resource. During the 17th century, the glassmakers of Bohemia began experimenting with making crystal glass beads. In 1715, glassmakers earned a patent for the world’s first crystal cut stone, the chaton. This cut crystal had a pointed back to mimic the appearance and sparkle of a diamond. Typically, most historians credit Georg Friedrich Strass with creating the first rhinestone in 1760. Instead of a pointed back, this rhinestone had a flat back. Strass coated this flat side with a metal powder that acted as a mirror to reflect light. Now the fashion industry could also use these sparkling crystals for clothing. 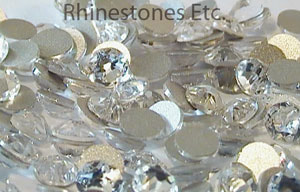
The Many Uses of Flatback Rhinestone Flatback rhinestones are extremely versatile giving you an almost endless number of ways to use them. First of all, you can glue rhinestones to clothing. Frequently, you’ll see wedding dresses and other formal wear embellished with rhinestones. Sports competition attire such as figure skating and gymnastics use rhinestones as well as dance and cheerleading costumes. Interior design is another place flat back where you can use rhinestones. You can bling out candlesticks, coffee mugs, glass items, and many other home decor items. Rhinestone wallpaper is also a new fashion statement that is trending. Any area in your home that you want to draw attention to or brighten can benefit from sparkling crystals. Some other popular items include water tumblers, key fobs, sunglasses, shoes, and cell phone cases. As you can see, the possibilities of using rhinestones are nearly endless. Of course, rhinestone jewelry still remains popular. Cheaper than the cost of diamonds, yet with just as much sparkle, rhinestones never fail to dazzle. 
Is There a Certain Glue to Use? When gluing rhinestones, it’s important to think about the surface of your bling project. For example, fabric is porous while plastic is smooth. Not all rhinestone glues work well with smooth surfaces so it’s important to check the manufacturer’s recommendations. In addition, there is a 2-step process to gluing flatback rhinestones: choosing the right glue and gluing correctly. Many people only focus on picking a glue to use. This is unfortunate because gluing incorrectly can lead to rhinestones falling off. For fabrics, my favorite glue is Gem-Tac. It is clear drying, washable, and easy to apply. To adhere rhinestones to materials such as metal, glass, and vinyl, I like to use E6000. This glue also dries clear and is washable, but it can be a bit harder to apply. When gluing rhinestones, use an amount of glue slightly smaller than the rhinestone. Some of the glue should seep out from the sides when you press the rhinestone into the glue. This creates a seal which helps prevent the rhinestones from falling off. Use too little glue, and you are likely to lose some rhinestones the next time you wash your garment. 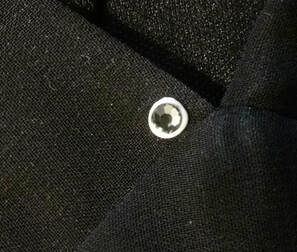
So, what are you waiting for? Do you want to begin on a rhinestone project? Rhinestones Etc. sells flatback rhinestones online with competitive pricing and great customer service! We’ve been in business for over 10 years helping customers create dazzling blinged-out creations. Browse ourstore for all your crystalline needs and find the perfect hue and size for your project!
2 Comments
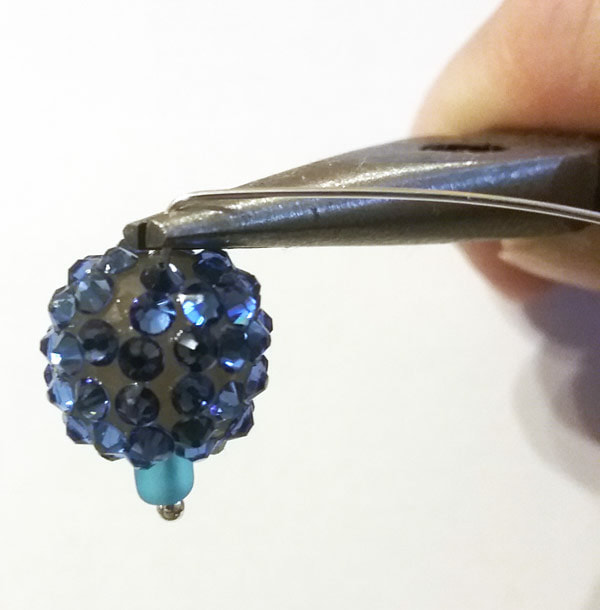
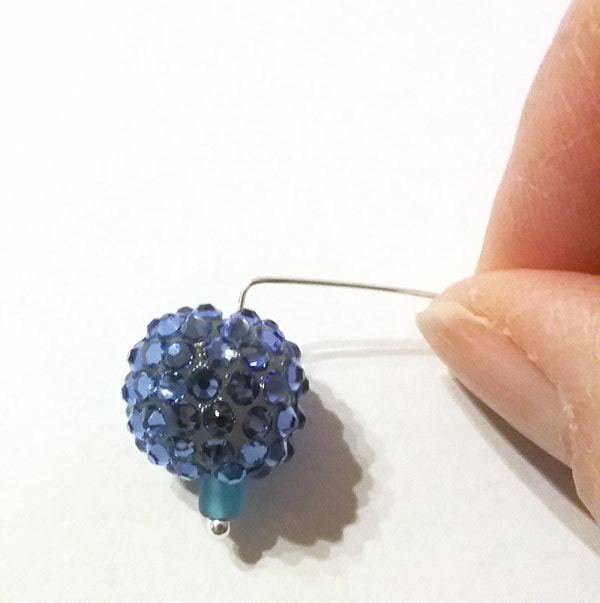
I just love a sparkly pair of earrings. There is something magical that happens when you put in a pair that makes you feel so glamorous. However, many times sparkly earrings are expensive. So how can you feel glamorous without breaking the bank? Make your own with rhinestones! These earrings use easy to make homemade pave beads. Pave beads are round beads covered with small rhinestones. While there are many different types for sale online, you can make your own. Also, I used Swarovski Rhinestones for maximum sparkle. For this project I used: Oven backed polymer clay 9ss rhinestones about 65 E6000 2 head pins 2 Ear wires 2 small beads Jewelry pliers – chain/needle nose, round nose, flat nose and side cutters 2 - 4 mm jump rings 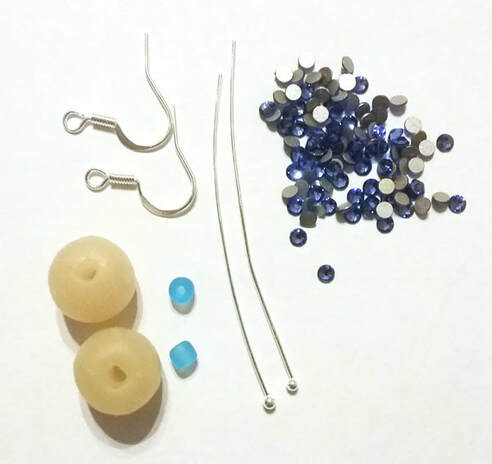 How to Make Pave Beads To begin, make 2 balls out of polymer oven baked clay. Each ball should measure about 12mm. Using a straight pin or small nail, make a hole through the center, large enough to fit an eye pin through. Bake for 15 minutes at 275 degrees. When finished baking, remove from oven and let cool. Next, the rhinestones need to be glued to the clay balls. Although there are several suitable glues, I chose to use E6000 for this project for its strength of adherence. E6000 tends to be gloppy so I like to squeeze a small amount over a paper plate. Use a toothpick to scrape a small amount of glue. Apply this to the clay ball. Pick up a rhinestone with tweezers or a wax tipped tool and gently press it into the glue. Continue gluing until the bead is covered with rhinestones leaving the hole open. Let dry for 24 hours. 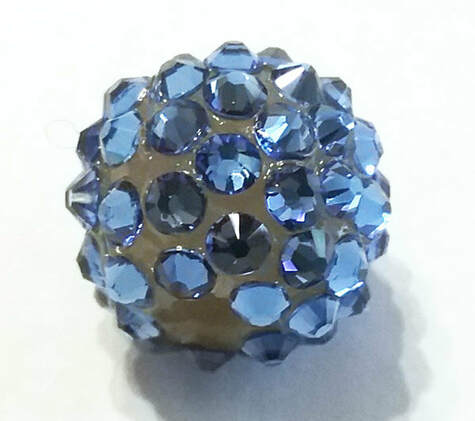 How to Make DIY Earrings Slide a small bead onto the eye pin and then the pave bead on top. 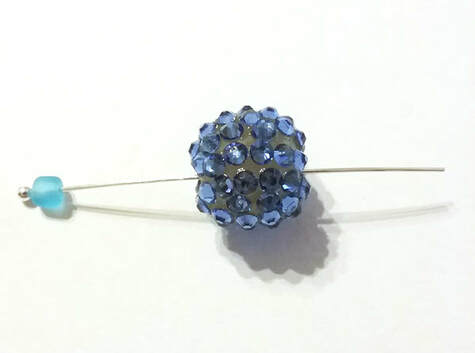 Using the chain nose pliers bend the eye to a 90 degree angle
Then, using the round nose pliers, bend the wire around the pliers to make the loop. 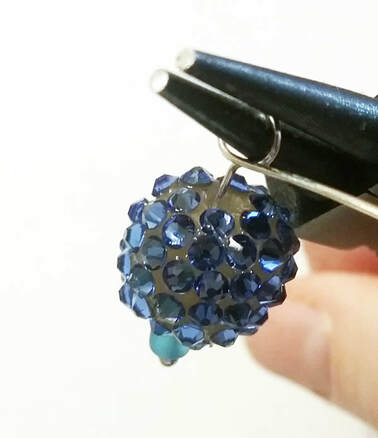 Hold the loop with the flat nose pliers and start to wrap the excess wire underneath the loop. Before you get to the bottom, cut the excess wire and then tuck in the end. Next, open a 4mm jump ring. Attach the ear wire to the loop in the pave bead using the jump ring. Close the jump ring and your earring is finished. 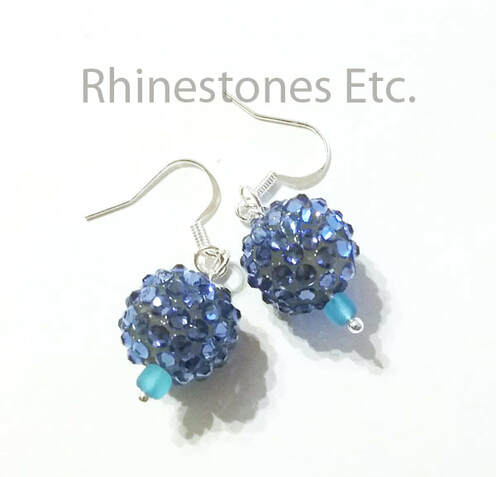 Every movement of you head will produce a twinkle of light as each rhinestone on the pave beads sparkle. Glamourous and captivating, these earrings will accessorize any outfit. Easy to make and inexpensive, you’ll want to have several pairs of these DIY earrings on hand. 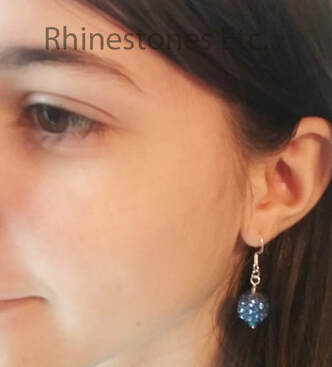 Need rhinestones to get you started on making some pave beads? Rhinestones Etc. has competitive pricing and excellent customer service. The gymnast stands at the corner ready to perform her floor exercise. As she beings her movements, the rhinestones on her competition outfit catch the light. A myriad of colors is reflected as she prances, somersaults and vaults across the floor. She finishes her routine, flawless just like her outfit. Do you have a daughter passionate about gymnastics? Then you know, the right costume is very important. But costumes with rhinestones are very expensive. Can you buy a plain gymnastic costume and add rhinestones yourself? Yes, you can. And gluing rhinestones yourself can save you a bundle of money.  Pick your Glue Gymnastic costumes must be very stretchy to conform to every movement the gymnast makes. Generally, these outfits are made from 4-way stretch fabric. Is it difficult to glue rhinestones to stretchy fabrics? No, it is not any different than gluing to skating dresses, something I did frequently when my daughter figure skated. Just make sure the area of the costume where you are gluing lays flat. In certain places of the costume, you may need to stretch the fabric slightly to have a flat surface. Next, choose your glue. My favorite glue for adhering rhinestones to fabric is Gem-Tac. It dries, clear, is washable and is very easy to apply. Another glue many people use is E6000. I don’t like this as much as it tends to be gloppy and I find it more difficult to apply. If you choose some other glue, just make sure it is suitable for embellishments, dries clear and is washable. 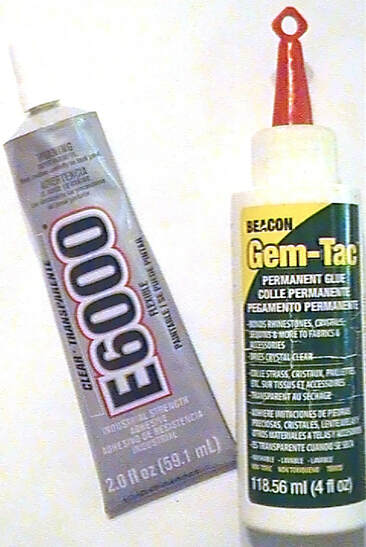 How to Glue Rhinestones to Gymnastic Costumes To glue rhinestones, place a drop of glue slightly smaller than the rhinestone. Pick up a rhinestone using tweezers or a wax tipped tool. Gently press it into the glue drop. Check to make sure a small amount of glue has seeped out around the rhinestones. This is very important as it makes a seal which helps protect the rhinestone from peeling off. When you have finished gluing rhinestones, leave the garment laying flat for 24 hours.  Now that you see how simple it is, you can stop paying high prices for rhinestoned gymnastic costumes. Buy a plain one and dazzle it up yourself with rhinestones! Need rhinestones for a gymnastic costume? Rhinestones Etc has discount pricing and excellent customer service. And now you can get free shipping off your first purchase! Just click on the button above to get a coupon code off for free shipping off your first purchase! Nailheads were originally used in the construction of furniture. Primarily, they were used to attach upholstery to the wooden frame. As time went on, they became more decorative. Today, nailheads can still be used in furniture as my friend, Julie, from Project Vintage shows in her re-imagined desk. To attach the nailheads to the desk, she simply tapped them in using a hammer. And while nailheads are still used as a decorative touch in furniture, they are also used to embellish clothing. 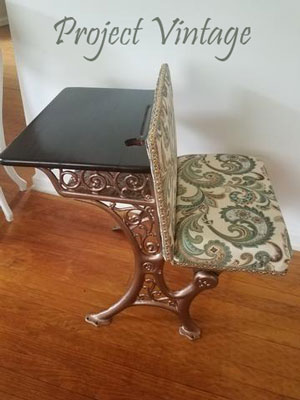 What Are Nailheads? Imagine a shiny decorative metal head with prongs underneath. The number of prongs varies from 2 to 8 based on the size, shape and manufacturer of the nailhead. In addition, the length of the prongs or legs varies as well from 1/16 to 3/16 of an inch. When you are bedazzling a thick material such as denim, or using the nailheads for furniture, you will want the longer leg (prong). You can use the shorter leg nai heads on thinner fabrics. Also, the size of the decorative head varies in size as well and is available in many different shapes. Browse the internet to find round flat, pearl (cone), star, square, dome, bar, flower or diamond shaped nailheads. Some of the colors are available are black, bronze, silver, gold, gunmetal, copper and antique finishes. You can mix and match shapes, sizes and colors to create your own unique look. 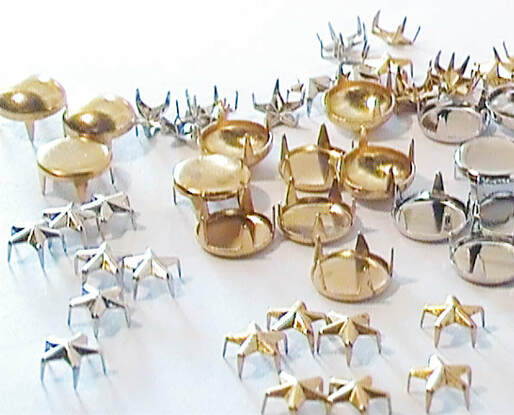 How are Nail heads Used in Clothing Denim looks especially fresh when embellished with nailheads. Try adding nailheads to jeans jacket for a bold fashion statement. Application of nailheads is easy. If you plan on applying a lot of nailheads, you may want to invest in a bedazzler. Prices start at about $20. However, nailheads can easily be applied by hand as well. Simply insert the prongs into the fabric. Using the flat end of a scissor, bend all the prongs to lay flat against the material. It’s that simple. 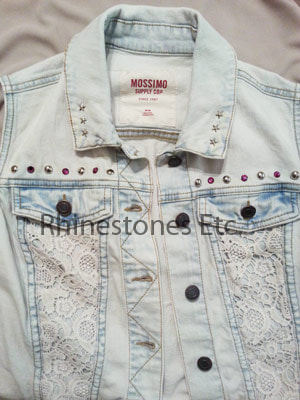 So, what are you waiting for to get started? How about free shipping on your first purchase of nail heads from Rhinestones Etc? Rhinestones Etc has discount pricing on all embellishments and fantastic customer service! Browse the store for the finest selection. Very often, we use the word “love” to describe a variety of things we care about. For example, I love chocolate (well, who doesn’t), or I love that outfit. We also use it to describe human relationships, as in “I love you”. Not far off is Valentine’s Day, the holiday to celebrate love. One way to celebrate is to wear a blinged out t-shirt emblazoned with the word “love” on it. Our downloadable rhinestone template makes it easy to make your very own rhinestone t-shirt. Even if you have never blinged out anything before, you can easily make this shirt.  How to Use Our Rhinestone Template First, download the template. Just click here to do so. The template tells the size and quantity of the rhinestones you will need. Decide on a rhinestone color. You can use crystal on any colored shirt or try another color such as red or black on a contrasting color. Next, decide whether you want to use hot fix rhinestones or flat back (glue-on) rhinestones. Both are easy to use and are a matter of preference. If you choose hot fix rhinestones, you will need either a hot fix tool or transfer paper. Glue on rhinestones will require an adhesive. 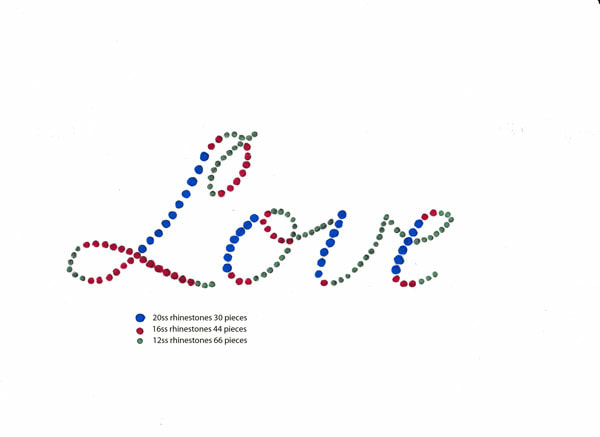 How to Make a Hot Fix Transfer Hot fix rhinestones already have glue on them. Using transfer paper with them makes the process super easy. Lay out the rhinestones facet side up according to the pattern. Peel the transfer paper from its backing and gently place the sticky side on top of the rhinestones. Gently press down so that the rhinestones stick to the transfer paper. Position the rhinestone transfer on your t-shirt. Heat up your iron to the hottest setting without steam. When hot, gently press down on the transfer holding for about 15 seconds. Pick up the iron and reposition the iron to another part of the rhinestone transfer. Repeat this process until all the rhinestones have been heated. DO NOT slide the iron as this may dislodge and move the rhinestones. Allow to cool for a few minutes and then remove the transfer paper. Your shirt is now finished. An alternative is to use a hot fix tool. As with the glue on method, lay out the rhinestones on the shirt and remove one rhinestone at a time to heat. 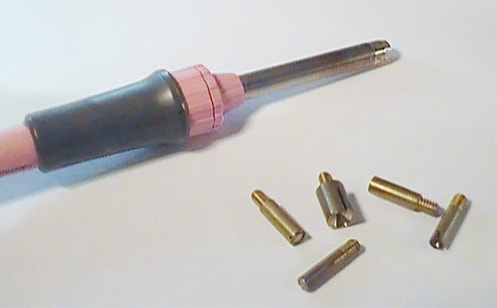 How to Use the Rhinestone Template with Glue-On Rhinestones Flat back rhinestones require the use of an adhesive. My favorite glue for fabrics is Gem-Tac. It is perfect for gluing rhinestones to fabric, dries clear, is washable and is easy to apply. Place the rhinestones on your shirt according to the template. Then, when you are ready to glue, pick up one rhinestone off the shirt. Squeeze a drop of glue just slightly smaller than the rhinestone in its place. Press the rhinestone into the glue drop. Some of the glue should seep out from the edges. This is necessary to form a seal which helps to keep the rhinestone from peeling off. Continue gluing in this manner until all the rhinestones have been glued in place. While hot fix rhinestone glue dries quickly, adhesives for flat back need to dry flat for 24 hours. 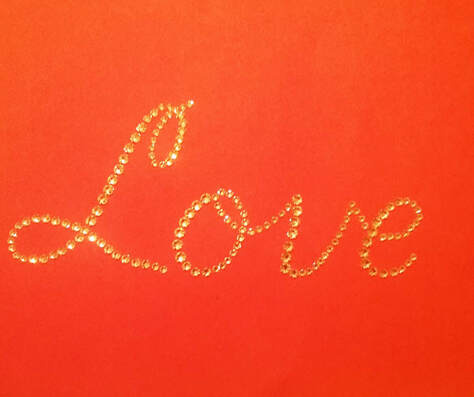 Additionally, our finished rhinestone transfer measures 7.75 inches by 3 inches. Combine it with our heart template for even more bling! Wear it on Valentine’s day or whenever you feel like showing your love. Need rhinestones to bling out your shirt? Rhinestones Etc. has discount prices and great customer service! Browse our online store to find your perfect hue.
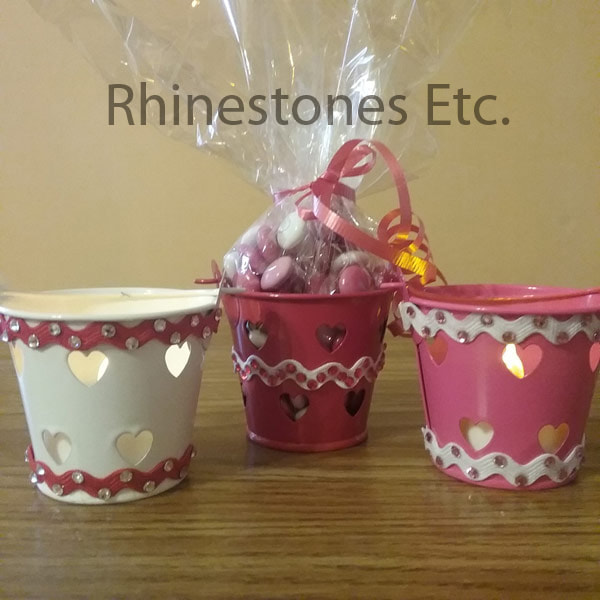
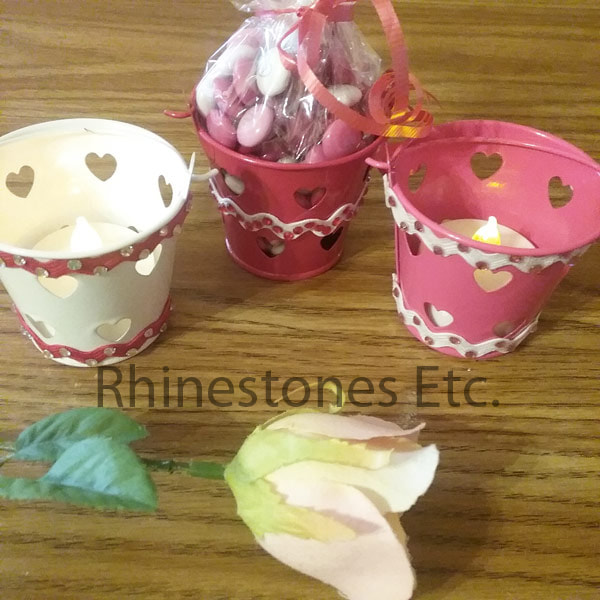
Valentine’s Day is just around the corner. Perhaps you are having a party with some of your children’s friends, or maybe you’ve got bring something to hand out at your child’s school. These cute little buckets embellished with rhinestones and easy to make. Plus, they are an inexpensive DIY Valentine gift. This makes a great gift for children filled with small candies. Additionally, place a battery- operated votive candle inside for a unique table setting. Either one of these would also make great wedding favors. 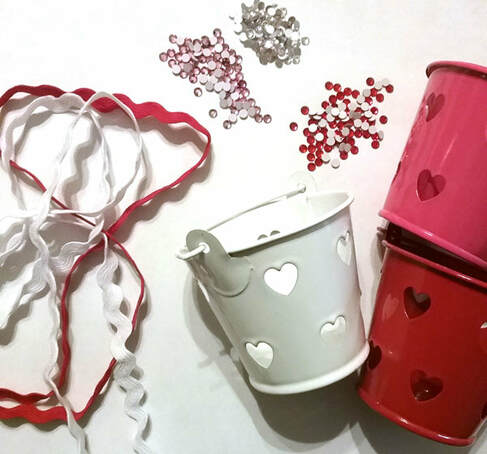 I picked these buckets up on clearance a few years ago at my local craft store. However, colored buckets without the heart cutouts are available at Amazon for about 50 cents each.(https://www.amazon.com/Juvale-2-Inch-Small-Metal-Buckets/dp/B076D6XQKD/ref=sr_1_1?ie=UTF8&qid=1547210452&sr=8-1&keywords=craft+2+inch+diameter+metal+buckets). The rick rack trim I picked up at Walmart for $1 for each color. Most likely you can buy this in bulk for cheaper. Another idea is to use lace as trim instead of rick rack. Depending on the brand of rhinestones and the design, rhinestones may cost you between $2 and $5 per bucket. Then total cost may run you between $3.50 - $8.00 per bucket. How to DIY Valentine Gift Glue the trim to the buckets. You can glue the trim along the top and bottom edges or along the middle. For this project, I used Gem-Tac. Gem-Tac dries clear and is easy to apply. Although not specifically recommended for metal, it does adhere fabric to metal nicely. And the rhinestones will be applied to the trim which is fabric. If you decide to apply rhinestones directly to the metal, I recommend using E6000 for a stronger bond. 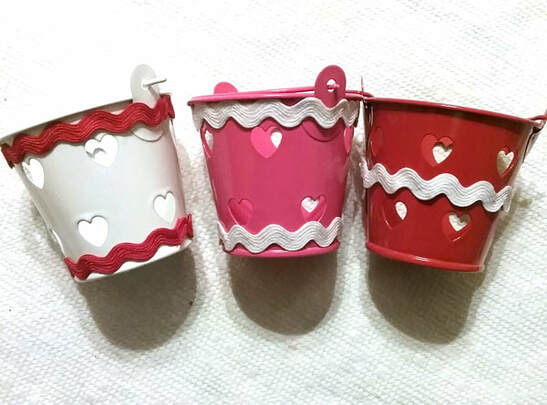 Once dry, glue 12ss rhinestone along the trim, again using a color contrasting to the trim but complimentary to the bucket color. Place a drop of glue slightly smaller that the rhinestone on the trim. Using a wax tipped tool or tweezers, pick up a rhinestone and gently press it onto the glue drop. Allow to dry for 24 hours. To make a sweet treat, wrap candies in plastic wrap and tie with curling ribbon. Pop in a battery- operated tea light for a table setting (do not use real tealight candles as the flame will scorch the inside of the bucket). Both variations make great party favors.
So, go ahead and throw a party for Valentine’s Day. Make this easy, inexpensive DIY Valentine gift hand out in celebration of love. Need rhinestones to get started on your Valentine's Day gift? Rhinestones Etc. has discount pricing and excellent customer service. And now get free shipping on your first purchase! Click on the button above to get your coupon code! Rhinestone jeans are a hot fashion item. However, most retail rhinestone jeans use the cheaper less flashier rhinestones. And jeans that use higher quality rhinestones are quite pricey. Then sometimes you just have a favorite brand that you like to wear. That pair that fits so well and feels so great and it is your go-to jeans. But, sometimes even your favorite pair can use a face lift or upgrade. How about adding some bling? Why not embellish them with some rhinestones? You can buy your favorite brand and embellish them yourself and for a lot less than retail. 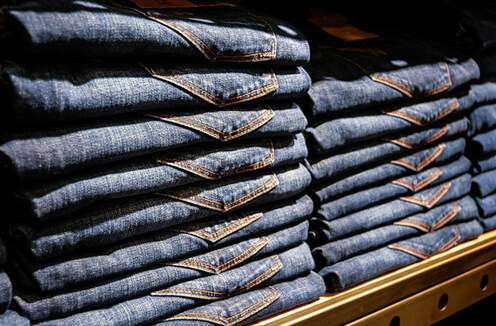 Can you DIY Rhinestone Jeans? Will rhinestones stick to denim? Yes. Even though denim is a thick material, you can glue rhinestones to jeans. My favorite fabric glue is Gem-Tac and it works well for gluing to denim. It dries clear, is washable and the flow is easy to control. Additionally, is E6000 another popular choice for gluing rhinestones to fabric. The most important thing to remember when gluing rhinestones is to make sure some of the glue seeps out from the sides of the rhinestone. This produces a seal which helps protect the rhinestone from peeling off. Place a drop of glue slightly smaller than the rhinestone on your jeans and gently press the rhinestone into the glue drop. Some of glue should ooze out from the sides. 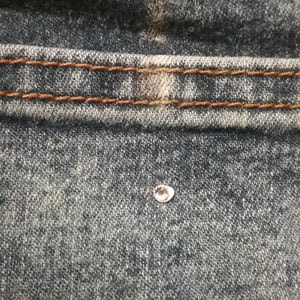 Some ideas to get you started on your Rhinestone jeans Now that you’ve decided to embellish your jeans with rhinestones, what next? If you are a beginner, you can start with something simple. Put a few rhinestones on the back pockets. Simply glue a straight line of rhinestones along the top edge of the pocket. Shift lines and use multiple colors for a more intricate design. 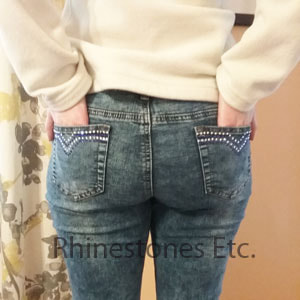 Another idea is to use fabric paint and rhinestones. Use a stencil and fabric paint a design on a pant leg of your jeans. Craft stores are great places to find stencils. A trick I like to use is to copy designs out of embroidery books on card stock. Using an X-acto knife, cut out the insides and you’ve got yourself a stencil. Embellish parts of the design with rhinestones to make it pop. 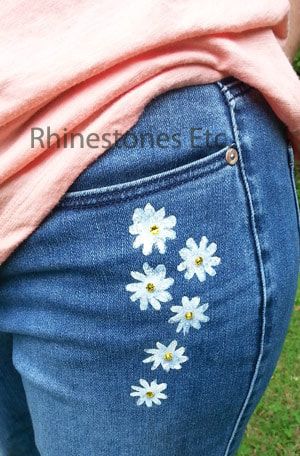 There are so many ways to personalize your jeans with rhinestones. Search the internet for ideas to get inspired. Release your imagination to make you own unique pair of rhinestone jeans.
Do you need rhinestones to get you started on embellishing your denim jeans with rhinestones? Rhinestones Etc has discount pricing and great customer service! Browse our store for quality rhinestones to DIY your jeans. Valentine’s Day is observed February 14 and is a celebration of love. A perfect way to celebrate is to wear a t-shirt with a brilliant rhinestone heart. It’s easy to make one of your own with our rhinestone template. Grab yourself a shirt and download the heart template.  First, A Brief History of Valentine’s Day But as the original Valentine was a martyr how did he become associated with this day? And how did the traditional heart shape come to symbolize love as it bears little resemblance to the human heart? As with many things steeped in history, there is some legend and mystery surrounding this day. St Valentine was a priest martyred in Rome during Claudius’ reign in the first century. Claudius had outlawed marriages believing the institution was weakening his army. Valentine continued to marry couples in secret and was arrested and put to death for his disobedience. Fast forward to the 13th and 14th centuries when nature-minded European nobility began noticing bird mating season occurring in February. Some began sending love notes during this bird-mating season and as time passed, the tradition caught on. Later on, February 14th became the day associated with sending these love notes. Similarly, the use of the heart shape on Valentine’s Day is also steeped in speculation. Some Middle Ages art work provides some clues. Documenti d’amore, a poem by Francesco Barberino, written in the early 1300’s contains an illustration of a cupid throwing heart shapes. Then in the early 15th century, the tapestry “Le don du Coeur” depicted a man holding a small red heart. Soon the heart shape was adopted as a symbol of romance and courtly love.  How to use our rhinestone template There are two different ways to apply the rhinestones. First, you can use hot fix rhinestones and transfer paper. Lay the rhinestones out on wax paper (or some other non-stick surface.) Place the sticky part of the transfer paper over the rhinestones. Gently press down so the rhinestones stick to the paper. Set the transfer paper with rhinestones on your shirt and use an iron to adhere. Or you can glue them on using an adhesive. Start by laying the rhinestones out according to the template. Remove one rhinestone from the design. Squeeze a drop of glue slightly smaller than the rhinestone in that spot. Using a wax tipped tool or tweezers, press the rhinestone into the glue drop. Continue gluing in this manner. Allow to dry flat for 24 hours. 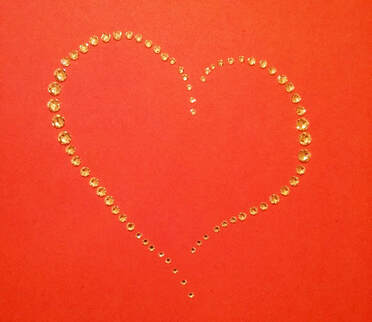 However, you choose to celebrate Valentine’s Day, you can’t go wrong with a blinged out rhinestone shirt. A heart is easy to replicate with rhinestones and our heart template makes it even easier. You can follow the rhinestone template exactly or you can experiment with different rhinestone sizes and colors. Finished rhinestone heart measure approximately 4 x 4 inches. Simply download the heart template to get started. Need rhinestones to make your blinged out shirt? Rhinestones Etc. has discount prices and excellent customer service! Browse our online store to find the perfect crystalline product for your bling project.
|
KarenI have been adding bling for over 20 years. Through my projects, I hope you find inspiration. Categories
All
Archives
July 2024
|

 RSS Feed
Home About Policies Return Shipping
Contact Us Size Chart Privacy Products Reviews
Copyright 2024 Rhinestones Etc. All rights reserved.
Contact Us Size Chart Privacy Products Reviews
Copyright 2024 Rhinestones Etc. All rights reserved.