|
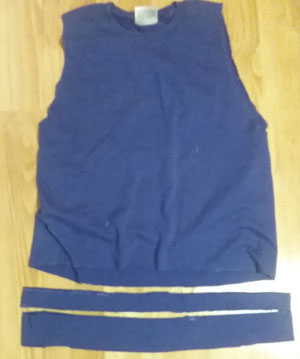
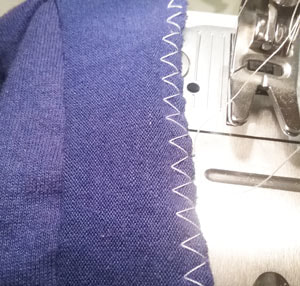
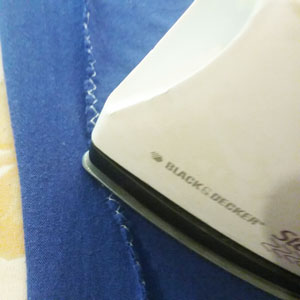
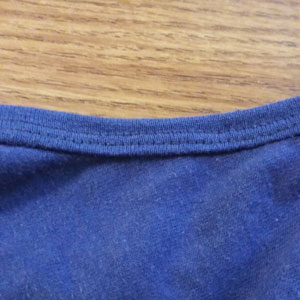
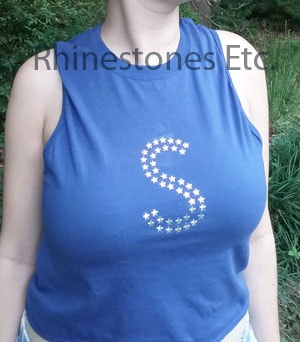
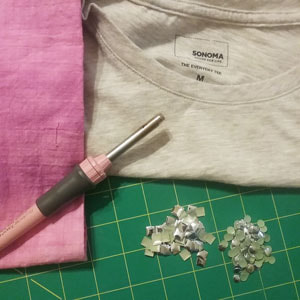
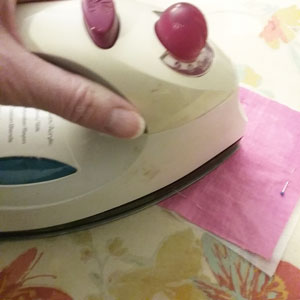
Staying abreast with all the latest fashion trends is costly. You want to look fresh and trendy while staying within your budget. That's where DIY comes in handy. With an embellished t-shirt, you can be fashionable without going over budget. For this project I used: 1 plain t shirt (an inexpensive craft store t shirt) Sewing machine Silver star metal studs Hot fix tool or iron How to make an embellished t shirt. Begin by cutting the sleeves off at the seam. Cut the seam off the bottom of the shirt and then cut 2 pieces off the bottom 1 inch wide. You can adjust how short you want the shirt to be by cutting more or less of the bottom off. Cut 2 inches off the short end one of the strips and then sew the ends together (you are making the loop smaller). Cut the other strip in half. Take the 2 smaller strips and fold them in half and mark the middle. Stitch the 2 shorter ends together forming a loop. Using a medium length zig zag stitch or serger, stitch one of these strips, right sides together, to the armhole stretching to so that the halfway mark matches the shoulder seam and back to the starting point. You are tightening up the armhole as you sew the facing on. Do the same for the other armhole. Take the longer strip and again mark the middle. Beginning at the side, use the same zig zag stitch sew to the bottom of the shirt, stretching to match the middle with the other side of the shirt and back to the starting point. Here you are tightening up the waist. Press all seams towards the outside edges. Fold the raw edge of the facing to the inside of the shirt. Using a double needle (which allows for stretch in the material), topstitch the facing. Do the same for the bottom of the shirt. For this shirt, we chose to go with an initial for the design. I laid out silver metal studs in the form of the letter “S”. Using a hot fix tool or hot iron without steam, press down on the metal studs for 12-15 seconds. If your shirt is thin, you may want to place a piece of wax paper in the inside of the shirt to prevent the glue from adhering the sides together. Allow to cool. Inexpensive but easy to make. An embellished t-shirt is an easy way to stay trendy while keeping your wallet happy.
Hot fix metal studs are available from: www.RhnestonesEtc.com
0 Comments
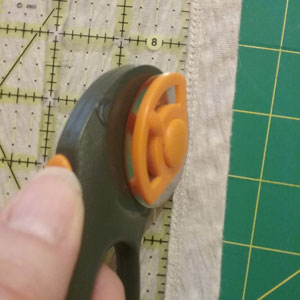
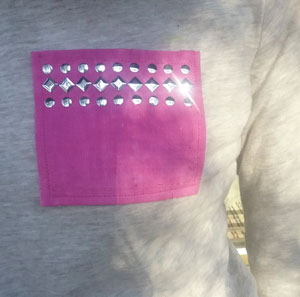
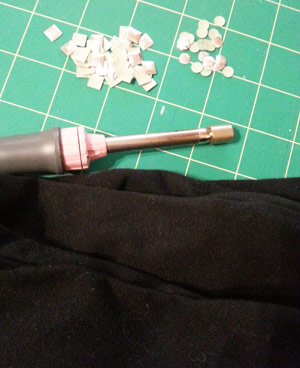
Embellishing with metal studs Some time ago, I posted instructions on how to embellish a pair of leggings with metal studs. After the project, I stored the leggings at the bottom of my drawer since I had nothing to wear with them. Months later, I found a plain tee shirt and with a little creativity, I was able to create the perfect embellished shirt to pair with my leggings. While this product requires sewing skills, it is still basic enough for beginners to learn. For this project I used: Tee shirt Thin fusible facing Sewing maching with single and twin needle and thread Scrap material about 1/2 yard Metal studs: 6 mm silver round and 7 mm silver square Hot fix tool or iron For the bottom two pieces cut the same shape whether you want square edges or rounded. For the length cut each piece about 4 inches longer than the width shirt and about 10 inches in length (or whatever length you want to add to the shirt). Cut a square piece for the pocket. Cut a piece of fusible facing the same size as the pocket. Following the manufacturer's instructions use a hot iron without steam to fuse the facing to the pocket. Fold down the pocket ¼ of an inch from the top part of the pocket and stitch. Fold ¼ inch at the bottom and sides and baste into place. Position the pocket on the shirt and baste into place. Check the position of the pocket to make sure it is straight and in the correct position and stitch into place. Remove all basing stitches. Cut the bottom part of the tee shirt off along the hem line. Using a serger or narrow zigzag stitch edge the bottom piece to prevent fraying. If you prefer, you can hem it. Sew the two bottom pieces together from the top part that will be stitched to the shirt to about 4 inches down, sewing in reverse at the bottom to lock the stitching. Mark the center of both the bottom piece and front and back of the tee shirt. With right sides together, pin the bottom piece to the tee shirt, matching side seams. The bottom piece should be bigger as we cut it 4 inches longer than the tee shirt. You will be stretching the tee shirt as you sew to match up with the center and side seams. Baste into place. Baste again about ¼ of an inch above the first basting line. The next step involves a double needle which when sewn, will allow the tee shirt to stretch without breaking the thread. If you use a straight stitch, the thread will break as the tee shirt stretches. Using the double needle, sew on the top (right) side of the tee shirt between the basting stitches, tucking the seam underneath towards the top of the shirt. I wanted to incorporate the same design from the leggings on to the pocket of the shirt. I positioned some square and round metal studs in a similar pattern to the leggings. Use the flat attachment for the hot fix tool and heat up. Gently press down on the metal studs for 12-15 seconds. Repeat process. If you are using an iron, set iron to the hottest setting without steam. Place a piece of white paper over design to prevent scorching. Gently press down for 10-15 seconds. DO NOT SLIDE the iron as this may move your metal studs. Allow to cool. Once too short, my top is now the perfect length to pair with leggings, not to mention that it matches my outfit perfectly! But don't stop there! Why not experiment and combine this shirt with your favorite pair of jeans for a fresh and edgier look.
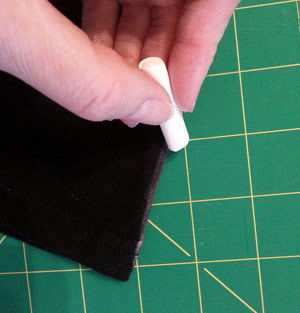
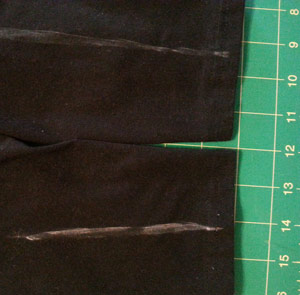
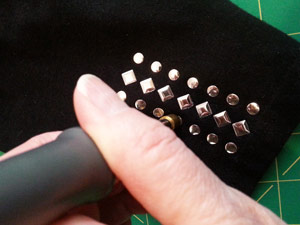
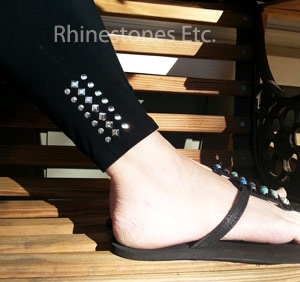
Metal studs are available from: www.RhinestonesEtc.com Hot Fix Metal Trim Embellished Leggings Comfortable and fashionable – leggings are the hot in item. And while they are a great fashion statement, you don’t want to look like everyone else. A great way to customize your leggings and have you stand out is to add metal studs. For this project I used: I pair of black leggings 14 - Square 7 mm silver hot fix metal studs 28 - Round 6 mm silver hot fix metal studs Hot fix tool Prewash your leggings before you start. If you leggings are made of a thinner material, place a piece of wax paper between layers to prevent gluing both sides of the legs together. Fold the bottom part of the legs in half so that the outside part of the legging, the part by your ankle, makes a fold. Use a piece of white chalk to mark the edge. This will serve as a guide line to keep your design straight. Unfold the legs and lay flat. Using the chalk lines as guides, lay out the metal studs to the design of your choice. I like just a little bit of bling so I embellished the bottom 3 inches. When you are happy with your layout, heat your hot fix tool. Gently press down on the metal studs for 12-15 seconds. Repeat process. If you are using an iron, set iron to the hottest setting without steam. Place a piece of white paper over design to prevent scorching. Gently press down for 10-15 seconds. DO NOT SLIDE the iron as this may move your metal studs. Allow to cool. Stunning eye catching leggings to wear at your next event and will guarantee that you to stand out.
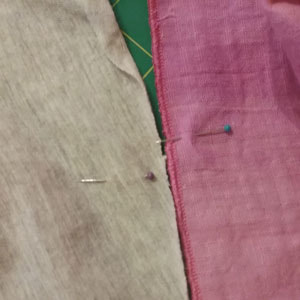
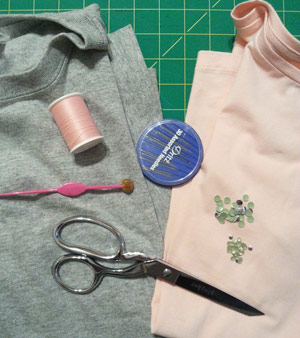
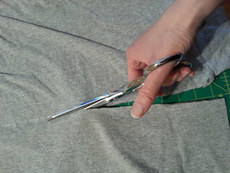
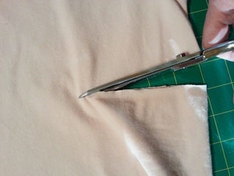
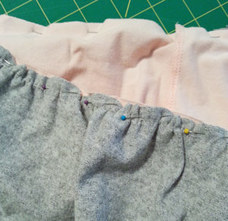
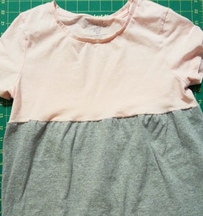
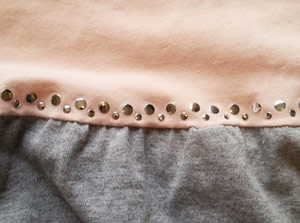
Hot fix metal studs are available from: www.RhinestonesEtc.com DIY Fashion Shirt You are out shopping for new clothes but the prices overwhelm you, when suddenly you find a good deal for a t-shirt. The only problem is the shirt is way too plain. With the help of another shirt and some metal studs, you can transform the shirt into something fabulous. For this project I used: 2 tee shirts (the gray one purchase at local craft store) Scissors pins sewing machine hot fix wand or iron 4 mm silver round hot fix metal studs 6 mm silver round hot fix metal studs I used 2 tee shirts for this project. The pink one is the size I wear that I picked up on clearance, and the gray one is larger purchased at the local craft store. Prewash both shirts before starting. Lay the gray tee shirt on a flat surface and cut straight across just below the arm hole. Place the bottom piece aside and discard the top. Lay the pink tee shirt out flat and cut straight across about 3 1/2 inches below the arm hole. Place the top piece aside and discard the bottom. Sew a gathering stitch ½ inch from the top edge of the gray piece. Gather to fit the width of the pink shirt. Pin right sides together spreading the gathers along the edge of the shirt. Using a ½ inch seam allowance, sew together using a medium zigzag stitch or serger. What I really like about using hot fix embellishments is that once you lay out your design, you can just press the hot fix wand on the embellishment to adhere. If the shirts are thin, you can place a piece of wax paper between layers to prevent gluing through the back. I spaced 4 mm silver round hot fix metal studs along the seam of the two shirts spacing about ½ inches apart. I spaced the 6 mm silver round hot fix metal studs above the line of 4 mm studs in between these smaller studs. If you are using a hot fix wand, use the flat head for metal studs. Heat the wand and when hot, gently press on the metal stud for 12-15 seconds. Repeat until all the studs are adhered. You can also use an iron. Heat iron to the highest setting without steam. Place a white piece of paper over design to prevent scorching and gently press down for 12-15 seconds. DO NOT slide iron as this may move your metal studs. Casual yet chic, this will be your new favorite shirt.
|
KarenI have been adding bling for over 20 years. Through my projects, I hope you find inspiration. Categories
All
Archives
July 2024
|
Home About Policies Return Shipping
Contact Us Size Chart Privacy Products Reviews
Copyright 2024 Rhinestones Etc. All rights reserved.
Contact Us Size Chart Privacy Products Reviews
Copyright 2024 Rhinestones Etc. All rights reserved.




 RSS Feed