|
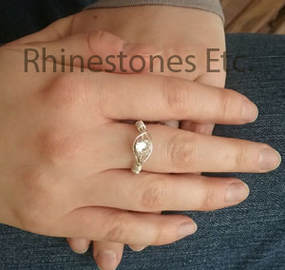
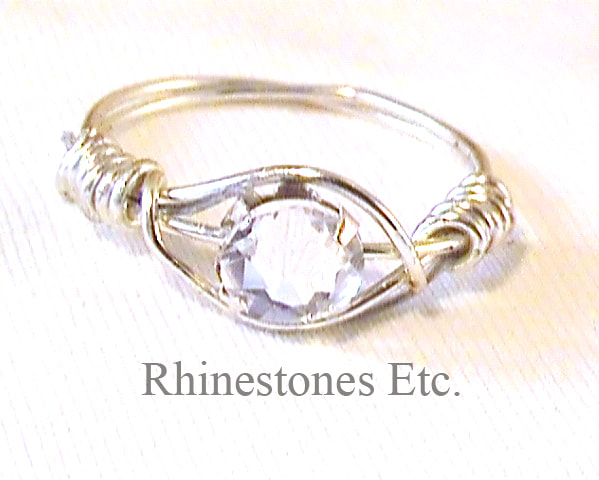
Do It Yourself Rhinestone Jewelry As the mother of five children (yes, you read that right) there isn’t always money left over for luxuries like fancy clothing or jewelry. So, I am always excited when I discover new ways to make seemly exquisite jewelry at a low cost. This DIY rhinestone ring is easy to craft and perfect for those days when you want a little extra sparkle on your hands. Requiring no previous experience, this project is ideal for beginners wanting to learn the craft of jewelry making! For this project I used: 20-22 silver gauge wire 19 strand silver wire (flexible) Jewelry pliers 30ss Crystal Rose Montee Highlighter or any other household item that has the same circumference as your finger 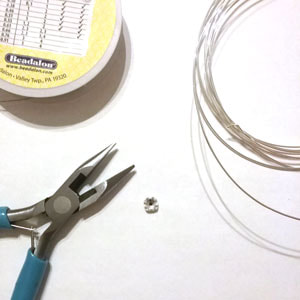 Cut a piece of the 20-gauge wire 12 inches long. Cut a piece of 19 strand 6 inches long. Thread each one through the cross setting on the back of the Rose Montee. 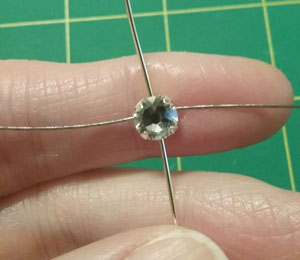 For the ring size, I do not have a ring size stick so using a tape measure, I measured the circumference of my finger and found that a highlighter had the same circumference as my finger. Place the Rose Montee in the center of the 20-gauge wire stone side up then wrap the left side once around back to the Rose Montee and then do the same for the right side. 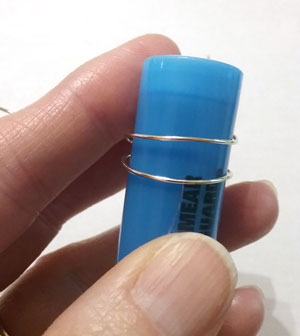 Gently slide the wire off the highlighter. Slightly bend the left wire to go around the Rose Montee. Do the same for the other side. 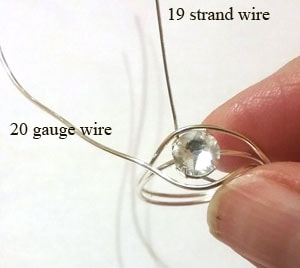 Bend the 20-gauge wire and begin to wrap it around the ring catching the 19 strand wire in the coils. I work on both sides at the same time but you can wrap one side first and then the other. 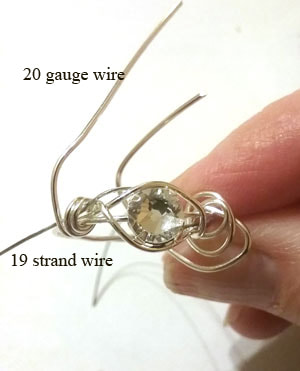 Tighten the coils so that the 19-strand wire is secure then cut as close as possible to the 20-gauge wire. Continue wrapping once or twice more with the 20 gauge wire. Cut the wire and tuck the end in.
Brighten your everyday look with this sparkly ring or combine it with your favorite evening dress for a flawless finish down to your fingertips!
Rose Montee rhinestones are available from: www.RhinestonesEtc.com
0 Comments
Simple diy washer bracelet Washer jewelry is the latest craze, combining simple washers with beads or rhinestones to create beautiful pieces with a unique flair. Previously, I created a simple washer bracelet and was so enthralled by the finished result that I decided to craft another creation based on this popular trend. My sister’s 50th birthday is coming up and wanting to make her a special gift, I came up with this elaborate design. For this project I used: Washers (#8) 12 mm Purple hemp cord E6000 Fuchsia 12ss rhinestones Cord end caps 2 4 mm jump rings Lobster clasp Wax tipped tool or tweezers Jewelry pliers  Cut 2 pieces of hemp cord about 12 inches in length. I like my bracelets 7 inches in length, so I used 12 washers. Thread one piece of the hemp cord through the washers. In order to get the washers to lay flat, you want to thread the next washer from the same exit location as the previous one. So for example, the thread exits the washer from the bottom, you'll thread the next washer from the bottom. When the thread exits from the top, you'll thread the next washer from the top (see the photo below). 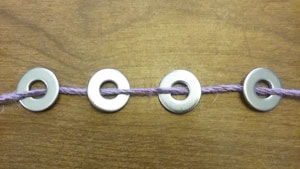 Take the second piece of hemp cord and thread it through the washers opposite the first piece of cord.. So if the first cord is on top, the second cord should be threaded underneath the washer. The next washer will be threaded from the same place as the exit location of the previous washer, same as you did for the first cord. 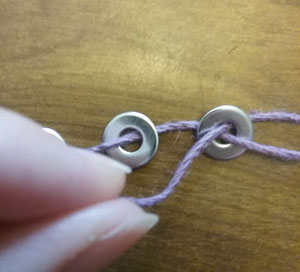 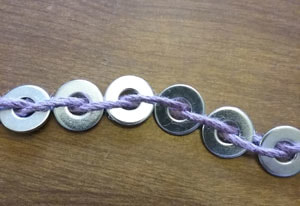 To keep the washers from sliding along the cord, take the end and thread it through the last washer again. 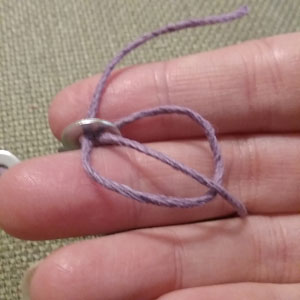 Measure the bracelet to the correct length and cut off the excess cord. Attach a cord end cap to each end. At one end, attach a jump ring and lobster clasp. You may also want to attach a jump ring to the other end. Lay the bracelet flat. I use E6000 to attach rhinestone to metal because of the strong bond it makes; however, some people don’t like to use it because of the warnings. Always glue in a well-ventilated area and follow the manufacturer’s instructions. Since E6000 tends to be gloppy, I squeeze a small amount over a paper plate and using a toothpick apply glue to the surface slightly smaller than the rhinestone. Then using a wax tipped tool or tweezers, pick up a rhinestone and gently press it into the glue drop. 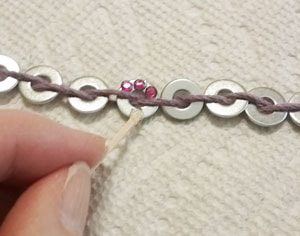 I glued 3 rhinestones above the cord, and three below it. 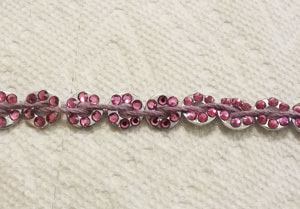 Allow to dry flat for 24 hours. 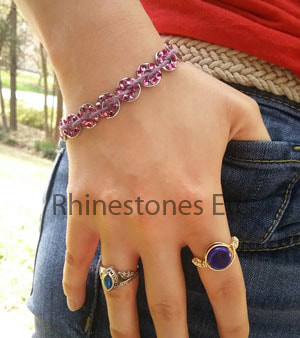 Keeping up with the latest fads is simple and inexpensive when you have crafty hands and can craft your own creations! Suitable for everyday wear, or compatible with your favorite evening dress, stay in style with this lovely washer bracelet!
Rhinestones and wax tipped tool are available from: www.RhinestonesEtc.com |
KarenI have been adding bling for over 20 years. Through my projects, I hope you find inspiration. Categories
All
Archives
July 2024
|

 RSS Feed
Home About Policies Return Shipping
Contact Us Size Chart Privacy Products Reviews
Copyright 2024 Rhinestones Etc. All rights reserved.
Contact Us Size Chart Privacy Products Reviews
Copyright 2024 Rhinestones Etc. All rights reserved.