|
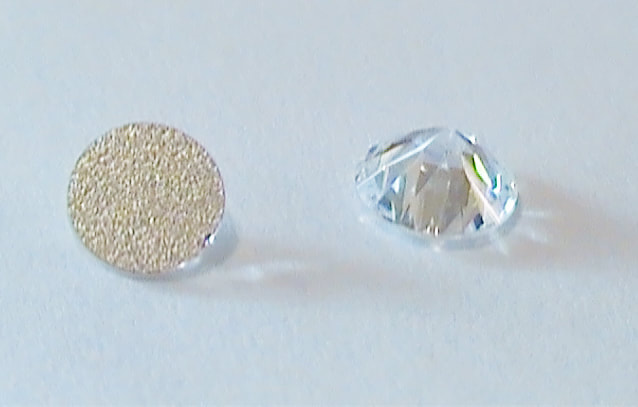
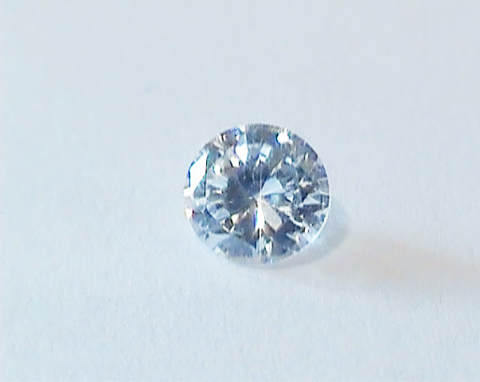
If you are new to rhinestones, you are probably overwhelmed by the options and choices. Who knew there were so many colors to choose from? And sizes? It’s certainly not one size fits all. Then there are pointed back rhinestones or flat back rhinestones. When are pointed back rhinestones used? Pointed back rhinestones A pointed back is comprised of three main areas: the girdle, crown and pavilion. The girdle is the widest part of the stone. Next, the crown is the part above the girdle and the pavilion below. Facets are cut along the pavilion as well as the crown to reflect light to provide the maximum brilliance. Light entering the crown will be reflected back through the crown by the facets in the pavilion. This method of faceting takes the best advantage of the optical properties of the stone to produce maximum sparkle. Pointed back rhinestones can be used in jewelry making. These rhinestones require a setting in a cup shape for the pointed back to sit in. Browse the internet and you can find settings for rings, earring and pendants. Depending on the type of setting, the rhinestone is either glued in or the prongs are bent to hold the rhinestone. Nail design is another way small pointed-backs can be used. Sizes such as 10ss or smaller work well as the pavilion is small. Videos on YouTube show technicians placing rhinestones into the topcoat or attached with nail glue. You can read how to attach rhinestones to nails here. Flat Back Rhinestones Flat back rhinestones are coated with foil on the backside and facets are cut just on the crown. In this case, the foil coating helps reflect light back up through the facets cut into the crown. Additionally, the number of facets cut into the crown affect the amount of sparkle; the more facets, the more sparkle. Swarovski’s Xirius Rhinestone has the most with 16 facets and most other manufacturer’s having 10 or 12 facets. There are settings for flat back rhinestones in jewelry making as well. Simply glue the rhinestone to the flat surface on the setting or bend the prongs to hold the rhinestone. Nail design allows for more creativity as larger size stones can be glued to the nail surface. Moreover, this allows for a wider variety of rhinestone sizes to be used. So how do I choose which type of rhinestone to use? First, determine its use when choosing between the two types . Clothing, shoes, dancing and skating costumes will require flat back rhinestones. However, nails and jewelry making depends simply on your preference. Rhinestones Etc. sells quality rhinestones with excellent customer service.
7 Comments
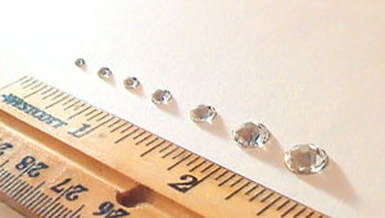
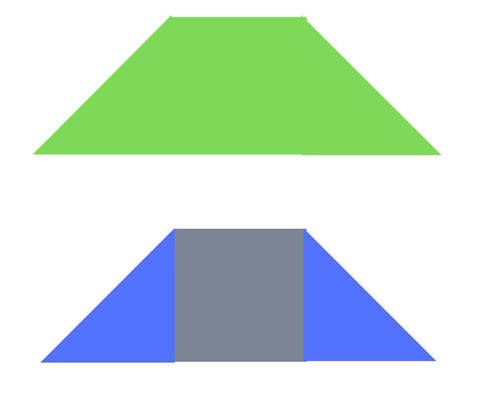
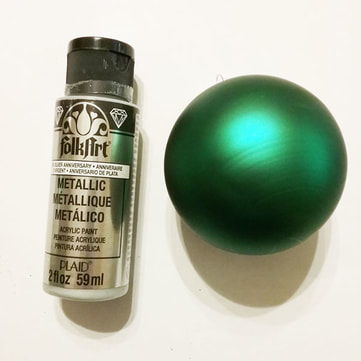
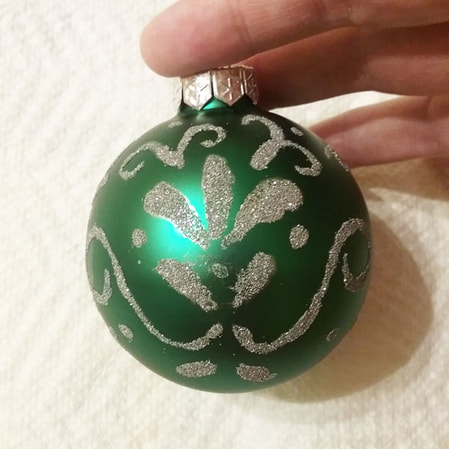
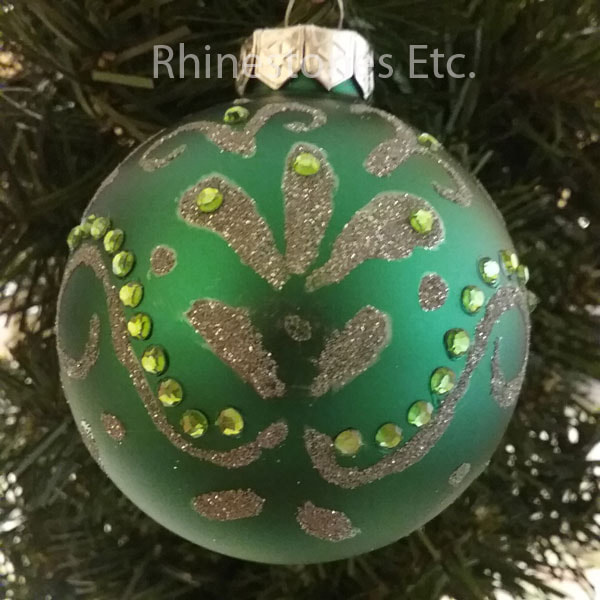
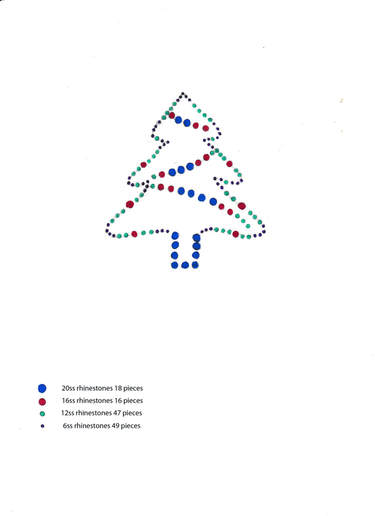
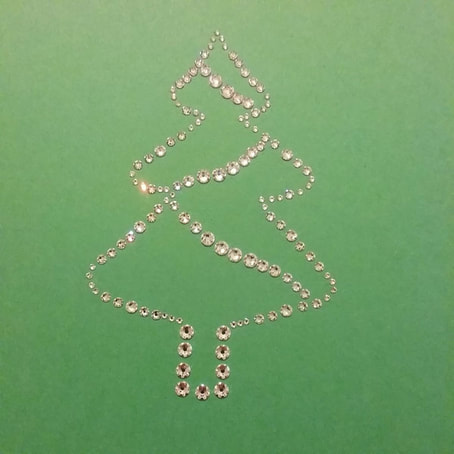
Don’t you just love rhinestone boots? Yet, sparkly boots can put a serious dent in your budget costing you hundreds of dollars. However, you can rhinestone the boots yourself and save yourself a bundle of money. But how many will you need to cover the area of boot you are embellishing? Ugh! You were never good at math and have no idea where to begin. The Math needed to determine how many rhinestones needed for Rhinestone Boots Once you’ve got your boots, you need to pick out your rhinestone size. Most likely a larger size rhinestone will work best, perhaps 20ss. If you are not sure, you can read all about rhinestone sizes here. Hark back to your Geometry lessons, as they’re going to come in handy. First, you need to figure the area of the boot that will be covered in rhinestones. In order to figure out the area of a square or rectangle, you multiply the length by the height. So, let’s say you want to glue rhinestones to a rectangular area that measures 3 x 4. The area of this would be 12 square inches. Now, rhinestones are different sizes, so depending on what size you choose will affect how many you need. Of course, the larger the rhinestone, the less you need to cover 1 square inch. Likewise, the smaller the rhinestone, the more you need to cover 1 square inch. For your convenience, here are the most common rhinestone sizes and the amount needed to cover 1 square inch: 12ss – 67.14 rhinestones 16ss – 42.41 rhinestones 20ss – 29.20 rhinestones 30ss - 15.68 rhinestones Obviously, you can’t glue on .14 of a rhinestone. To compensate, you can leave some space between the stones when gluing. Or you can shrink the area to be embellished to cover a slightly smaller area. Remember, those numbers above will cover 1 square inch, but you have 12 square inches you want to cover. Simply multiply the number of square inches you want to cover by the number of rhinestones in one square inch. In other words, using our example of 20ss rhinestones: 29.20 (the number of rhinestones per square inch) x 12 (the area to be covered) = 350.40 rhinestones. And to continue with our example of boots, this would cover only 1 boot. Multiply the number by 2 to find the number of rhinestones needed to cover both boots. Finding Areas of Odd Shapes Simple right? Of course, the problem gets slightly more difficult when dealing with odd shapes. When confronted with these shapes, try to break the larger shape into smaller, simpler shapes. Then find the area of these smaller shapes. Take, for example, this trapezoid shape above. How do you find the area of it? We can break it down into a square and 2 triangles. Now we can find the area of the square, then the two triangles and add the totals together. (On the occasion that you forgot your geometry lessons, the area of a triangle is ½ the base times the height). Still confused about how many rhinestones to buy to rhinestone boots? Rhinestones Etc. can help. With a friendly staff, contact Rhinestones Etc with your questions. Do you need rhinestones for your project? Rhinestones Etc. has competitive pricing and excellent customer service. Sometimes, when you use crafting items differently than their intended purpose, the result is something unexpectedly beautiful. Embossing powder is generally used for card making and heated after applied to give it a nice glossy look. I liked the fine particle sparkle of the power and used it in this DIY Christmas tree ornament. Due to its painted pattern, this project is a little more difficult than most of my previous DIY ornaments. However, don’t let the difficulty of it intimidate you as try to create your own easy pattern. For this project I used: 1 green ornament Metallic Silver acrylic craft paint Silver embossing powder Peridot 12ss rhinestones Paint brush Wax tipped tool or tweezers How to Make a Christmas Tree ornament Pick out a design you wish to paint on the ornament. It may be useful if you can find a template or pattern to copy. Using the metallic silver paint, paint your design on the ornament once section at a time. While the paint is still wet, sprinkle the embossing powder over the painted areas. Brush off the excess powder. Continue painting and sprinkling embossing power until your design is complete. If possible, hang you ornament to dry. Generally, embossing powder is heated to produce a glossing look. However, I left the power unheated as I liked the grainy look on the shiny ornament. Gluing Rhinestones to the Ornament Next, I glue Peridot 12ss rhinestones within my design to add extra sparkle. Either E6000 or Gem Tac works well for this project. Because I could use slightly less adhesive and because of the strong bond, I chose to use E6000. Gem Tac tends to leave glue marks once it dries on the ornament. Use a toothpick to apply E6000 to the ornament. Then using a wax tipped tool or tweezers, pick up a rhinestone and gently press it into the glue. Keep on gluing rhinestones, accentuating the painted/embossed areas. Allow to dry for 24 hours. Need rhinestones to get started making your own sparkly ornaments? Rhinestones Etc. has a large selection of rhinestones and competitive prices! You want to make your own blinged out shirt but you never blinged anything before. While straight lines and scatter patterns don’t seem too difficult, they’re much too boring to do. Besides, you were hoping for something more. But you’re not artsy and you can’t draw even draw anything better than a stick figure. You’ve looked in the craft stores. However, their rhinestone transfer designs are expensive, and they use cheaper rhinestones. Where do you begin? Do you have a design in mind? Rhinestone templates are a great place to begin. A template gives you the number of rhinestones, what sizes used and the placement of rhinestones. Even if you are a newbie, pictures are easy to make with rhinestones. Plus, you can follow the rhinestone template exactly or you can experiment with different rhinestone sizes and colors. There are two different ways to apply the rhinestones: hot fix rhinestones and transfer paper or glue on. Hot fix Rhinestone Transfers The easiest way to affix a rhinestone picture to a shirt is with the use of hot fix rhinestones. Hot fix rhinestones have glue on them. When they are heated, the glue is activated. After the glue cools, a permanent bond forms. Using hot fix transfer paper makes rhinestone transfers super easy. This paper is made of 2 parts, a non-sticky and a sticky sheet. First, lay the template on a flat surface. Separate the transfer paper, laying the clear sticky piece on top of the template, sticky side up. Then simply place the rhinestones in the correct positions, facet side down and glue side up, following the template. Now you are ready to apply your transfer. Heat your iron up so that It reaches a temperature of 250°F to 340°F without steam. Position your hot fix transfer and press down with the iron for 12-15 seconds. Do not slide the iron as this may dislodge and move the rhinestones. Continue picking up the iron and pressing down until the glue on all the rhinestones has been activated. Glue on method Gluing rhinestones with an adhesive is a little harder. I usually lay the design out with the rhinestones on the shirt following the template. This way you can see the spacing and placement before gluing. Once you are satisfied with the design, pick up one rhinestone with a wax tipped tool from the shirt. Place a drop of glue slightly smaller than the rhinestone on the shirt. Gently press the rhinestone into the glue drop. Keep on gluing in the manner until all the rhinestones are glue in place. Let dry flat for 24 hours. And with Christmas just around the corner, you will love our new Christmas template. Simply go to our website: www.Rhinestones.com and click on the top tap templates. Available for download is our template of a Christmas tree. If you have any questions about starting this project, feel free to contact us with any questions. Need rhinestones to get started on your project? Rhinestones Etc. has a large stock of rhinestones.
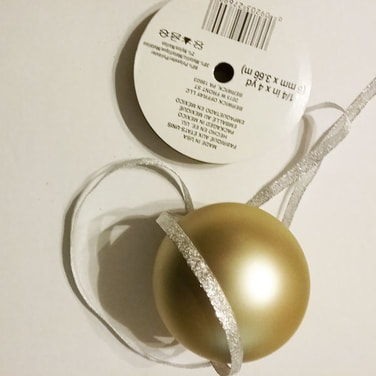
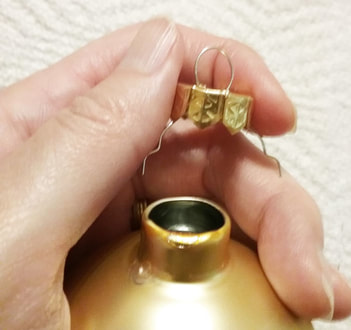
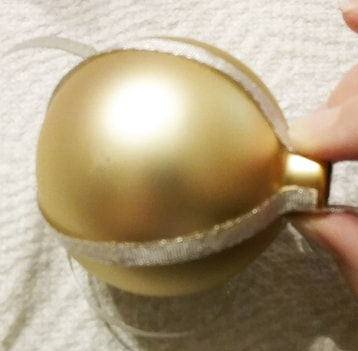
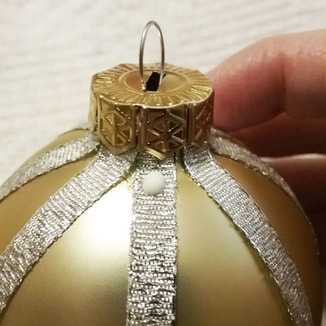
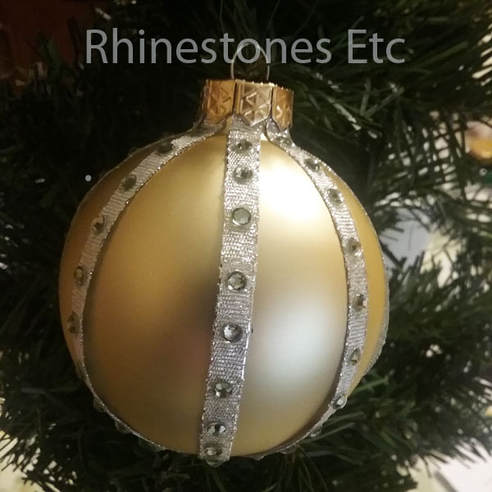
“Silver and gold Silver and gold Mean so much more When I see Silver And gold decorations On ev'ry Christmas tree” -Burl Ives It’s that time again, when Christmas lyrics resound in our head. The lyrics from this Christmas carol pairs silver and gold together, two colors that look spectacular on a Christmas tree. And what’s not to love about these super easy DIY silver and gold ornaments? Read on for the instructions! For this project I used: 1 gold round ornament Silver ribbon about ¼ of an inch wide Gem Tac Wax tipped tool or tweezers Black diamond 12ss rhinestones How to make a Silver and Gold Ornament Begin by taking off the top metal loop of the ornament. Cut three pieces of ribbon the circumference of the ornament. For my ornament, I cut three pieces 8 inches in length. Using Gem tac, glue one piece of ribbon from the top to the bottom and back to the top of the ornament. Glue the second piece so that the ornament is broken into quarters. Then. glue the third piece in between the other two pieces of ribbon so that the ribbon divides your ornament into 8 equal sections. Let dry completely. How to Glue Rhinestones to the Ornament To glue the rhinestones on, place a drop of glue slightly smaller than the rhinestone on the ribbon. Using the wax tipped tool or tweezers, pick up a rhinestone and gently press it into the glue drop. Continue gluing rhinestones along the ribbon, spacing the rhinestones about ¼ of an inch apart. Allow to dry for 24 hours. When completely dry, replace the metal loop on top of the ornament. Fun and easy to make, these sparkly DIY gold and silver ornaments will dazzle on your tree. Experiment with different color ribbons or ornaments for your own bold and sparkly look. Need some rhinestones for your project? Rhinestones Etc has a large selection of rhinestones, with fast shipping and great customer service!
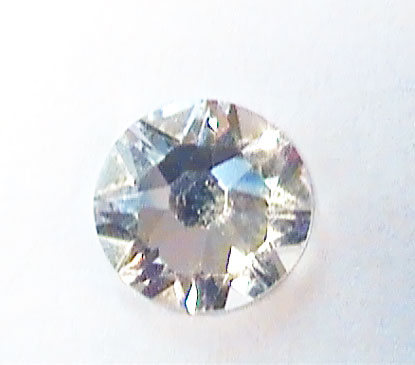
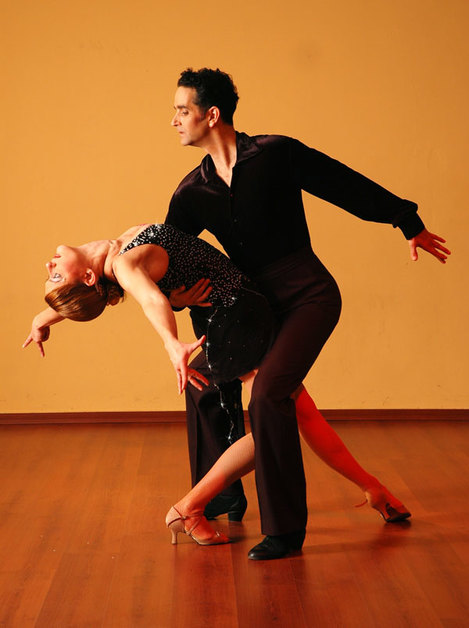
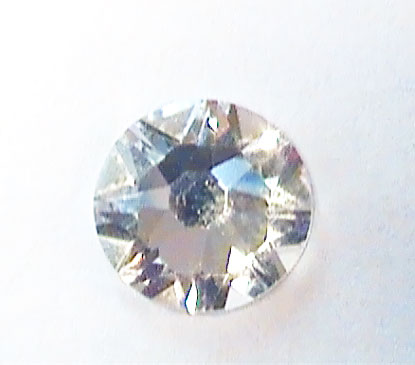
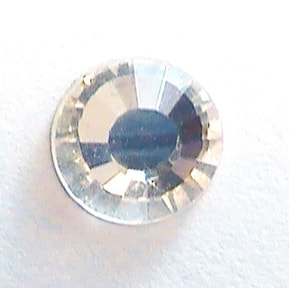
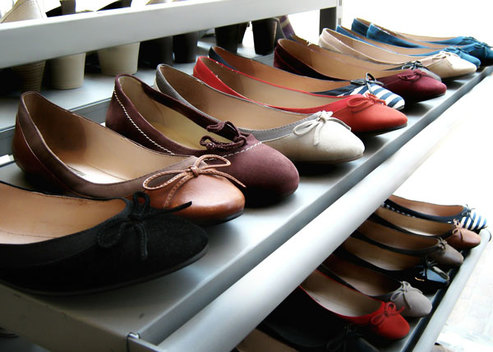
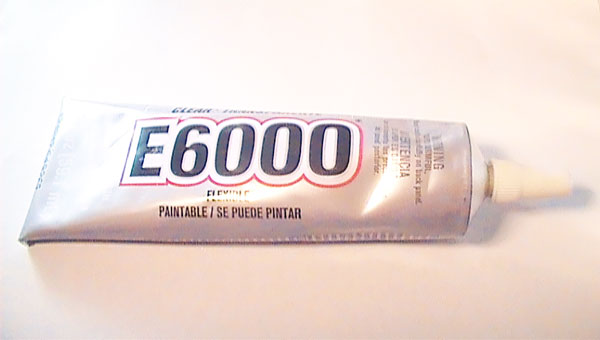
As the ballroom dancers move across the floor, they create a blur of glittering light. The rhinestones on their dance costumes sparkle. Their movement in conjunction with the rhinestones produce a glittery brilliance that you just can’t miss. What is it about rhinestone bling that draws our attention to them and we just can’t look away? What creates Rhinestone Sparkle? There are two rhinestone bling factors to consider: material and facets. Rhinestones are pieces of crystal, glass or acrylic with facets on them. Both need to be considered together when discussing bling rhinestone bling. Rhinestones Material First, the material the rhinestone is made from affects its sparkle. Crystal has reflective properties or the ability to reflect light. In addition, it has a prismatic effect or the ability to break up light much like a prism. Glass has some reflective properties but no prismatic qualities. And acrylic has softer reflection properties than glass with no prismatic effect either. Facets Affect Rhinestone Bling Name brand rhinestones such as Swarovski or Preciosa start out as a single piece of crystal. Facets are laser cut into the crystal to form the rhinestone. Likewise, glass rhinestones are usually laser cut as well. Acrylic rhinestones are formed from molds. 16 facet rhinestone 10 facet rhinestone Moreover, the greater the number of facets a rhinestone has, the more sparkle it creates. Comparatively, it is also true that the more facets a rhinestone has, the more expensive it is. Swarovski’s Xirius Rhinestones has the most facets on the market, 16. These facets are arranged in a star shaped pattern. It is also the most expensive rhinestone. Preciosa has 12 facets. Other less known brands have 10. Generally, acrylic rhinestones have 8 facets. Furthermore, the facets on all these rhinestones including Preciosa, are arranged around the side. So, in conclusion, the bling factor is affected by two factors: material and facets. Primarily, the first factor to consider is what the rhinestone is made from. And the second factor is the number of facets. Each must be considered when deciding which rhinestone is right for your project. Need help in deciding? Rhinestones Etc. can help. Contact us with all your rhinestone questions. We ship rhinestones fast! Footwear is the foundation of any outfit. Your choice can define your look and presents a particular image to the world. Yet, owning a pair of Jimmy Choo or Christian Louboutin shoes is way out of many women’s budgets. One way to accessorize your wardrobe ensemble is to create shoes with rhinestones. When you want to keep your shoe collection fresh and exciting, you can add rhinestones for a new look. Adding bling to any type of footwear adds elegance and beauty. Plus, it’s simple to do and you can save money doing it yourself. The Best Adhesives for Gluing Rhinestones to Shoes Generally, you can attach rhinestones to any type of footwear including boots and athletic shoes. To keep rhinestones from falling off, be sure to use a good adhesive with a strong bond. Typically, many people use E6000 for gluing rhinestones to shoes. Another popular glue is Gem-Tac. Both work on a variety of surfaces and dry clear. However, always check the manufacturer’s specifications on the material it bonds and recommended type of rhinestone. Some adhesives can ruin acrylic embellishments. Additionally, you’ll want to avoid areas of your shoe that will be constantly stressed. For example, footwear flexes where your toes bend. This constant folding of your footwear may also cause rhinestones to fall off. Types of Rhinestones If you’ve never purchased rhinestones, you may be confused by all the different kinds available. Google the word “rhinestone” and results will show acrylic, glass, crystal, Czech, Austrian, or Asian options. Furthermore, you’ll notice a vast difference in price structure. Usually, manufacturers base their pricing on the cost of the raw material and the process to create their product. For example, manufacturers produce resin and acrylic rhinestones by pouring raw material into a mold. While manufacturers of more expensive crystal rhinestones cut facets into the surface of the crystal. Another consideration is the number of facets and their arrangement. These two factors, along with the material, determine the stone’s sparkle, scintillation, and dispersion. Moreover, you’ll find many different rhinestone sizes from tiny to large. Some beginners struggle with deciding on the perfect size for their project. Often, the design will dictate which size will work best. Other times, it’s just a matter of preference. Creating Shoes with Rhinestones Once you decide on your kind of rhinestones and glue, the next most important aspect is the gluing process. Many beginners will use too little glue. Over time, these rhinestones may peel and fall off. When gluing rhinestones, it’s very important that a little bit of glue seeps slightly out from the edges. This produces a seal to keep the rhinestone in place. Generally, rhinestones adhesives dry clear, so once the glue dries, only the sparkle shines through. FAQs about Rhinestones Are you ready to begin blinging out shoes, but have more questions? Below, we’ve answered a few commonly asked questions. Which Rhinestone Brand Should I Buy? With so many rhinestone brands available, it can be hard to choose the perfect one for your project. Sometimes only the best will do. Generally, Austrian and Czech manufacturers have a reputation for quality. However, you’ll also find some Asian manufacturers producing excellent embellishments at a fraction of the price. We carry Preciosa Maxima and another high-quality Asian brand, PriceLess. How Many Rhinestones Should I Buy? Generally, many retailers package rhinestones in 1 gross batches. This means each package will contain 144 rhinestones. First, you’ll need to measure the area you want to cover. Then, compare this to the size of the rhinestones you want to purchase. Larger rhinestones cover a larger area, so you’ll need less than if you buy a smaller stone. What’s The Best Color? Usually, this choice is a matter of preference. You can choose to match the color of your shoes to simply create sparkle. Whereas choosing a contrasting hue will give your footwear a nice pop of color while adding shimmer. Many people choose crystal or crystal AB because both colors work great with any background color. Ready to begin your project of making shoes with rhinestones? Rhinestones Etc. offers competitive pricing, fast shipping, and great customer service. |
KarenI have been adding bling for over 20 years. Through my projects, I hope you find inspiration. Categories
All
Archives
July 2024
|
Home About Policies Return Shipping
Contact Us Size Chart Privacy Products Reviews
Copyright 2024 Rhinestones Etc. All rights reserved.
Contact Us Size Chart Privacy Products Reviews
Copyright 2024 Rhinestones Etc. All rights reserved.


 RSS Feed