|
Give your favorite coffee drinker a beautiful bling coffee mug this Valentine’s Day! While purchasing a blinged out coffee mug is expensive, you can create one with a few supplies. Even if you’ve never glued rhinestones before, our step-by-step instructions make this project super easy.
Gathering Your Bling Supplies Remember your elementary school days when you handed out a Valentine’s Day card to all your friends? Letting your friends know how you feel about them doesn’t stop when you're older. Furthermore, Valentine’s Day is the perfect day to let a friend know how much you care. When beginning a bling project, you’ll have to decide on the type of rhinestone you want to use. Manufacturers make acrylic, glass, and crystal rhinestones. While acrylic rhinestones are the cheapest, they also have the least amount of sparkle. Next, you need to decide on your rhinestone color and size. Most rhinestone manufacturers create a large variety of hues. Usually, you can find standard colors, AB, and opals. Generally, manufacturers sort rhinestone sizes by the “ss” designation. Typically, retailers will provide a rhinestone size chart that converts ss to millimeters. Sometimes, you may want to use a larger rhinestone, other times a smaller one. For instance, using a smaller rhinestone for a large area will take you longer and require more stones. However, smaller rhinestones work better when creating initials or words. Finally, you’ll need glue to permanently adhere the rhinestones to the mug. Typically, you can find several rhinestone adhesives at your craft store. Always check the manufacturer’s instructions to make sure the glue is compatible with your project, dries clear, and is washable. For example, E6000 provides a strong bond, especially when gluing to ceramic. However, the manufacturer doesn’t recommend using it with acrylic rhinestones. This includes resin and jelly which are a type of acrylic.
Steps to Make A Bling Coffee Mug
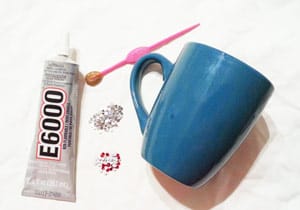
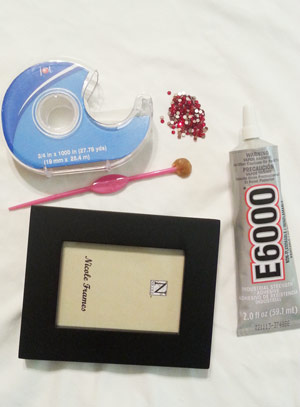
To make this blinged out project I used:
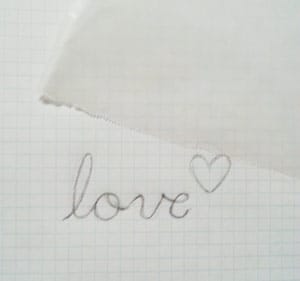
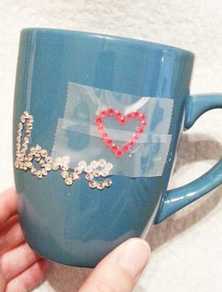
Many times, I like to use some sort of template to keep my design centered and even. Although a Cricut machine can do this easily, it’s also expensive. Thus, I began by sketching my design out on graph paper to keep my design symmetrical. To complete my design, I glued the word “love” and the symbol "heart" separately.
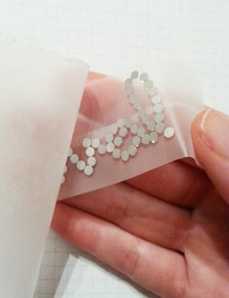
Once I finished drawing my design, I placed a piece of wax paper over it. The wax paper is opaque and will still let you see the underlying sketch. Next, I laid out the crystal rhinestones on the wax paper following the lines of my design.
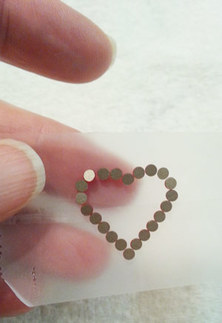
Now, I had to transfer my design to create my bling coffee mug. Using scotch tape keeps the rhinestones in place and allows me to place glue on the backsides. For this project, I used two pieces of thick tape, slightly longer than my design. Place the tape over the rhinestones, pressing down to make sure each one sticks to the tape. Then, peel the tape away from the wax paper.
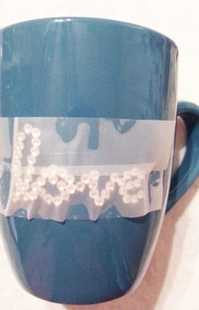
Accordingly, I could now flip over the rhinestone design and apply my adhesive. I placed a drop of E6000 slightly smaller than the rhinestones on each of the rhinestones. Centering my design on the coffee mug, I taped the rhinestone design to the coffee mug. Before moving on to create the heart, I allowed the glue to dry for 24 hours.
After 24 hours, I peeled the tape off the mug. Then, I repeated the process for the heart, again allowing the glue to dry for 24 hours. Once again, after the glue had dried, I peeled off the remaining tape.
A Bling Coffee Mug Makes A Great Gift
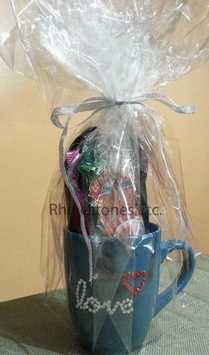
You can fill the mug with packets of flavored hot chocolate, tea, or coffee. Then, wrap it in clear cellophane paper, tie it with a ribbon, and you're ready to give your gift! Moreover, you can create other designs like initials. Your friend will love this and think of you every time she sips her favorite beverage.
Of course, blinged out drinking vessels are not microwaveable or dishwasher safe. In addition, never leave them soaking in water.
Plus, when you need rhinestone supplies, view Rhinestones Etc. huge selection of colors and sizes. Plus, We have fast processing times so you get your embellishments fast.
0 Comments
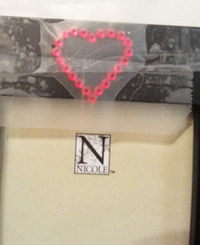
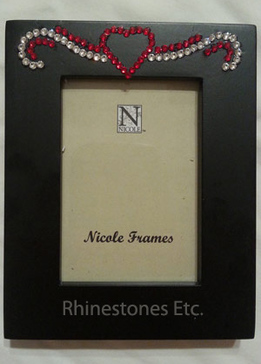
Rhinestone embellished picture frame Finding the perfect gift for Valentine’s Day can be challenging especially when you want to give something personal. Why not decorate a picture frame to not only make it personalized, but also use it to capture your favorite moment of the two of you together. For this project I used: 1 picture frame 9ss Light Siam Rhinestones 10ss Crystal Rhinestones E6000 Wax tipped tool I find it difficult to glue rhinestones symmetrically when doing it freehand. An easier way is to lay a piece of wax paper over graph paper and lay the rhinestones out on the wax paper. The graph paper helps to keep your design symmetrical. Once your design is complete, carefully tape the rhinestones with scotch tape and peel off the wax paper. Place a drop of glue on the back of each of the rhinestone slightly smaller than the rhinestone and tape to the picture frame. Allow to dry for 24 hours. After 24 hours, remove the tape. I wanted to add a little something more to the design and this I did freehand, although the same method of taping can be used. Now you have the perfect way to remember your favorite moment with your loved one for years to come.
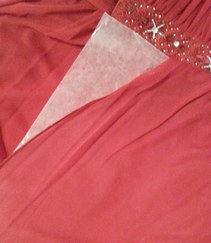
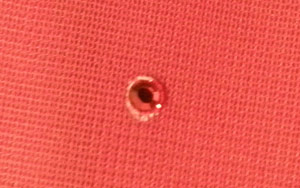
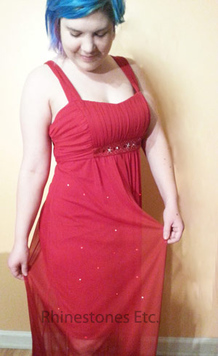
Rhinestones and wax tipped tool are available from: www.RhinestonesEtc.com How to rhinestone a dress My oldest daughter bought a dress for her first company Christmas party. It had some bling on it – a few rhinestones and sequins on the waistband; however, the dress needed something else. “More bling, please,“ she asked. I wanted the skirt to enhance the waistband- not detract from it. The result is a subtle hint of sparkle on the skirt. For this project I used: Crystal 12ss PriceLess Rhinestones Light Siam 12ss PricesLess Rhinestones Gem Tac Wax paper Wax tipped tool Prewash and dry the garment before you start gluing to remove any chemical finish. Lay the garment as flat as possible. The skirt on this dress is mesh so I placed a piece of wax paper between the layers of the skirt to prevent the glue from seeping through and gluing the layers together. I glued a few Crystal rhinestones scattered on the skirt with many more Light Siam rhinestones. My ratio was about 3 Light Siam rhinestones for each Crystal rhinestone. The Light Siam matches the color of the skirt so the stones are not obvious until the light hits them and sends out showers of sparkle. Begin by placing a drop of glue about the size of the rhinestone on the garment. You want the glue to seep out slightly from the sides of the rhinestone to create a seal and prevent the rhinestone from peeling off. Allow to dry flat for 24 hours.
And just like that a pretty dress turns into a stunning dress. My daughter will attend the Christmas party knowing that this dress is sure to turn heads. |
KarenI have been adding bling for over 20 years. Through my projects, I hope you find inspiration. Categories
All
Archives
July 2024
|
Home About Policies Return Shipping
Contact Us Size Chart Privacy Products Reviews
Copyright 2024 Rhinestones Etc. All rights reserved.
Contact Us Size Chart Privacy Products Reviews
Copyright 2024 Rhinestones Etc. All rights reserved.


 RSS Feed