 Snowflakes are a miracle of nature: frozen bits of water vapor crystallized into a perfect work of art. Although not as intricate as Mother Nature, you can have you own snowflakes sparkle on a wintery day. The snowflakes on these gloves won’t melt but they will sparkle. For this project I used: 1 pair of black gloves Wax paper 58 - 12ss Crystal Rhinestones Wax tipped tool or tweezers Gem Tac 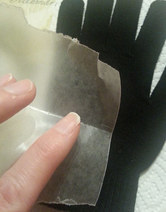 Begin by placing a piece of wax paper inside the gloves to keep the glue from seeping through and gluing both sides together. Lay the design on the top side of the glove in a snowflake pattern. Once you are satisfied with the layout, remove one of the rhinestones using the tweezers or wax tipped tool. Place a drop of glue about the same size as the rhinestone and gently press the rhinestones into the glue drop so that the glue covers the edges of the rhinestone.  Continue gluing rhinestones in this manner until both gloves are done. Allow to dry flat for 24 hours. When completely dry, remove the wax paper from inside the gloves. 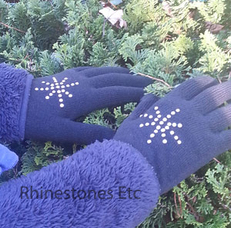 You now have a fun accessory that not only keeps your hands warm but sparkles as well.
Rhinestones are available from: www.RhinetonesEtc.com Do you want to be notified of upcoming sales, new clearance, contests and giveaways? Would you like our free guide to rhinestoning? Subscribe to our newsletter by clicking here.
0 Comments
Legend has it that Martin Luther began the tradition of decorating trees to celebrate Christmas. Walking through the woods one winter evening, he was awed by evergreens, their branches dusted with snow, shimmering in the moonlight. When he got home, he erected a tree and decorated it with candles. You can have your very own Christmas tree decorating you with this Christmas pin. For this project you need: Green Sculpey clay Gem Tac glue Tweezer or wax tipped tool Pin 17- 12ss Swarovski Elements Rhinestones Flat back in various colors Tree cookie cutter (about 2 in. x 1 in.) or template and plastic knife 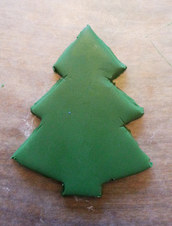 Roll out the green Sculpey clay to ¼ of an inch thickness. Cut out Christmas tree shape using the cookie cutter or a template and plastic knife. Place on a cookie sheet that has been lined with white paper. Bake in a preheated 275 degree oven for 15 minutes. Remove from the oven and allow to cool. 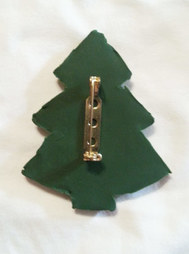 Once cool, place a drop of Gem Tac slightly larger than the rhinestone, on the front of the tree. Using the tweezer or wax tipped tool, pick up a rhinestone and place it in the drop of glue. Gently press down allowing the glue to cover the edges of the rhinestone. Continue placing glue drops and rhinestones randomly and using different colors of rhinestones. Allow to dry for 24 hours. When the glue is completely dry, turn the pin over and using Gem Tac, glue the pin in place. Again, allow to dry for 24 hours. 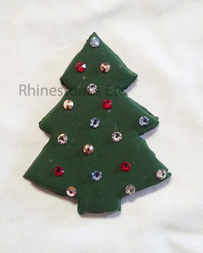 Festive and easy to make, this Christmas tree pin is sure to please even the toughest Grinch. Rhinestones are available from: www.RhinestonesEtc.com Do you want to be notified of upcoming sales, new clearance, contests and giveaways? Would you like our free guide to rhinestoning? Subscribe to our newsletter by clicking here. DIY Christmas Pin In October, I introduced the holiday collection: rhinestones pins that you can make yourself. Here is the first of my 2 Christmas pins: For this project you need: White sculpey clay Snowflake cookie cutter about 1 inch in diameter Clear glitter Pin 12 Crystal Swarovski Elements 12ss rhinestones 1 Crystal Swarovski Elements 20ss rhinestone Gem Tac glue Wax tipped tool or tweezer  Roll out white sculpey clay to ¼ of an inch thickness. Using the snowflake shaped cookie cutter, cut out a snowflake shape. If you have small round or oval shaped cookie cutters, you can use them to cut out the inside of your snowflake pin. Otherwise you can use a clay poker tool and poke holes in the middle of the snowflake. 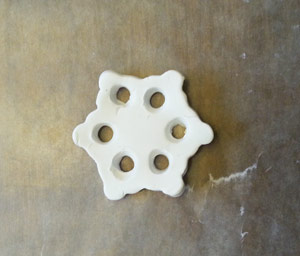 Sprinkle with the clear glitter and place on a cookie sheet that has been lined with white paper. Bake in a preheated 275 degree oven for 15 minutes. When done baking, remove from the oven and allow to cool. 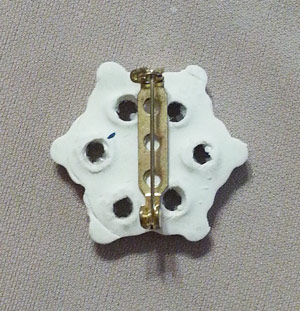 We will be using the same technique as for the snowflake ornament. Using Gem Tac glue, place a drop of glue slightly larger than your rhinestone on the clay snowflake. Using a tweezer or wax tipped tool, place a rhinestone in the glue and gently press down allowing glue to cover the edges of the rhinestone. Continue until your snowflake is adorned with rhinestones. 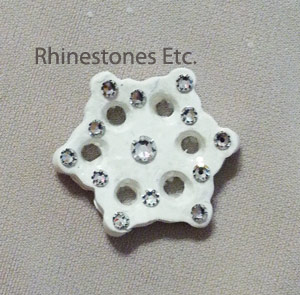 Pin it to your jacket or dress – or anywhere you want to add a bit of sparkle. Crystal Swarovski Elements Rhinestones are available from: www.RhinestonesEtc.com |
KarenI have been adding bling for over 20 years. Through my projects, I hope you find inspiration. Categories
All
Archives
July 2024
|

 RSS Feed
Home About Policies Return Shipping
Contact Us Size Chart Privacy Products Reviews
Copyright 2024 Rhinestones Etc. All rights reserved.
Contact Us Size Chart Privacy Products Reviews
Copyright 2024 Rhinestones Etc. All rights reserved.