|
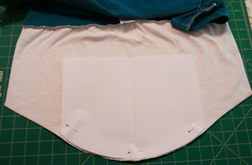
How to make a Jazzy Top My college daughter needed a quick yet sophisticated costume to wear over leggings for a duet for a Spring Dance Recital. Keep reading to see what I did with some tee shirts from the craft store with rhinestones and hot fix metal trim. For this project I used: Craft store tee shirts in contrasting colors – the top one tight fitting and the bottom one larger Scissors Sewing machine 12ss crystal rhinestones 4 mm silver hot fix metal trim Gem Tac adhesive Hot fix wand (or iron) Wax tipped tool 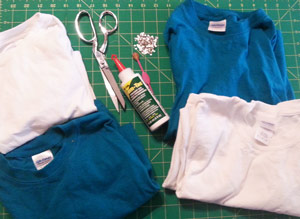 Begin by deciding how long you want the top piece, measure and cut the bottom off. My shirt measures about 16 inches from the shoulder. Decide how much you want to add to the bottom, measure the contrasting tee shirt and cut. The white piece I added to the bottom measured about 11 inches. On the tee shirt piece for the bottom (the white piece), sew gathering stitches along the top edge. Gather to fit the top, pin and then using a medium zigzag stitch or serger, sew top and bottom together.  Using an oval shaped template, mark the bottom of the top with chalk and cut. Using an oval template, cut out an oval shape at the top of the shoulders. Cut the seams around the neckline and bottom sleeve edges.
I used an ½ inch distance between the rhinestones and ½ distance between the metal trim. Place a drop of glue slightly smaller than the rhinestone on the neckline and using a wax tipped tool or tweezers, pick up a rhinestone and gently press it into the glue. Continue along the neckline and also along the oval cut out on top of the shoulders. Allow to dry flat for 24 hours. The metal trim is hot fix, so lay out your metal studs offset from the rhinestones and heat your hot fix tool. When the tool is hot, gently press down on the metal trim using the flat tip and hold for 12-15 seconds to activate the glue. You can also use an iron on the highest setting without steam. You may want to place a piece of white paper between the iron and shirt to prevent scorching. Gently press down holding for 12-15 seconds. Do not slide the iron as this may move the metal trim.  Simple, yet jazzy, my daughter was thrilled with her costume and I was happy with how easy it was to make.
Rhinestones, hot fix metal trim and wax tipped tool are available from: www.RhinestonesEtc.com
0 Comments
DIY Mother's Day Gift Mother’s Day is fast approaching and as it nears, it is time to start thinking about the perfect Mother’s Day gift. I like to give my mother personal and meaningful gifts. A slide bangle bracelet with homemade charms is both personal and stylish. In addition, adding rhinestones to the charms to accentuate it makes the gift even more special and personalized. For this project I used: 1 slide bangle bracelet Sculpey clay 8 mm jump rings E6000 Wax tipped tool Toothpick Small clay shape cookie cutters 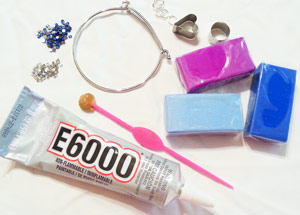 There are many great ideas for making clay charms. Whatever you decide to make, roll out the clay to ¼ inch thickness. My mother is a bird lover, so I shaped some light blue clay into a bird shape and added a darker blue for the wing. Using a small circular clay cookie cutter, I cut out a circular shape and a heart shape. The heart shape I added very small balls of clay to make a flower. Using the toothpick, poke a hole in the top of the charms for the jump ring. Place on a cookie sheet line with white paper and bake for 15 minutes at 275 degrees. Allow to cool completely. 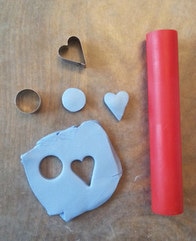 Decide how you want to accentuate your charms. I wanted my mother’s initial on the circular charm and I wanted a rhinestone for the birds eye and rhinestones on the wing. Place a drop of E6000 slightly smaller than the rhinestones and using a wax tipped tool, gently press into the glue. Allow to dry for 24 hours. 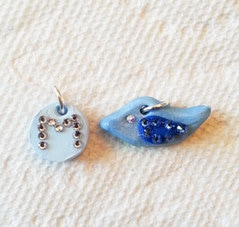 Open up a jump ring, insert it into the hole in your charm and close the jump ring. Depending in the style of your slide bangle bracelet, you may need to add another jump ring. Open your bracelet and slide on your charms. 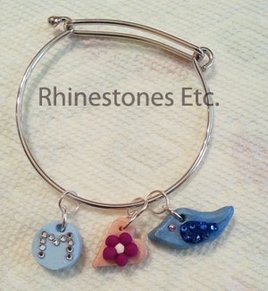 Your mother will love her new bracelet and for years to come, you can continue making her personalize unique charms to add to her bracelet.
Rhinestones and wax tipped tool are available from: www.RhinestonesEtc.com Easter Egg Craft The right centerpiece can add a touch of elegance to your table for your holiday gathering. In my last blog, I showed you how to make colorful sparkle Easter eggs. In this tutorial, I will show you how to make Easter eggs with a more Victorian look. For this project I used: Plastic eggs Gesso ( a paint primer) Paint brush Clear sparkle glitter Lace/ribbon 16ss and 10ss white half pearls E6000 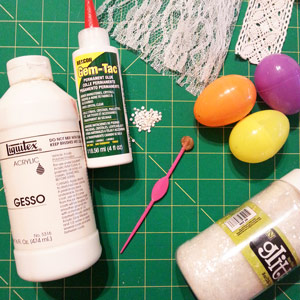 Begin by painting the plastic eggs with Gesso. Gesso is a paint primer that is available where ever art supplies are sold. You can either use white paint over the Gesso or as I did, paint several coats of Gesso on the eggs allowing each coat to dry completely. When painting the last coat, sprinkle the clear glitter on the wet paint and allow to dry.  Cut a piece of ribbon/lace to fit around the egg. Initially, I used Gem Tac but for some reason this glue which normally dries clear, dried yellow. E6000 worked better so I switched to using that. Glue the ribbon/lace along the seam of the egg. Allow to dry. When dry, glue pearls onto the ribbon/lace. Place a drop of glue slightly smaller than the pearls and using your wax tipped tool or tweezers, place the pearl in the glue and gently press down. Continue gluing pearls until your eggs are embellished. Allow to dry completely. 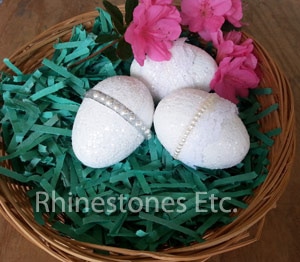 Perfect to add to your collection or start a new dazzling one. These eggs are sure to add a touch of elegance to your table.
Half pearls are available from: www.RhinestonesEtc.com |
KarenI have been adding bling for over 20 years. Through my projects, I hope you find inspiration. Categories
All
Archives
July 2024
|

 RSS Feed
Home About Policies Return Shipping
Contact Us Size Chart Privacy Products Reviews
Copyright 2024 Rhinestones Etc. All rights reserved.
Contact Us Size Chart Privacy Products Reviews
Copyright 2024 Rhinestones Etc. All rights reserved.