|
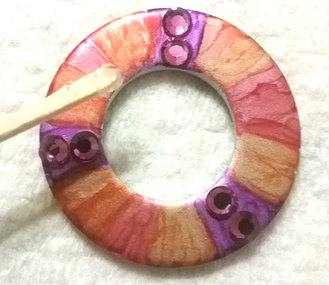
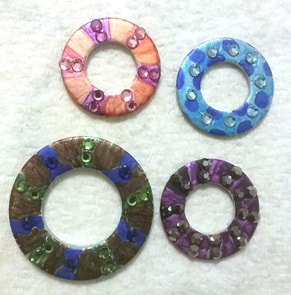
Alcohol ink washer necklaces are the latest fashion and I love the look of them. You take a simple item, a washer from the hardware store, color it with alcohol ink and you have a work of art. Simply attach a cord and you have a stunning necklace. Add rhinestones to make your necklace stand out even more. For this project I used: ½ and ¾ inch washers Alcohol ink markers Various rhinestone colors in size 12ss E6000 Wax tipped tool or tweezers Embroidery thread Cord end caps 4 mm jump rings Lobster clasp Krylon clear matte acrylic coating Jewelry pliers How to Make Washer Necklaces One of my daughters is a very good abstract artist. Some of her artwork is on Facebook as ArtisticallySweet and Instagram as @megcatdragon. She colored the washers with alcohol ink markers. 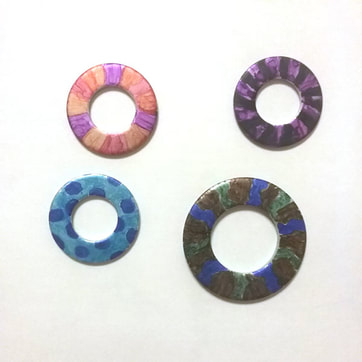 Once the ink dries, you will want to put a clear protective coating on it. Krylon brand which is easy to apply and dries in 10-15 minutes. Follow the manufacturer’s instructions when applying. I picked some coordinating rhinestones colors in size 12ss to enhance the washers with. When gluing rhinestones to metal, I like to use E6000 because of the strong bond. Use in a well-ventilated area and always follow the manufacturer’s instructions. E6000 can be a bit gloppy, so I squeeze E6000 over a paper plate and use a toothpick to apply to glue. Then using tweezers or wax tipped tool, pick up a rhinestone and gently press it into the glue. Continue gluing rhinestones and then allow to dry for 24 hours.
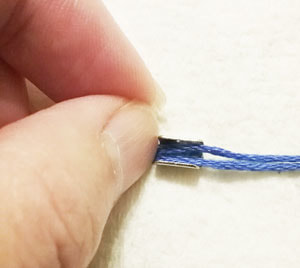
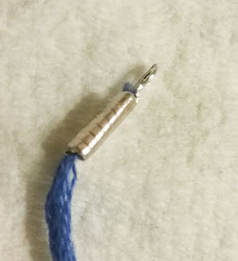
For the cord, I used embroidery floss. It comes in many colors, so you are sure to find one that will coordinate with your necklace. Measure your neck to see where you want the necklace to lay. You can use one long piece of floss, or as I did, two shorter pieces. I cut mine 27 inches long. Fold the floss in half to form a loop at the one end. Pull this loop from underneath the washer up through the hole. Take the two loose ends, put them through the loop and pull to tighten. Do the same for the other piece of floss.  Trim the ends of the floss so they are even. Then taking a cord end clasp, lay the ends of the embroidery floss in the clasp and using jewelry pliers, bend the first side over then the other to secure the ends.
On one end add a jump ring and lobster clasp and on the other just a jump ring.  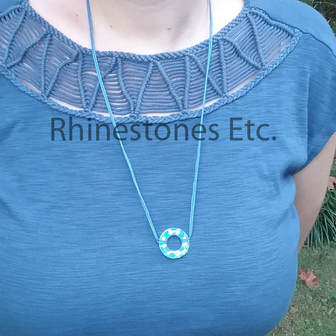 Stunning, aren’t they? And so simple to make. Unleash your creative side and make some washer necklaces for every outfit! Are you ready to make your own washer necklaces and need some rhinestones? Rhinestones and wax tipped tools are available from: www.RhinestonesEtc.com
0 Comments
Rhinestones make an ordinary item into something spectacular. Dresses, shoes, handbags, or sunglasses are just a few examples. Yet, when you’re looking to buy rhinestones, you’ll find different brands, colors, and sizes at different costs. It can be very confusing when comparing rhinestone prices. Some manufacturers produce quality rhinestones at a lower price than name brands. Knowing a bit about rhinestones can help you find a good rhinestone at a competitive price. Generally, retailers base pricing on the following factors:
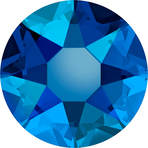
Let’s Look At Rhinestone Types Rhinestones are available in crystal, glass, and acrylic. Crystal rhinestones are the most expensive, followed by glass, and then acrylic. Generally, this is due to the cost of the manufacturing process. The name-brand rhinestones, Swarovski and Preciosa, are crystal rhinestones. Years ago, these crystal components contained lead. However, both companies have developed a lead-free rhinestone without losing any of the beauty of leaded crystal. Moreover, for bedazzling higher-end clothing, nothing beats a crystal rhinestone. Crystal has the characteristic or the ability to break up light much like a prism. As light enters the crystal, it can create a rainbow of hues as it refracts and disperses. Glass rhinestones can bend and reflect light, but it lacks the prismatic quality of crystal. In addition, not all manufacturers machine-cut glass rhinestones. Some companies use molds. Acrylic rhinestones are plastic molded embellishments. In a one-step process, manufacturers insert the material into the mold. Once the acrylic hardens, the manufacturer removes the rhinestone from the mold.
Hot Fix, Flatback, Sew-on, or Pointed Back? When you’re looking to buy rhinestones, you’ll see them grouped by hot fix, flatback, sew-on, or pointed back. What can be confusing is that flatbacks, hot fix, and sew-on, all have a flat side. Only pointed backs have depth on both sides. Hot fix rhinestones have an adhesive attached to the flat side of the embellishment. To attach the rhinestone, you need a hot fix wand. This tool will heat the rhinestones to activate the glue to a temperature range of 250° F - 340° F. Typically, hot fix rhinestones are slightly more expensive than flatbacks. Sew-on rhinestones are exactly as their name implies. Some rhinestones have holes drilled into the sides of the embellishment while others have a hole in the middle. Another type of sew-on rhinestone is the montee. These are rhinestones in settings with channels on the back for sewing. Generally, sew-on rhinestones cost more than flatbacks too. Normally, you use pointed back rhinestones in jewelry making. Sometimes, manicurists will use smaller pointed back rhinestones in nail design. Although comparable in price to flatbacks, you’ll have less selection with colors. The most popular type of rhinestone is the flatback. Suitable for many projects, this type of rhinestone requires glue to attach it. Your choice of glue depends upon the object to which you’re attaching the rhinestone.
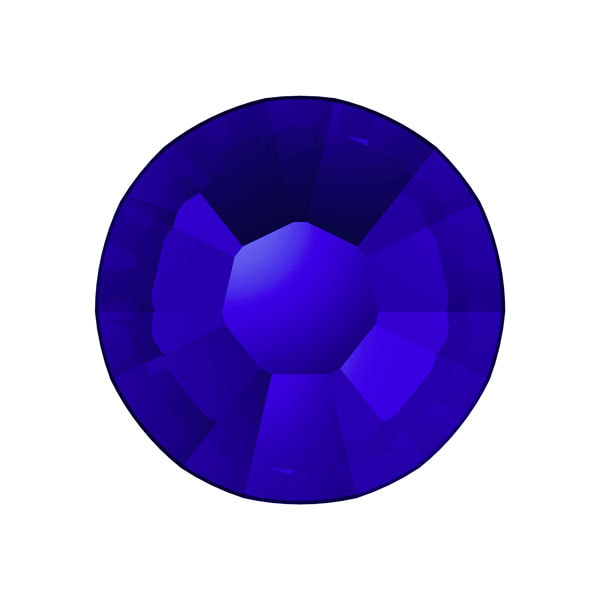
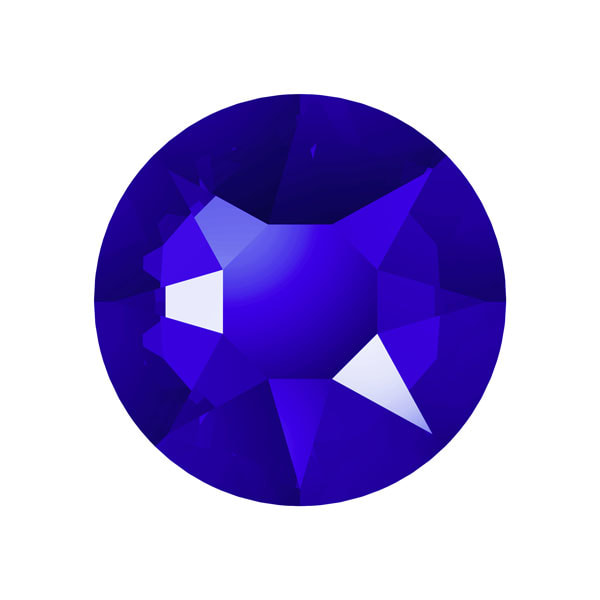
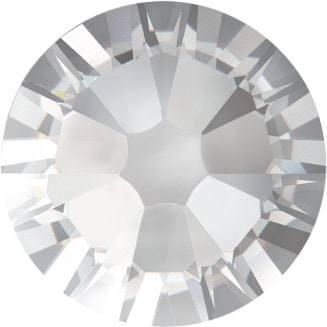
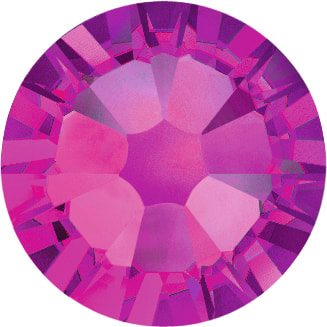
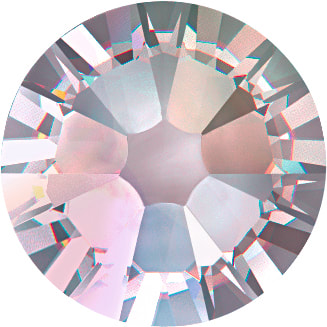
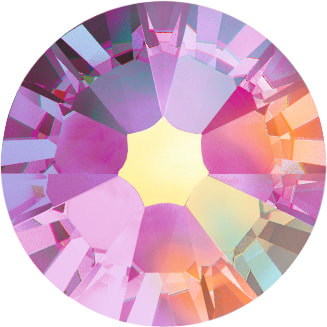
Crystal Standard Color Crystal AB AB Color Fascinating Facts About Facets Facets are plane surfaces on the rhinestone that reflect light. A rhinestone with more facets will reflect more light. Swarovski is the most expensive rhinestone with the most facets, 16. However, at the beginning of 2021, Swarovski announced a restructuring plan that eliminated rhinestones from the retail market. Preciosa, the oldest manufacturer of rhinestones is next with 15 facets. Other less expensive rhinestones have 12, 10, or fewer facets. Another important component in producing sparkle is the arrangement of facets. Facets should be symmetrical and properly spaced. Advanced manufacturing processes can design rhinestone facets for the maximum dispersion of light. Finally, flatback rhinestones have a foil backing to reflect light out. The quality of this foil backing is also important when gluing rhinestones. Some cheaper stones will peel off after gluing due to their poor-quality backing. Rhinestone Colors Will Brighten Your Project Manufacturers produce rhinestones in a rainbow of colors. The variety of colors depends, of course, on the manufacturer. Crystal, or clear, is the least expensive. Standard colors are a bit more expensive followed by Aurore Boreale (AB) colors. AB colors are standard colors covered in a rainbow color giving the crystal an iridescent look. Finally, Aurum is the most expensive color available. Manufacturers apply a thin layer of 24 karat gold on the surface. An important characteristic is the consistency of color. Higher-end manufacturers produce rhinestones with a hue that is consistent throughout the rhinestone. Furthermore, good quality rhinestones have color that is true between different batches.
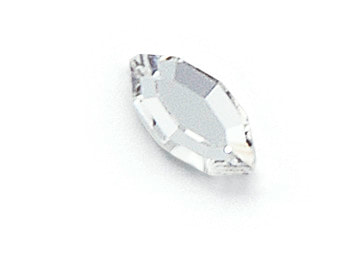
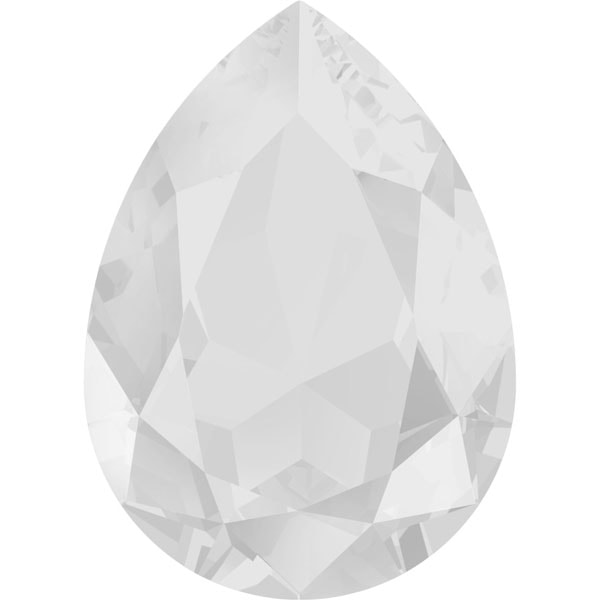
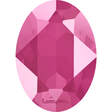
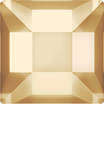
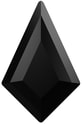
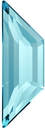
Rhinestone Sizes and Shapes The round rhinestone shape is the most common and least expensive. However, even round rhinestones have some variations. There are Rivoli and chessboard cuts with facets arranges differently than the standard round rhinestone. Other shapes include:
Of course, pricing depends on the shape of the rhinestone along with the color and sizing. Typically, the smaller the rhinestone the lower the price. Likewise, the larger the rhinestone, the higher the cost. Determining which rhinestone is bigger can be confusing as rhinestones manufacturers use a unique way of measuring them. Rhinestone manufacturers use the term stone size or “ss” to determine rhinestones sizing. This method of sizing continues from the days when there were naturally occurring rhinestones. Prospectors would gather this natural resource, dropping them through preset holes to determine the stone size. Often, retailers will give the millimeter size alongside the ss size for clarification. Generally, the smaller the number next to the ss, the smaller the rhinestone. We Offer Competitive Rhinestone Prices
When you’re looking to buy embellishments, you want competitive rhinestone prices, quality products, and great customer service. Selling embellishments since 2011, Rhinestones Etc. wants to be your source for embellishments. We will continue to sell Swarovski products for as long as the supply lasts. In the meantime, we’re transitioning over to Preciosa Maxima. In addition, we proudly offer a less expensive genuine crystal rhinestone, PriceLess. Rhinestones add sparkling brilliance to many elements. Jewelry, clothing, handbags, and shoes become elegant and brilliant with crystal components. Certainly, the rhinestone size can dramatically affect the finished look. If you’re the rhinestone designer and are unfamiliar with sizing, you could be facing a dilemma. Manufacturers produce rhinestones in a variety of sizes. Moreover, manufacturers use a unique way to measure the size of the rhinestone. What Does “ss” Mean Anyway? Many years ago, local gem hunters found sparkling quartz along the banks of the Rhine River. Finders of this natural resource would sort each specimen according to its stone size or “ss”. Later when manufacturers devised a way to produce sparkling crystal, they kept this way of measurement. Today, manufacturers and retailers of rhinestones will supply an equivalent millimeter size next to the “ss” size for clarity: ss mm ss mm ss mm 3 1.4 8 2.35 20 4.7 4 1.6 9 2.65 30 6.41 5 1.8 10 2.85 34 7.17 6 2.0 12 3.1 40 8.54 7 2.15 16 3.9 48 11.11  Choosing the Perfect Rhinestone Size When deciding on the rhinestone size, consider the size of your project and the area you want to cover. Generally, if you’re bedazzling a smaller object, you want to use a smaller rhinestone. However, larger rhinestones cover a bigger area requiring less. For example, if you’re bedazzling a small child’s shoe, you’ll probably want to use a smaller size. Smaller size rhinestones are also perfect for lettering on t-shirts. Moreover, nail technicians will often use smaller sizes for a sparkling manicure. Whereas other projects may require a larger size rhinestone. Larger stones have a greater surface area to reflect light making a bigger impact. Typically, you’ll find bigger rhinestones on competitive sports costumes like gymnastics and skating. Often, designers of dance outfits and bridal wear will use larger sizes as well. In addition, you can also mix sizes. Scatter patterns tend to use a combination of proportions to produce a glittering show of sparkle. You may also want to use a combination of sizes when covering an emblem or logo. Larger sizes will cover more area while the smaller sizes give the appearance of depth.  FAQs about Rhinestones If you’re new to purchasing and applying rhinestones, you probably have many questions. We’ve answered some of your most commonly asked ones below. Does the Quality of the Rhinestone Matter? Generally, you determine the quality of a rhinestone by the material, the number of facets, and consistency in manufacturing. Determining the amount of sparkle, scintillation, and impact will help you choose from the many types available. Typically, the pricing of the rhinestone will give some indication of the characteristics of the product. For example, manufacturers produced acrylic, glass, and crystal rhinestones. Usually, acrylic is the least expensive to make while crystal is more costly. However, even among these materials, you’ll find different levels of quality. Your budget and type of project will guide your decisions for the best rhinestone to choose. What Type of Glue Works Best? Basically, you can attach rhinestones to virtually anything. Clothing, shoes, handbags, eyewear, keychains, and cell phones are just some of the many objects people bedazzle. Your choice of glue often depends upon the surface structure of the object. Although many different adhesives will work on fabrics, some are easier to apply than others. For example, you can use E6000 on clothing but it can be difficult to use. This glue tends to be gloppy and dries quickly. Alternatively, Gem-Tac is easy to apply and works well with fabrics. However, for a stronger bond to glue to glass or metal, E6000 is the preferred choice. Check the manufacturer's instructions for recommended surfaces before your start. Where Can I Buy Quality Rhinestones?
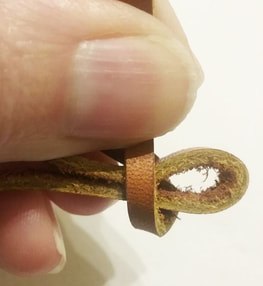
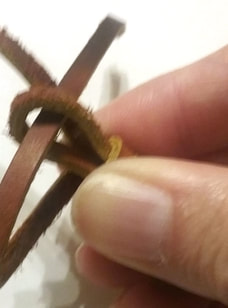
Since 2011, Rhinestones Etc. has been offering competitive pricing, fast shipping, and great customer service. Currently, we carry the brand name Preciosa Maxima Rhinestone and the cost-effective PriceLess brand. You’ve just purchased your first blinged-out tee shirt. Or maybe, you’ve taken the time to bedazzle clothing yourself. Whichever the scenario, you’ve worn the article of clothing and now it needs washing. Do you know how to clean rhinestones affixed to your clothes? 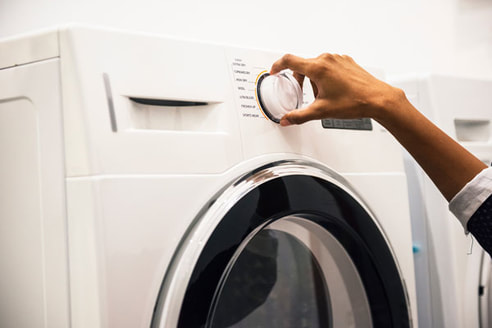 How to Clean Rhinestones on Your Blinged-Out Clothing Certainly, there are several ways to attach rhinestones to your clothing. While the most popular is to use glue, you can also use settings or sew-on rhinestones. Generally, all method types are safe to wash in the washing machine according to leading manufacturers Swarovski and Preciosa. However, you need to take a few precautions to protect your bedazzled clothes. First, turn the garment inside out. Then, place the garment in a soft garment bag to protect the crystals as much as possible. Be sure to use a mild detergent and set your washing machine to the gentle cycle. Neither manufacturer recommends using chlorine bleach as this can damage the crystal. Alternatively, you can also hand wash the garment with a mild detergent. However, avoid wringing the article of clothing to protect the embellishments. Also, depending on the rhinestone type, you may be able to dry clean the garment. Crystal rhinestone manufacturers suggest only using a hydrocarbon dry cleaning solvent. While any type of dry-cleaning solution may crack acrylic rhinestones. Drying Your Bedazzled Clothes Ideally, clothes bedazzled with crystal rhinestones should be line dried out of direct sunlight. Some adhesives can loosen from the heat of a dryer causing rhinestones to fall off. Often, manufacturers of less expensive rhinestones allow you to tumble dry bedazzled clothing. However, these manufacturers recommend turning the garment inside out. Additionally, these manufacturers also suggest placing the garment in a soft wash bag to protect the rhinestones. Furthermore, the dryer should be set to a low temperature. 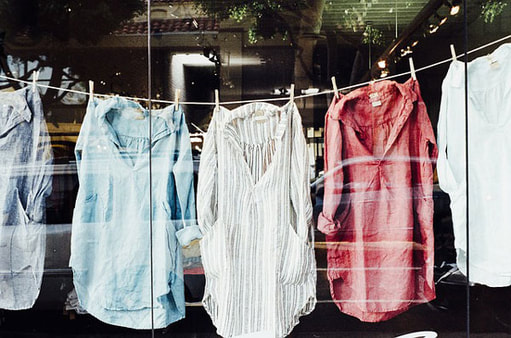 FAQs About Rhinestones In addition to asking the question how to clean rhinestones, you may have other questions. We’ve compiled a list of commonly asked questions. Does The Glue I Use Matter? Generally, certain glues are better for attaching rhinestones to particular surfaces. For example, Beacon’s Gem-Tac is an excellent adhesive for attaching rhinestones to fabric, wood, suede, glass, vinyl, and metal. While you can use E6000’s on all these materials plus leather, cement, plastic, tile, ceramic, rubber, or Styrofoam. The manufactures do not recommend gluing acrylic rhinestones with E6000. When choosing your glue, make sure the manufacture recommends the glue for your particular surface. Additionally, check to make sure the glue dries clear and is washable. Can I Wash a Garment with Hot Fix Rhinestones? Often, commercial blinged-out clothing manufacturers use hotfix rhinestones applied with a heat press. Hotfix rhinestones have a layer of glue on the flat side. When heated, the glue liquefies. The glue solidifies when it cools. This forms a permanent bond between the rhinestone and the material. Generally, you may wash garments with hotfix rhinestones according to the directions given above. However, many manufacturers recommend line drying clothing with hotfix rhinestones. Sometimes, the heat from the dryer can reactive the glue, loosening the bond. What Other Items Can I Bedazzle with Rhinestones? Although clothing is a popular item to bedazzle, you can attach rhinestones to many other items. Shoes, pocketbooks, coffee mugs, key fobs, and sunglasses are just some examples of the many articles you can bling. Always check the glue manufactures suggested list of surfaces to ensure a good bond. If you need to clean any of these items, be sure to use a mild detergent and gentle cleaning. For example, if you have a rhinestone mug, hand wash the item rather than place it in the dishwasher. Where Can I Buy Quality Rhinestones? Rhinestones Etc. has been selling quality embellishments since 2011. We offer fast shipping and great customer service. DIY: Leather Wrap Necklace Have you seen leather wrap necklaces, the newest jewelry trend? I set out to make one and worked on several different designs. Some ideas didn’t work and some ideas I didn’t like. The kind that wrapped around your neck several times, was too constricting for me. I tried making one with a washer, but the washer was too heavy, and the necklace kept slipping. I finally found a design with a noose knot that I loved. For this project I used: Leather strip 1/8 inch wide and about 30 inches long E6000 64 Crystal AB 10ss rhinestones Wax tipped tool or tweezers How to Make a Leather Wrap Necklace Cut the strip of leather to about 30 inches in length. To make a noose knot, leave about 6 inches on one end and shape the leather into an “S” shape.  Try to make the shape small, only about 1 inch in length. Take the right end and go underneath the shape.
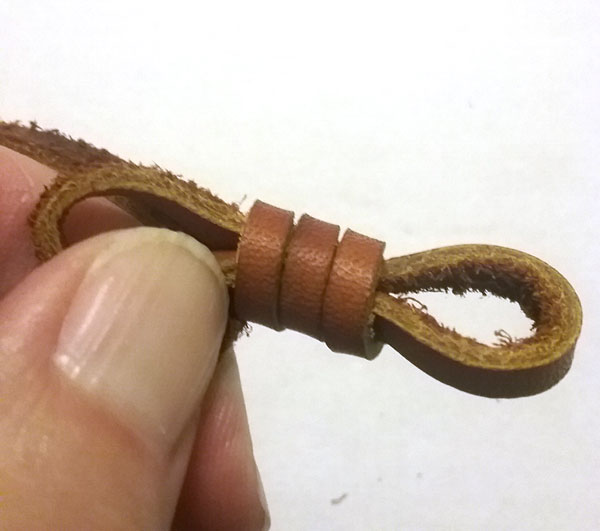
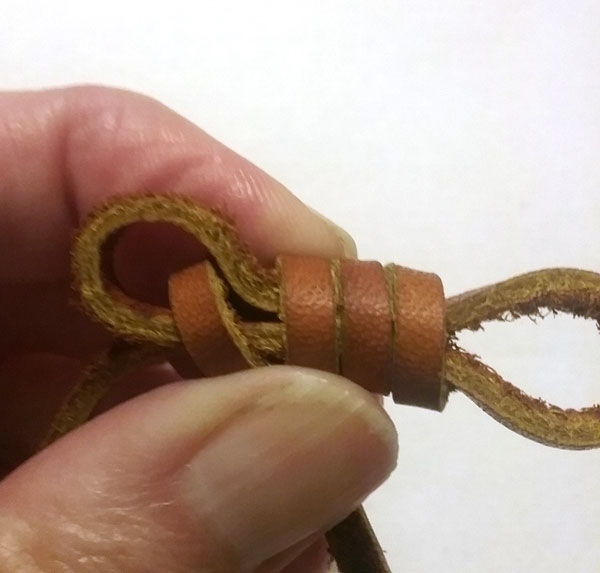
Continue wrapping around the “S” shape 3 times, tightening the wrap as you go. Slip the end (the end you’ve been wrapping around with) into the left loop, pulling tight.
Now take the right loop and pull tight so that the left loop will disappear. And there is your noose knot. You can put a drop of glue on it to secure it if you wish. Cut the short end off close to the knot. In gluing the rhinestones into place, I use E6000 on leather. It makes a super strong bond, and I don’t have to worry about the rhinestones falling off. Make sure to use it in a well-ventilated area and follow the manufacturer’s instructions. Because E6000 is a bit gloppy, I use a toothpick to apply it. 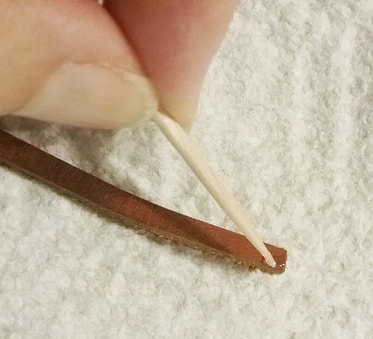 After applying the glue, pick up a rhinestone and gently press in into place. I glued 8 rhinestones per side on the very end of the leather. Also, I measured where the knot would sit around my neck and glued 8 rhinestones per side there to keep the knot from slipping. 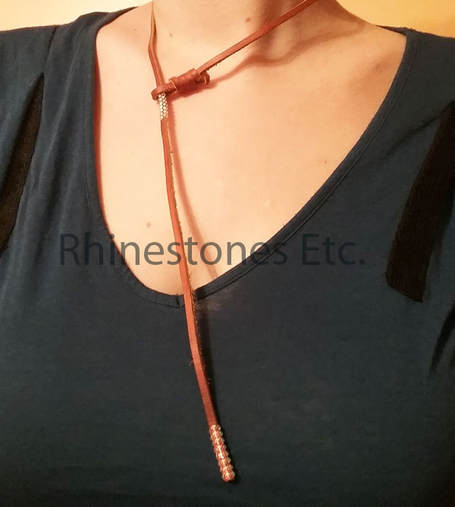 This leather wrap necklace is super easy to make, and the rhinestones give it that extra eye-catching sparkle. Wear it with your favorite outfit to give it some extra jazz! Need some rhinestones to make your leather wrap necklace? Rhinestones and wax tipped tools are available from: www.RhinestonesEtc.com 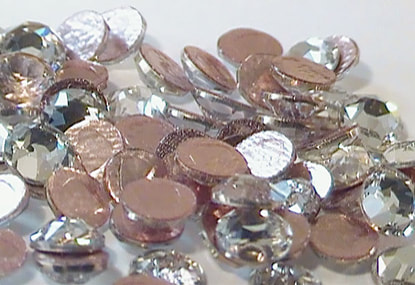
Generally, you can choose several different methods when attaching rhinestones to fabric. Usually, the most popular way is using glue. You can also use metal settings or sew the crystals into place. Another method is using hot fix rhinestones. Heat Activated Rhinestones Like sew-on and glue on rhinestones, hotfix crystals have a flat back rather than a pointed back. On the backside, manufacturers coat the rhinestone with a heat-activated adhesive. Once you heat the glue and apply the crystal, you have a strong and durable bond. Using heat activated crystals offers several great advantages:
Application Methods
Hotfix rhinestones require a specific temperature, pressure, and time for a successful application. To activate the glue, most manufacturers recommend a temperature range of 250 degrees F - 340 degrees F. For those of you who use Celsius, that’s 120 degrees C – 170 degrees C. For proper adhesion, the glue needs to be liquid enough to soak into the base material. Typically, the temperature, pressure, and time depend on the equipment you’re using to adhere the crystals. Generally, you can use one of three tools to activate the glue:
Unfortunately, irons with vents don’t provide a flat surface and consequently prevent adequate pressure for proper adhesion. Also, water and steam can negatively affect the hotfix application. Thus, for proper application, you’ll need to use a non-steam iron. Comparatively, a hotfix wand is ideal for home use. You can find a variety of manufacturers including the name brands BeJeweler and Kandi. Wands come with different screw-on tips to accommodate different size rhinestones. The wand can pick up a rhinestone and heat the glue. Once you see the glue begin to bubble, you simply tap the rhinestone onto the fabric. Another tool for applying heat activated rhinestones is a heat press. Although on the pricier side, you may want to consider buying one if you’re blinging many garments. A heat press delivers pressure and high heat for a preset time. Thus, you’ll get professional results for your rhinestone application. One other tool you may want to consider using with an iron or heat press is transfer paper. Transfer paper allows heat to pass through without melting. With a tacky side to hold your embellishments in place, you can create intricate and detailed designs. It’s also transparent making it easy to view your design before applying. 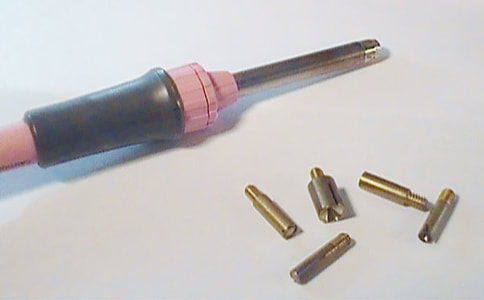
A Few Considerations When Using Hot Fix Rhinestones First, always pre-wash your fabric before you start. This will remove any chemical finishes that may interfere with the absorbency of the glue. Moreover, the quality of the base material and the size of the rhinestone will affect the bond. Keep in mind also, that some fabrics are just not suitable for hotfix applications. These include very tightly woven textiles, smooth leather or smooth imitation leather, and thin fabrics like organza. In addition, those fabrics with water-repellent treatments, easy-to-care treatments, or softening agents may not be suitable. To check the fabric for hotfix application, you can do the water droplet test. Apply several drops of water to the fabric. If the fabric absorbs the water droplet quickly, you can use hot fix rhinestones. However, if the water pearls or if the material absorbs the water slowly, you can’t use them. Ready to start your bling project? Rhinestones Etc. has a huge inventory of high-quality rhinestones at competitive prices. We offer fast processing times so you get your stones quickly. Plus. We have excellent customer service. Browse our online store to find your perfect rhinestone color. When my son was little, he loved the television show Bob the Builder, a show about a construction worker and his tool friends. He had a CD with Bob the Builder songs which he played constantly. One song had these lyrics: “Don’t go blaming the tool box, you need the right tools for the job.” Sometimes you can get the job done with what you have on hand. But, specialized tools can make the job so much easier.  The same holds true for gluing rhinestones. Basically, you just need rhinestones and glue and something to pick the rhinestones up with. Tweezers are one option. Just make sure you don’t squeeze the tweezers too tightly or your rhinestone will slip out and go flying. Also, whenever you press the rhinestone into the glue drop you may get glue on the tweezers' ends. Make sure you wipe the glue off, so that the rhinestone doesn’t stick to the tweezers. Wax Tipped Rhinestone Tool Overall, one of the handiest tools to have is a wax tipped tool. This tool allows you to simply tap the rhinestone and it will stick to the tip. It will stay there until you press it into your glue drop. And the wax tipped tool fits comfortably in your hand, much like a pencil. Gluing rhinestones is quick and easy with a wax tipped tool. 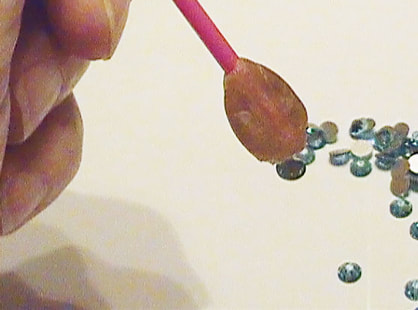 There are varying types of wax tipped tools on the market, ranging in price. You can spend out $2.00 for a simple wax tipped tool. Or you can invest in a higher end Crystal Katana for about $25. If you are just starting out, the cheaper wax tipped tools are great. In fact, that’s what I use most of the time. 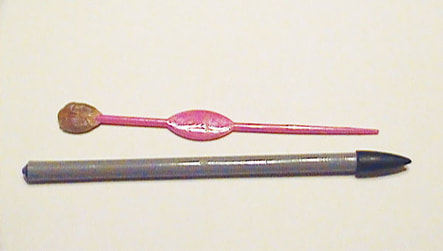 Once you try a wax tipped tool, you will never go back to tweezers again. Ultimately, you’ll find it much easier and quicker to glue rhinestones when you use a wax tipped tool.
Wax tipped tools are available from: www.RhinestonesEtc.com Diamonds are a girl’s best friend, or so the song goes. And what’s not to love about diamonds? Sparkly and prismatic, it’s hard to miss someone wearing diamonds. But diamonds are very expensive and sometimes we want some sparkle without the extravagant price tag. 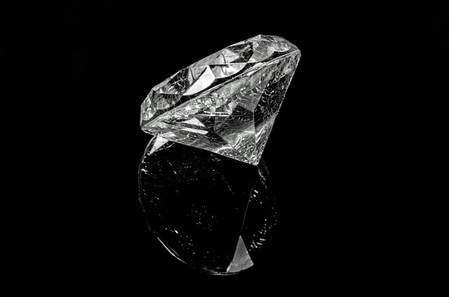 When you buy a quality diamond, you do your research to make sure your money is well spent. You consider the 4 Cs of diamond buying - cut, color, clarity, and carat weight. These standards are the most important characteristics to understand when making a diamond purchase and help determine the value of the diamond. Rhinestones are diamonds cousins, sparkly and prismatic at a much lower cost. Comparatively, there are characteristics to consider to finding quality rhinestones. The 4 C’s in considering the quality of rhinestones are similar to diamonds. They are: cut, clarity, color and contour. Characteristics of Quality Rhinestones Let’s examine in depth these 4 C’s of rhinestones: Cut: In a rhinestone this refers to the faceting, specifically the number of facets. Because the more facets a rhinestone has, the more light it reflects. Consequently, the more light the rhinestone reflects, the more sparkle it has. Swarovski Xirius rhinestones has 16 facets and Preciosa has 12. Other manufacturers may have only 10 or less facets. Color: This refers to the fidelity and intensity of the color. Among the same color, are all the rhinestone the same hue? Any variations in color? Even in different lots, the color should be the same. A variation in color can ruin the effect you are trying to achieve with rhinestones.
Clarity: Quality rhinestones should be free from cloudy spots, streaks or bubbles. Or in other words, the rhinestone should be clear and free from any defects. Contour: Are all the rhinestones perfectly shaped? If you are buying round rhinestones, you certainly don’t want some with flattened sides. Every rhinestone should be consistently the same shape.
Never forget to consider these 4 C’s of rhinestones when buying. Name brand rhinestones have built up their reputation over the years, so you can be assured of quality rhinestones when making a purchase. Rhinestones Etc. provides great prices on rhinestones without sacrificing excellent customer service. Visit our store at www.RhinestonesEtc.com Accessorizing an outfit can really add that extra something and make it stand out. Adding just the right jewelry can really impact how you feel about yourself. You can go from pretty to beautiful just by adding the right touch. But it isn’t always easy to find the right jewelry to match an outfit. Once you see how simple it is to create your own rhinestone stud earrings, you’ll be making a pair to match every outfit. For this project I used: E6000 Flat post earrings and backings 30ss rhinestones Tweezers or wax tipped tool 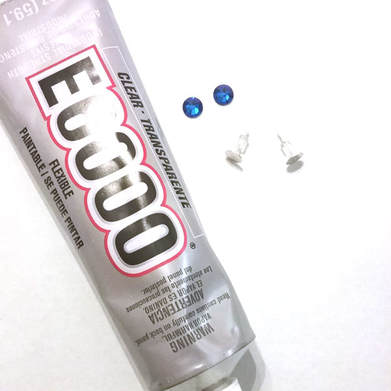 How to Make a Pair of Rhinestones Stud Earrings Most craft stores have a large jewelry supply section. So, you should have no trouble finding some flat post earrings and backings. I have a nickel allergy and was happy the ones I found were nickel free. When I glue rhinestones to metal, I like to use E6000. It provides a good adhesion to metal. Always make sure you use it in a well-ventilated area and follow the manufacturers instructions. Also, I found that you can use slightly less glue when using E6000 than other adhesives because it provides such a strong bond. 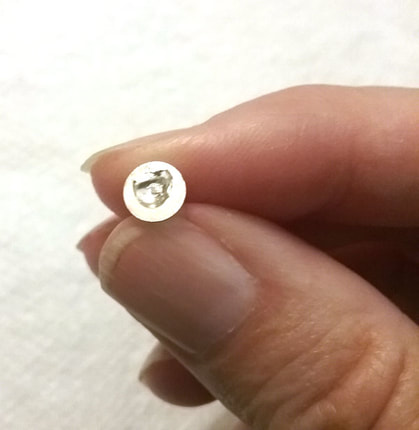 Start by applying E6000 to the flat part of the earring stud. Using a toothpick when applying E6000 helps to make sure you have the right amount as E6000 tends to be gloppy. Then, pick up a rhinestone using tweezers, or a wax tipped tool. Gently press the rhinestone into the glue. Do the same for the other earring stud. Allow to dry for 24 hours.  Super easy to make and as nice looking as those expensive department store earrings. Plus, you can make a different colored pair for every outfit you own without blowing your budget. Happy crafting!
Rhinestones are available from: www.RhinestonesEtc.com. |
KarenI have been adding bling for over 20 years. Through my projects, I hope you find inspiration. Categories
All
Archives
July 2024
|

 RSS Feed
Home About Policies Return Shipping
Contact Us Size Chart Privacy Products Reviews
Copyright 2024 Rhinestones Etc. All rights reserved.
Contact Us Size Chart Privacy Products Reviews
Copyright 2024 Rhinestones Etc. All rights reserved.