|
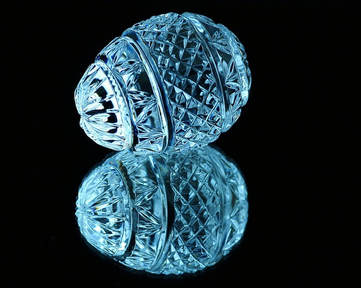
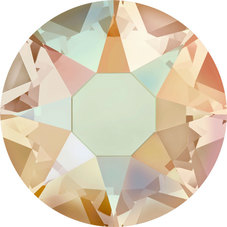
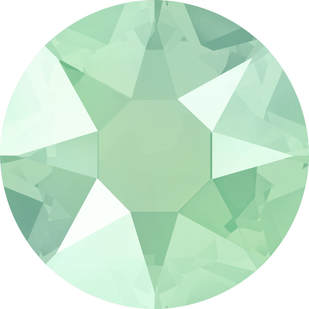
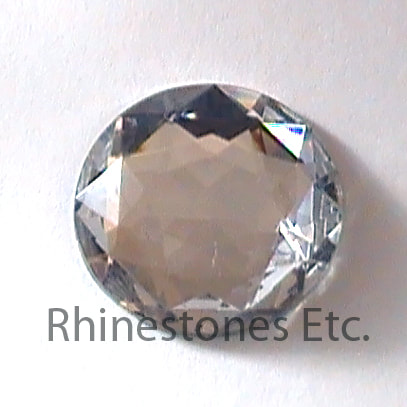
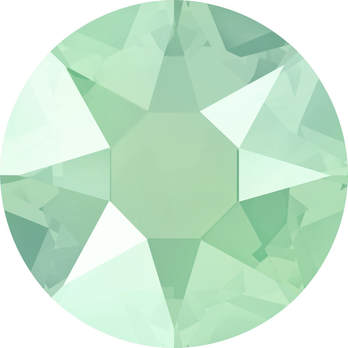
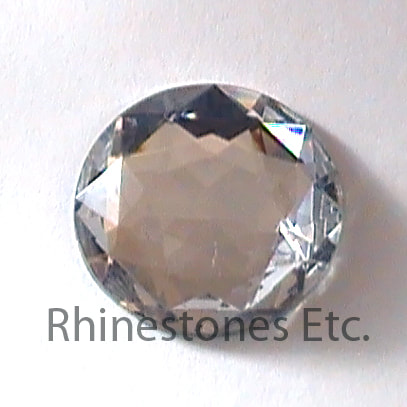
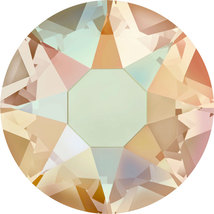
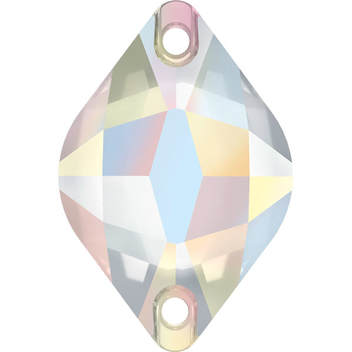
Drinking from a Waterford Crystal goblet is an opulent experience. The crystal-clear clarity of the goblet and the play of light along its surfaces are visually stimulating. It’s an entirely different experience sipping from a Waterford Crystal glass than from an ordinary piece of glass stemware. For elegance and luxury, the choice is crystal clear. The difference between glass and crystal rhinestones is similar to wine glasses. With flat faceted surfaces to reflect light, both produce sparkle. However, crystal rhinestones have a higher refraction index resulting in a greater reflection of light. Additionally, crystal has a higher dispersion index than glass giving it a prismatic effect. Isn't Crystal Rhinestone a Color? Indeed, it is and that’s where some confusion can arise. When you’re referring to crystal as a rhinestone color, you’re talking about the clear rhinestone. There’s also a clear rhinestone with the rainbow coating called Crystal AB as well as many other rhinestone colors. The color name has nothing to do with the material the manufacturer makes the rhinestone from. If you’re shopping for rhinestones, it’s important to determine the material the manufacturer uses to produce its rhinestones. Actually, crystal is a form of glass. Manufacturers make crystal by mixing glass components with lead. In doing so, the glass becomes clearer and inherits a higher level of refraction as well as a prismatic effect. Due to safety concerns with lead, today some crystal manufacturers substitute other minerals in place of lead. Many of these lead-free crystals still have similar refraction and prismatic effects of leaded crystal. Have you ever played with a prism as a child? Light enters the prism, bends, and exits the prism as a rainbow. Crystal has the same effect on light as a prism. This is why crystal chandeliers produce rainbows on nearby walls. How Does the Rhinestone Quality Compare? Generally, crystal is harder and denser than glass. This allows manufacturers to precision cut facets into the surface of the rhinestone. Glass becomes brittle as it hardens making it harder to cut. Typically, this is why you’ll find crystal rhinestones have more facets than glass rhinestones. In particular, the top name brands, Swarovski and Preciosa, manufacture lead-free crystal with the highest number of facets. These lead-free rhinestones have all the sparkle and brilliance of their previous crystal. Swarovski’s Xirius has 16 facets, while Preciosa’s Maxima has 15. The number of facets in glass rhinestones varies by manufacturer, but generally are between 8-11 facets. The Importance of the Number of Rhinestone Facets and the Arrangement Light reflects off of flat surfaces. Thus, the great the number of flat surfaces or facets a rhinestone has, the greater amount of light it reflects. Moreover, the arrangement of the facets along the surface affects the dispersion and reflection of light. As light hits the surface of a rhinestone, the facets reflect some of the light back to the viewer. Some of the light enters the rhinestone, bounces inside, bends, and exits out the top. This bending of the light results in the prismatic effect as the crystal spits white light into colors. The number of facets and the angles determines light’s performance and visibility. Should I Use Glass or Crystal Rhinestones for My Project?
Glass is cheaper to produce than crystal. Therefore, crystal rhinestones are more expensive than glass rhinestones. In some instances, you may want the highest quality rhinestone product. Jewelry projects or formal wear like a wedding gown may require brand-name crystal rhinestones. Other times, you may want less expensive glass rhinestones. If you need help in deciding, contact us. We’ll be happy to help. At Rhinestones Etc., customer service is our top priority. With fast processing and competitive pricing, we want to be your source for bling.
0 Comments
If you are new to rhinestones, you may be confused by the choices of sizes, colors and manufacturers. There are acrylic or crystal rhinestones, hot fix or non-hot fix, round, square or practically any shape imaginable. Not to mention all the many colors available. So many choices and where to begin? While there are many rhinestone options today, this was not always the case. Once upon a time, rhinestones were a naturally occurring resource. Quartz mixed with lead pebbles were found along the banks of the Rhine River, one of Europe’s greatest rivers. Eventually, this natural resource became depleted, and in 1715 the Czech company, Preciosa, developed a way to manufacture rhinestones. Daniel Swarovski originally worked for Preciosa and left to open his own company in 1895. Today, there are many manufacturers of crystal rhinestones as well as acrylic rhinestones. Types of Rhinestones Crystal rhinestones, those made by Swarovski, Preciosa and other manufacturers are laser cut. Different manufacturers have different number of facets. Keep in mind, that the more facets a rhinestone has, the more light it reflects. The Xiruis Rhinestone manufactured by Swarovski, has a whopping 16 facets. Preciosa Rhinestones have 12 facets. Should you decide to buy a non-brand name rhinestone, be sure to check on the number of facets as it will affect its sparkle. Additionally, crystal rhinestones break up the light like a prism. Rhinestones sparkle so beautifully because of this prismatic effect combined with the number of facets. In 2012, Swarovski patented a new lead-free crystal formula making their stones CPSIA compliant. CPSIA laws govern lead content in items for children. For this reason, Swarovski is a good choice for parents who have children ice skating, dancing, or in participating other activities. Acrylic rhinestones are molded rhinestones and while the facets do reflect the light, they do no have the prismatic effect of crystal. Inexpensive and lead free make acrylic rhinestones a good choice for children’s crafts. The 4 C’s Key points to keep in mind If you are planning on using a non-name brand rhinestone: the four C’s: color, cut, contour and clarity.
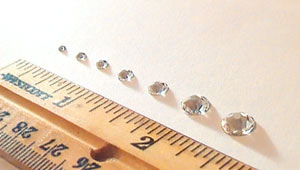
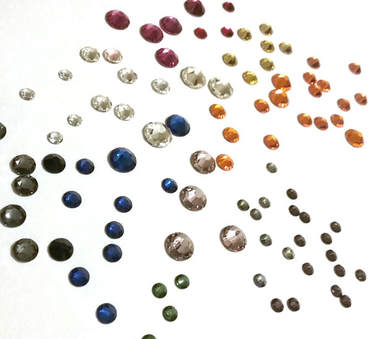
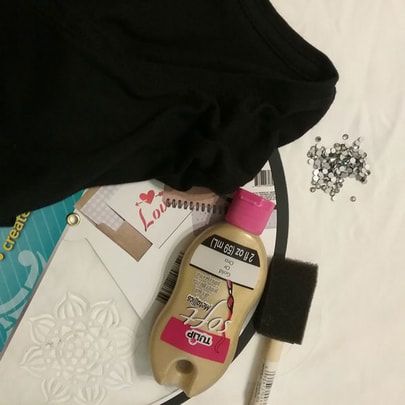
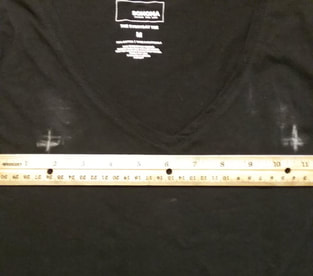
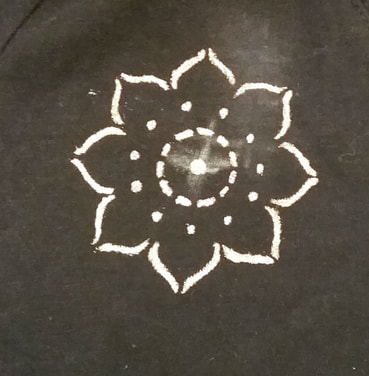
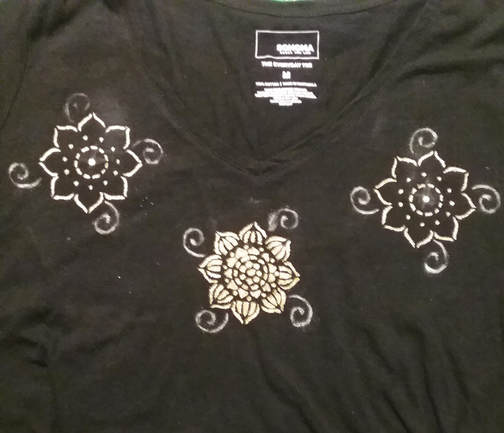
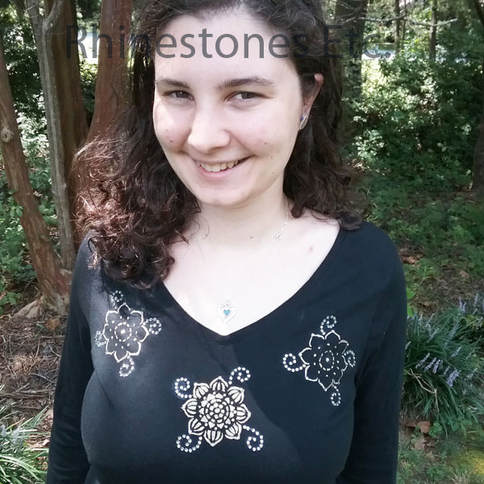
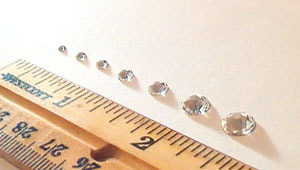
What about that “ss” size? Originally, when rhinestones were found along the banks of the Rhine River, they were measured in “stone sizes” or “ss”. Although natural rhinestones are no longer, the “ss” system of measurement is still in use today. The smaller the number next to the “ss”, the smaller the rhinestones. Likewise, the larger number next to the “ss”, the larger the rhinestones. And the smaller the rhinestone, the more you will need to cover an area. By the same token, the larger the rhinestone, the less you will need to cover an area. Most retailers will also give the millimeter size. Below is a conversion chart from ss to millimeters: ss mm ss mm ss mm 3 1.4 8 2.35 20 4.7 4 1.6 9 2.65 30 6.41 5 1.8 10 2.85 34 7.17 6 2.0 12 3.1 40 8.54 7 2.15 16 3.9 48 11.11 Recommended Adhesives There are two things to consider when applying rhinestones. First, the surface and then the type of rhinestone. Some adhesives provide a more permanent bond to some surfaces. Beacon’s Gem Tac is a great all-purpose glue. Gem Tac is recommended for fabric, wood, suede, glass, vinyl and metal. E6000 is another adhesive suitable for just about any type of surface. Recommended for all the surfaces as Gem Tac as well as plastic, tile, ceramic, cement, rubber, leather and Styrofoam. However, this glue is a bit harder to work with as it’s thicker and harder to apply. Keep in mind that this glue dries quickly and must be used in a well-ventilated area. Be careful as some adhesives are not recommended for use with Acrylic rhinestones. Beacon’s Fabri-Tac and E6000 are not recommended for use with these types of rhinestones. Always check the glue manufacturer’s instructions and the supplier of your rhinestones for the best adhesive to use. How to attach Rhinestones to Fabric After you pick your adhesive, you are ready to glue. Prewash whatever garment you are applying rhinestones to. Squeeze a drop of glue slightly smaller than the rhinestone on your fabric. Using a tweezer or wax tipped tool, pick up the rhinestone and gently press it into the glue drop. Some glue should seep out of the edges of the rhinestone. This makes a seal and helps to prevent the rhinestone from peeling off. Allow to dry flat for 24 hours. Hot fix rhinestones are rhinestones with glue on the bottom. These can be adhered to fabric using a hot fix tool or a hot iron without steam. A hot fix tool is a wand with different size tips for the various size rhinestones. Position the rhinestones crystal side up, heat the tool, then vertically position the wand over the item you want to pick up. With a light touch, pick up the item in the cup at the end of the tip. It will stick in the tip. Depending on your type of wand, wait 10-15 seconds for the glue to heat (you will see it bubble). Gently tap the tip onto the fabric and the rhinestone will stick. Too much pressure will cause the rhinestone to stick in the tip so make sure you use a light touch. In a few minutes the glue will cool, and the rhinestone will be securely attached. Another nifty tool is hot fix transfer paper. You can make complicated designs or lettering by laying rhinestones on the sticky side, then simply use an iron without steam to apply. The recommended temperature for glue activation by Swarovski is a temperature range of 120°C to 170°C (250°F to 340°F). Due to a lack of absorbency, some fabrics are not suitable for use with hot fix rhinestones. These include tightly woven fabrics, very thin fabrics such as organza, leather or imitation leather as well as fabrics treated with water-repellent treatments, stain-resistant treatments and easy-to-care treatments. Other Methods for Attaching Rhinestones Two other ways of attaching rhinestones to fabric are sewing and metal settings. Sew-ons are rhinestones with predrilled holes for sewing. Simply sew the rhinestone on with a needle and thread through the holes. Rhinestones with metal settings that have channels on the back such as Rose Montees can be used for sewing as well. There are two types of metal settings, tiffany and rim. Tiffany settings enter from the back of the fabric, the rhinestone is placed in the middle of the prongs and then prongs fold over the front of the rhinestone. Rim settings fit over the top of the rhinestone and the prongs are pushed into the fabric and folded on the backside of the fabric. There are also rhinestones already attached to metal settings such as Rose Pins. How Many Rhinestones will I need? What is the size area you are covering and are you completely covering it with rhinestones? And yes, it involves math. For a straight line of rhinestones: Step A. Multiply the number of inches by 25.4 Step B. Then divide your answer by the millimeter size of the rhinestone. So for: 3.1 for 12ss (3.1 is the mm size for 12ss rhinestones) 3.9 for 16ss (3.9 is the mm size for 16ss rhinestones) 4.76 for 20ss (4.76 is the mm size for 20ss rhinestones) If you are covering a large area with rhinestones you will need this formula: Step A. Find the area by multiplying the width and length of the area you wish to rhinestone. Step B. Multiply the answer in Step 1 by 67.14 for 12ss rhinestones 42.41 for 16ss rhinestones 29.20 for 20ss rhinestones The answer will be the amount of rhinestones you will need to cover that area. If you are still confused or need help in figuring out how many rhinestones you will need, contact us here at Rhinestones Etc and we will be glad to help you do the math. What Color Rhinestones Should I use? Much of choosing a color is preference but choosing certain colors will give your project a certain look. Choosing a rhinestone the same color as the background will provide sparkle while blending in. A contrasting color will pop while providing sparkle. Not sure what color to use? Popular colors, crystal and crystal AB are good choices. Both colors look great with anything. Crystal is a clear rhinestone while Crystal AB is a clear rhinestone with an Aurore Boreale (AB) coating that gives the rhinestone a rainbow look. Crystal AB rhinestones are great at picking up and reflecting back the surrounding color. Is your Head spinning from all this information? Do you have more questions than answers? Don’t hesitate to contact the friendly staff at Rhinestones Etc. We love to help people with their projects. Crystal, glass, acrylic, or plastic. There are many rhinestone types available for purchase today. It wasn’t always so. The original rhinestone was a naturally occurring stone found along the banks of the Rhine River. These sparkling quartz pebbles most likely had a high lead content making them a highly sought prize. As the resource became depleted, glassmakers sought to copy the naturally occurring product. Today, there are many different manufacturers of rhinestones producing an assortment of colors, sizes, and shapes. If this is your first-time shopping for rhinestones, it can be confusing when looking at all the choices. When searching for a company that can help you sort through all the array of choices, shop Rhinestones Etc. A Brief History of Brand Name Rhinestone Manufacturers Glass craftsmen sought to imitate the sparkle and brilliance of real gemstones particularly diamonds. In 1715, Bohemian glassmakers introduced the chaton, the world’s first cut crystal stone. Later on, craftsmen coated the back of the crystal with a metal foil. These early rhinestones closely resembled real diamonds in appearance. However, these rhinestones were quite expensive as glassmakers needed to cut each one by hand. Almost 200 years later, one enterprising Bohemian glassmaker, Daniel Swarovski, devised a machine that cut crystal faster and more precise. This new invention cut crystal with unprecedented precision, revolutionizing rhinestone production. Moving to Austria, he worked hard to turn his product into the premier brand it is today. Meanwhile, the craftsman of Bohemia continued to work independently until 1948. Then, the 25 companies and factories continuing the glassmaking tradition merged into one national company under the name of Preciosa. Today, the name Preciosa, like Swarovski, is synonymous with quality. However, many other companies have sprung up to complete with these giants. These rhinestones may be crystal, glass, or acrylic with less facets. Consumers find these rhinestones appealing due to their much lower price point. Do Rhinestones Have Molded or Cut Facets? Facets are the small plane surfaces of the rhinestones. Depending on the manufacturer, rhinestone companies produce faceted rhinestones from a mold or cutting. Acrylic rhinestones have molded facets. Manufacturers inject acrylic into different shape molds. Typically, glass rhinestone manufacturers may use molds or cut facets. While crystal rhinestone manufacturers laser-cut facets. One characteristic of a quality rhinestones is the number of facets and these vary by manufacturer. The more facets, the great the reflection of light. The Swarovski Xirius Rhinestone has the greatest number of facets of any brand with 16. Preciosa’s Maxima Rhinestone has 15 facets. Some of the other lesser-known brands may have 10 facets. Typically, acrylic rhinestones have only 8 facets. Acrylic, Glass, or Crystal Rhinestones Crystal rhinestones are the most expensive but also the most diamondlike. In the past, manufacturers made crystal by adding lead to glass. Today, many companies use barium instead because of the toxicity of lead. At any rate, mixing glass with one of these ingredients leads to higher refraction of light. Thus, when light hits the rhinestone, it acts as a prism, breaking light up into a myriad of colors. Both Swarovski and Preciosa produce a lead-free crystal rhinestone. Made from plastic, acrylic rhinestones are lead-free. They are also the cheapest option and are great for crafting projects. Glass rhinestones fall somewhere in between acrylic and glass. The quality of glass rhinestones varies depending upon the manufacturer. Various Rhinestone Types Are Available in Many Colors and Shapes Whichever rhinestone you decide to buy, you’ll find a large selection of rhinestone colors to choose from. Both Swarovski and Preciosa produce a considerable selection of choices and routinely add new hues to their collections. Moreover, some rhinestone manufacturers make animal print, ceramic, or marble rhinestones. Additionally, rhinestone shapes are almost as varied as the color selection. While round is the most popular shape, you’ll also find square, rectangle, triangle, heart, pear, as well as many others. Moreover, all these shapes are available in different rhinestone sizes. Ranging from tiny .9mm to large 18.22 mm, rhinestone sizes depend on the manufacturer. Rhinestones Are Extremely Versatile All rhinestones come in a variety of colors, shapes, and sizes making them extremely versatile. Throwing a girl’s princess party? Some colorful acrylic rhinestones can will some inexpensive bling. Prom time and your budget is slim? Browse the racks at the thrift store and give your fashion discovery a boost of sparkle with rhinestones. Not sure where to begin with rhinestones? Here at Rhinestones Etc. we’ll help you find the right rhinestone, in the right size and color. Embellished shirts are expensive but cheap plain shirts tend to be boring. However, for most of us, our budget says buy the boring plain shirt. After you learn how easy and cheaper it is to bedazzle a shirt, you’ll be happy buying that ordinary solid color shirt. The t-shirt used in this project was one I found on clearance for $4.00 and the stencil I found at the dollar store. For this project I used: 1 t shirt Stencil Gold metallic fabric paint Paint brush Black diamond 12ss rhinestones (about 170 rhinestones) Gem Tac Wax tipped tool or tweezers Easy Steps to Bedazzle a Shirt Wash and dry your shirt. Because I like my designs to be somewhat symmetrical, I like to mark with chalk the position of the designs. Chalk works great because you can brush off your marks if you need to make a change and it easily washes out. Once I marked out the position of my design, I was ready to paint. You can use a shirt board If you have one; place it on the inside of the shirt. Usually, I just use a piece of thick cardboard I have laying around. Using the chalk marks, position your stencil and apply the fabric paint using a paint brush. Either a foam brush or a regular paint brush works fine. Remove the stencil and clean it off before repositioning it. When you are done painting, allow to dry completely. I chose the rhinestone color of black diamond because I liked how it reflected off the black of the shirt and yet didn’t overpower the gold color of the stencil designs. Again, I marked with chalk the design of the rhinestones. If the material to the t-shirt is thin, you may want to leave the shirt board in place when gluing or place a piece of wax paper on the inside of the shirt. To glue your rhinestones, place a drop of glue slightly smaller than the rhinestone on the shirt. Then, using your wax tipped tool or tweezers, pick up a rhinestone and gently press it into the glue drop. Continue gluing until your design is complete. Allow to dry flat for 24 hours. How much do you think you’d pay in retail for this shirt? At least $25. But by doing it yourself, you can bedazzle a shirt for $10-$15 depending on the brand of rhinestones you choose to use. You’ll feel trendy and stylish while keeping to your budget.
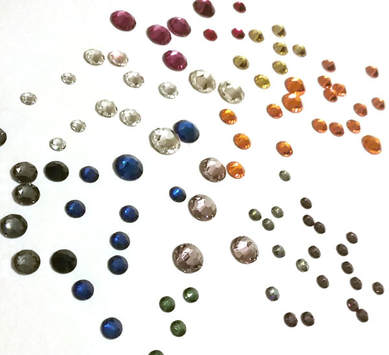
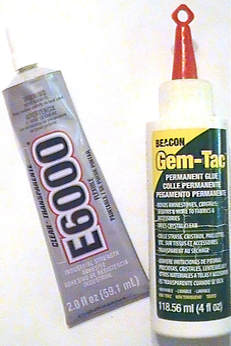
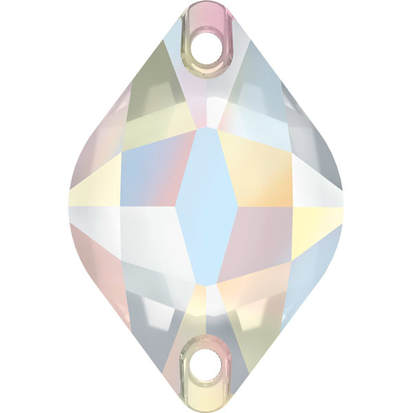
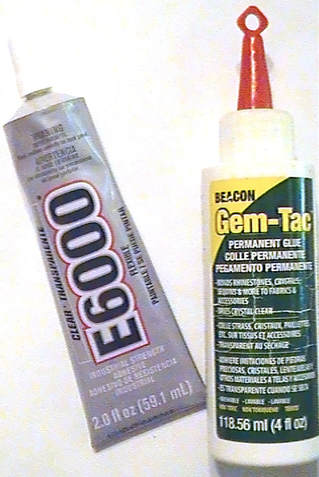
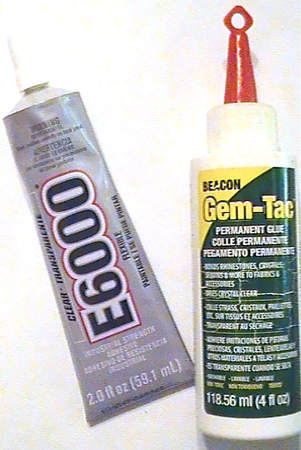
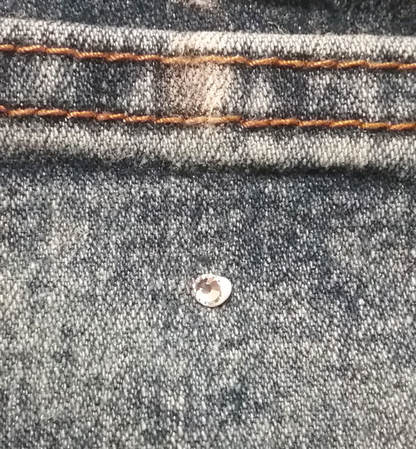
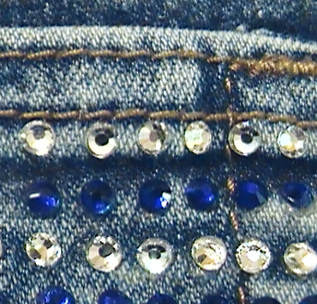
Often, we associate sparkling gemstones with Hollywood glamour or the lives of the rich and famous. There’s something about the play of light upon the facets that attract and enchant us. While most of us can’t afford designer clothing, we can easily alter store purchases with sparkling flatback crystals. Rhinestones add a bit of glamour at a reasonable price. Moreover, applying rhinestones to clothing isn’t as hard as you might think. No matter how you use them, rhinestones add a touch of elegant sparkle. Have a plain shirt? Bedazzle it with rhinestones for a dressy casual look. Upcoming wedding? Bling out your wedding invitations. Don’t know what to give your best friend for Christmas? Deck out a coffee mug with rhinestones. Rhinestones Etc. has many tutorials blogs like these with instructions. The Best Glue for Rhinestones Depends on the Surface Probably the most popular way to attach rhinestones is to use an adhesive. Your choice of glue depends on the surface you’re applying the rhinestone to and the rhinestone itself. The substrate, or surface you’re gluing to, can be porous or smooth, heavy or lightweight. Thus, some adhesives work better on certain surfaces. Beacon’s Gem-Tac is a great all-purpose glue. The manufacturer recommends this glue for fabric, wood, suede, glass, vinyl, and metal. It’s easy to apply, dries clear, and is washable. E6000 is another adhesive suitable for just about any type of surface. The manufacturer recommends it for all the same surfaces as Gem-Tac plus plastic, tile, ceramic, cement, rubber, leather, and Styrofoam. However, this glue is a bit harder to work as it is thicker, harder to apply, and dries quickly. There are applicator tips for E6000 that you can buy separately. We like to squeeze a bit out over a paper plate and use a toothpick to apply the glue. Once the glue starts to become tacky, simply squeeze out a bit more. This glue does dry quickly and you must use it in a well-ventilated area. While most adhesives are safe to use, some manufactures don’t recommend their product for use with Acrylic rhinestones. Both Beacon’s Fabri-Tac and E6000 advise against using their glue for use with these types of rhinestones. Always check the glue manufacturer’s instructions and the supplier of your rhinestones for the best adhesive to use. How to Glue Rhinestones onto Fabric The most important aspect of gluing rhinestones on fabric is using enough glue. One of the most frustrating aspects of bedazzling clothing is rhinestones falling off during washing. This always occurs with an improper gluing technique. To properly glue rhinestones, you need a drop of glue about the same size as the rhinestone. When you place the crystal in the glue, some adhesive should seep out from the sides. This creates a seal, firmly attaching the rhinestone to the fabric and prevents it from peeling off. Since all rhinestone fabric glues dry clear, the only thing you’ll see is the sparkle. Hot Fix Rhinestones Have Glue On Their Backing Hot fix rhinestones have flat backs with an adhesive already on their flat or backside. When you heat the glue to a temperature between 250-340° F, you can apply it to form a permanent bond. Some fabrics may be unsuitable for hot fix application. These types of textiles include tightly woven fabrics, thin fabrics like organza, or real and imitation leather. If you’re not sure if you can use hot fix rhinestones on your fabric, you can perform the pearl test. Place several drops of water on the material. Fabric that has water that pearls is not suitable for hot fix application. On the other hand, you can use hot fix rhinestones on fabrics that absorb the water drops quickly. Other Methods for Applying Rhinestones Two other ways of attaching rhinestones are sewing and metal settings. Sew-ons involve rhinestones with predrilled holes for attaching. Simply sew the rhinestone on with a needle and thread through the predrilled holes. Rose Montees are rhinestones set in a metal setting. The setting has a cross channel on the back for sewing or stringing wire through. Metal settings give your rhinestones and extra secure hold with a decorative element. Tiffany settings have the prongs come through the back of the fabric to attach the rhinestone. Whereas rim settings frame the rhinestone with the prongs going through the fabric from the top. Rose pins are rhinestones already attached to metal settings. Add Rhinestones For A Touch of Glamour As you can see, there are several methods of applying rhinestones. Some projects allow for different ways to affix them. Begin by thinking about the project you are working on. If you’re planning on using adhesive for attaching your rhinestones, check the glue manufacturer’s suggested use. If you still have any questions about what works best for your project, you can contact us for help at here. Of course, we'd love to be your source for rhinestones. With discount pricing, fast shipping and great customer service, Rhinestones Etc. can help you with your crystal needs. Are you new to using rhinestones? Then you may be scratching your head over rhinestones sizes. While jewelers use carats and millimeters to rhinestone manufacturers use something called “ss”. If you’re not familiar with this measurement, you may have difficulty determining which size you need. Many years ago, rhinestones were a naturally occurring resource found along the banks of the Rhine River in Europe. Sparkling quartz pebbles, prospectors measured these according to their stone size. Later, this measurement became shortened to ss. Over time, this natural resource became depleted. However, people loved their glittering effect so manufacturers found a way to produce rhinestones in the factory. Today, many manufacturers produce many different rhinestone sizes, but they still use the ss measurement. Which Rhinestone Size Should I Use For My Project? Manufacturers vary in the variety of sizes they produce. While they all use the ss measurement system, some companies have a larger selection of rhinestones sizes. Some produce only the most popular sizes such as 12ss, 16ss, and 20ss. Others, like Swarovski, create rhinestones from the tiniest 3ss size to the large 40ss size. The smaller the number next to the “ss”, the smaller the rhinestones. For example, a size 6ss rhinestone is about the size of a head of a pin. A size 34ss is slightly larger than an eraser on a pencil. Until you become familiar with the variations, it can be confusing. Thus, most companies will list the millimeter size alongside the “ss” size. Which size you should use depends on the type of project you’re working on. Smaller size rhinestones are perfect for nail design. Rhinestone nails are very trendy and fashionable. After applying nail polish, use nail glue and topcoat to secure the rhinestones on to your fingernails. Typically, costume designers like to use bigger rhinestones on dance and skating apparel. Generally, using a bigger rhinestone will give you a flashier shine. Incorporating several different sizes allows for a serendipitous, unforeseen play of light. Sometimes you may need very specific sizes. Many people like to bling out the Nike symbol on their sneakers. To do so requires a very specific set of rhinestones. Rhinestones Sizes Conversion Chart When trying to determine the best size for your project, it’s helpful to know the millimeter size. Most suppliers offer a conversion chart. For your convenience, below is a conversion chart from ss to millimeters: ss mm ss mm ss mm 3 1.4 8 2.35 20 4.7 4 1.6 9 2.65 30 6.41 5 1.8 10 2.85 34 7.17 6 2.0 12 3.1 40 8.54 7 2.15 16 3.9 48 11.11 Another aspect to consider when ordering your rhinestones is the area you’re planning to cover. Although larger rhinestones are more expensive, they do cover a larger area than smaller rhinestones. Fewer rhinestones also mean less work for you. Adding rhinestones to clothing, shoes, or nails adds explosions of light. Rhinestones grab your attention with each twinkle of a facet demanding attention. Undoubtedly, this is why so many fashion designers use them. Are you still have difficulty deciding on what size you need? Rhinestones Etc. will be happy to help you determine what works best. Send us your questions here, and we'll do our best to help you. Adding rhinestones to any type of clothing adds a bedazzling effect. With every movement, the rhinestones send out a shimmer of light. Yet, bedazzled clothing is expensive. However, once you see how easy it is to apply rhinestones to fabric, you’ll be bedazzling most of your wardrobe. You can attach rhinestones to many objects:
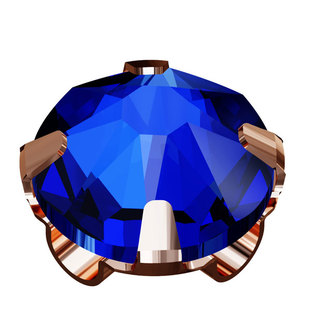
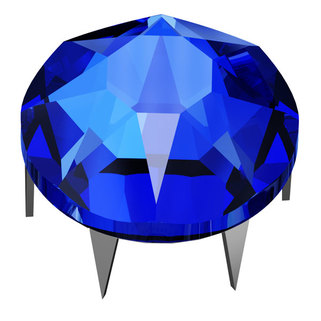
Rhinestones add sparkle to every object you add them to. However, it can be very intimidating the first time you try to glue rhinestones. Many first-timers are afraid of using too much glue or gluing rhinestones in the wrong position. Once you learn the technique you need to follow, you’ll see how easy it is to bedazzle clothing. Choose the Right Rhinestones Glue The most popular type of rhinestone is the non-hot fix also known as the flatback. To some, this term can be confusing because hotfix and sew-on rhinestones also have a flat back. Yet, manufacturers generally refer to flatback rhinestones as those needing glue or settings to attach them. Settings are pieces of metal with prongs to hold the rhinestone onto the fabric. You bend the prongs around the rhinestone to hold it into place. However, using glue is the most popular option for applying rhinestones. First, you need to select an adhesive. There are many different rhinestone adhesives on the market. Your choice will depend on the object you’re blinging. For instance, some glues work better on leather or glass. If you’re blinging a coffee mug or sneakers, you may want to use E 6000. This industrial-strength glue is great for a variety of surfaces:
However, this glue tends to be gloppy and hard to apply. Plus, the manufacturer doesn’t recommend using it with acrylic rhinestones. When applying rhinestones to fabric, you may want to use Gem-Tac. You can use this glue on an assortment of surfaces:
This glue is much easier to use to bedazzle clothing and makes applying rhinestones a snap. It’s our favorite glue to use on fabric. Whichever adhesive you choose, be sure the manufacturer recommends it for use on fabric, it's washable, and dries clear. The Technique To Apply Rhinestones to Fabric While choosing the right glue is important, there is also a technique for permanently attaching rhinestones. An improper gluing technique may cause your rhinestones to fall off, especially when you launder the garment. When applying rhinestones to fabric, it’s very important to use enough glue. Often, first-timers use too little glue fearing the adhesive will be visible. However, all glues for use with rhinestones dry clear. To begin with, pre-wash and dry your garment before you start gluing. Lay the garment as flat as possible. Sheer or thin fabrics may require a piece of wax paper between the layers of fabric. This prevents the glue from seeping through and inadvertently gluing layers together. The drop of glue should be about the size of the rhinestone. After you press the rhinestone into the glue, the glue should seep out from the edges. This makes a seal that helps keep the rhinestone from peeling off. One of the most common reasons for rhinestones falling off is this one, a lack of glue seal. After you finish gluing all your rhinestones to your garment, always let dry flat for 24 hours before wearing. While some glues set in 10 minutes, it takes 24 hours for all glues to dry completely. You’ll Need a Tool for Picking Up the Rhinestones
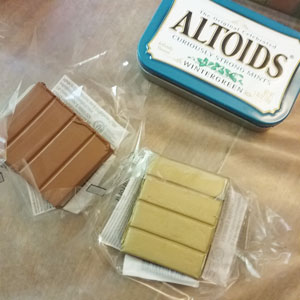
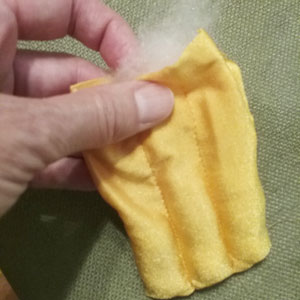
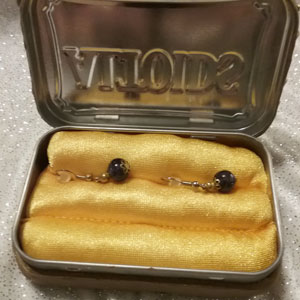
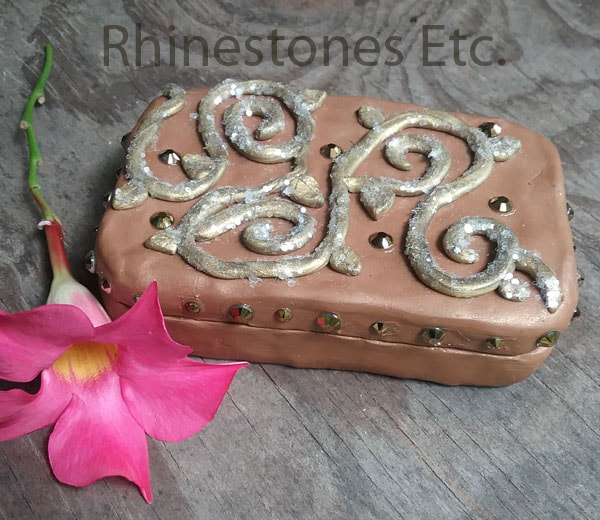
You’ll also need a tool for picking up the rhinestones. Many people use tweezers and these make an adequate tool. However, the glue will build up on the edges requiring frequent wiping. Moreover, be careful not to squeeze the tweezers too tightly or your rhinestone may go flying off. Another tool is a wax tipped tool. The wax end easily picks up many types of embellishments including rhinestones. When you press the rhinestone into the glue drop, the rhinestone detaches from the tool. There are many variations of this implement from cheap to expensive. Finding the Best Rhinestones for Your Project Rhinestones are available in different types. You can buy acrylic, glass, and crystal rhinestones. Generally, you’ll want to use cheaper rhinestones where the quality isn’t are important, like a children’s craft project. Likewise, you may want to use the more expensive brand-name rhinestones for more important occasions like a wedding. Plus, there are many good quality middle-of-the-road rhinestones. You can find many quality rhinestone choices at Rhinestones Etc. With fast shipping, competitive pricing, and excellent customer service, we want to be your source for bling supplies. Altoid mints come in a cute little tin. The latest crafting rage is to recycle these tins into cute scenes or children’s travel play sets. There are many mediums to choose from to cover your tin: paper, fabric and/or clay. I wanted an altered tin that was both beautiful and practical. When I travel, I never have a place to carry an extra pair of earrings. So, I set out to make a jewelry carrier out of my Altoid tin. For this project I used: Altoid tin Metallic gold oven baked clay Raw sienna color oven baked clay Modge podge Clear glitter 12ss and 20ss Dorado rhinestones Gem tac Scrap material 8.5 x 5.5 inches How to Make an Altered Altoid Tin Mix the gold with raw sienna until you get a rustic bronze color. Cover the lid and sides with a thin layer of clay making sure you can still open and close the lid. Using the gold clay, roll out some vines and position these on the lid. Shape some small leaves and place these along the leaves. Finger prints can be problematic and distract from the beauty of the case. Therefore, simply brush the clay surface with a 50/50 mixture of alcohol and water with a paint brush. The alcohol “melts” the clay and smooths the surface. Bake in a 275-degree oven for 15 minutes then remove and let cool. After the clay is cool, brush the vines and leaves with modge podge. Sprinkle the clear glitter on and let dry. Fold the scrap material right sides together. Sew up the 2 longer edges of the 3 open edges. Turn inside out. Sew lengthwise evenly spaced so that you have 3 pockets. Stuff each pocket with pillow stuffing. Once stuffed, turn the remaining edges to the inside and stitch the ends together. Place inside the tin. Glue several 20ss Dorado rhinestones scattered along the top of the tin using Gem Tac. Squeeze a drop of glue slightly smaller than the rhinestone. Using a tweezer or wax tipped tool, pick up a rhinestone and gently press it into the glue drop. Glue alternating 12ss and 20ss Dorado rhinestones along the side edge of the lid, spacing about 1/4 inch apart. Lastly, let the finished case dry for 24 hours without any further handling. Tins are fun to recycle and gluing on rhinestones adds to the fun. You can experiment with different styles and designs to come up with the perfect altered Altoid tin for you. Finally, these tins are the perfect way to store and safely carrying jewelry on a trip.
|
KarenI have been adding bling for over 20 years. Through my projects, I hope you find inspiration. Categories
All
Archives
July 2024
|
Home About Policies Return Shipping
Contact Us Size Chart Privacy Products Reviews
Copyright 2024 Rhinestones Etc. All rights reserved.
Contact Us Size Chart Privacy Products Reviews
Copyright 2024 Rhinestones Etc. All rights reserved.



 RSS Feed