|
You’ve been browsing online looking for some good quality rhinestones. As you look at sellers on Amazon, Ebay or the web, you find that there is a big difference in the pricing. In addition, some have brand names attached to them. Others you see are marked MC quality while others are marked DMC. Just what are MC and DMC and how do you know if you are getting quality rhinestones? Brand Name Rhinestones Famous brand name rhinestones, Swarovski and Preciosa, have been around for a long time. Since they are established companies, their quality is assured. And they are the most expensive as well. Brand name rhinestones are laser cut from a single piece of crystal. However, rhinestone manufacturers have emerged in Asia, particularly Korea and China. These manufacturers have labeled their product, DMC and MC. So, what is the difference in quality between the name brands and Machine Cut Rhinestones? Diamante Machine Cut and Machine Cut DMC stands for Diamante Machine Cut. Diamante rhinestones generally refer to Korean made rhinestones. These rhinestones can be glass or crystal. MC are Chinese made and are also machine cut rhinestones. Chinese rhinestones can also be crystal or glass. While Asian rhinestones are machine cut, there is more to the quality of the rhinestone than just machine cut. There is a noticeable difference between glass rhinestones and crystal rhinestones. Glass is made by mixing silica sand, limestone and soda ash. Mix glass components with lead or in lead free crystal barium oxide, potassium oxide or zinc oxide to make crystal. Crystal has a prismatic effect which has the ability to break light up much like a prism. Color and clarity of a rhinestone are also very important. Imagine buying a lot of rhinestones and the color is slightly off or the rhinestone is cloudy. Furthermore, the number of facets in each rhinestone determines the quality. The greater the number of facets, the greater the reflection of light. Whereas it is difficult to determine the quality of rhinestones online, you should be able to easily tell the difference if buying in person. If buying online, check out the reviews of the seller before buying. While this is helpful, customers have different perception of quality. When quality is very important to you, stay with a brand name rhinestone. If price is very important to you, then you will probably be happy with daimante rhinestones. Rhinestones Etc has been selling quality crystal products since 2011. With fast shipping and excellent customer shipping, we get your rhinestones to your doorstep very quickly! Browse our online store to find your rhinestone color!
0 Comments
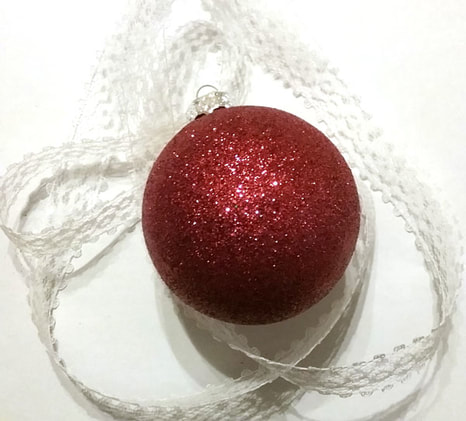
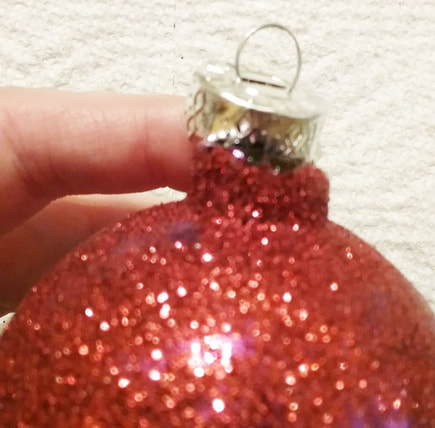
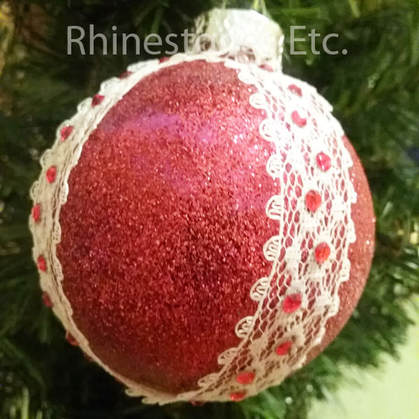
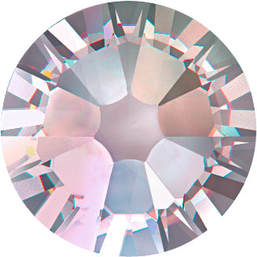
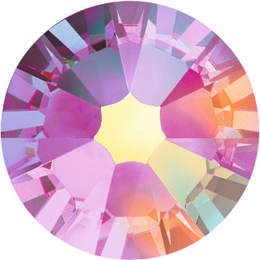
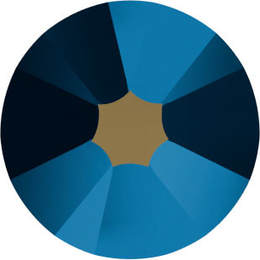
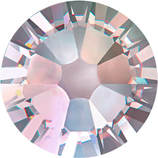
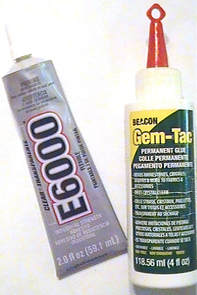
There is something about lace that gives a touch of elegance. Delicate and wispy, lace transforms ordinary into distinction. This red ornament is nice and glittery. But add lace and rhinestones and the ornament becomes exquisite. Simple to make, anyone can make these beautiful DIY Christmas ornaments. For this project I used: 1 red glittery red ornament (purchased at Target) White lace 12ss red rhinestones Gem Tac Wax tipped tool or tweezers How to make Rhinestone and Lace Christmas Ornaments Cut 2 pieces of lace the circumference of the ornament. Smaller width lace tends to work better. and I used ¾ of an inch lace. Remove the top silver part of the ornament. Gem Tac is a popular adhesive for bonding fabrics and embellishments. It works great on gluing the lace to the ornament. Glue one strip of lace starting at the top, going down to the bottom and back up to the top. On the opposite side, glue on other piece of lace. Let dry completely. Place the top back on the ornament. Gluing on the Rhinestones Now to glue on the rhinestones. Place a drop of glue, slightly smaller than the rhinestones. Using the tweezers or wax tipped tool, pick up a rhinestone and gently press it into the glue drop. The glue should seep slightly out from the edges. Continue gluing until your rhinestone is embellished. Allow to dry for 24 hours. These DIY Christmas ornaments are truly something special. The addition of lace and rhinestones truly enhance this ornament. So easy to make, have some on hand to give as gifts, for an ornament exchange or for your own tree. Create a bunch and have your very own rhinestone themed tree. Get started today on making them as Christmas is not too far away. Need some bling supplies? Rhinestones Etc. has great prices and excellent customer service. Have you ever had the opportunity to be far up North to see the Aurora Borealis or Northern Lights? If so, then you know the beautiful display they put on every night. Colors such as green, pink, red, yellow, blue and violet dance in the night sky. This phenomenon is caused by charged particles released from the sun’s atmosphere colliding with gaseous particles in the Earth’s atmosphere. As a result, there is a stunning display of spectacular dancing colors in the sky. AB Rhinestone Color Explained To replicate this phenomenon, rhinestone manufactures developed the AB or Aurore Boreale rhinestone. AB rhinestones are a beautiful display of colors very similar to the Northern Lights. To put it simply, this rhinestone is a base color with an iridescent coating over it. The result is an ever changing color rhinestone. As the light catches the rhinestone, different colors are reflected back much like the changing colors of the Northern Lights. In addition, AB rhinestones, pick up the color of the fabric you place the stone on. Therefore, their color reflection will change based on the background. It’s for this reason that AB rhinestones are so popular, for their ability to change color. AB Rhinestone Colors Available As previously mentioned, AB rhinestones are popular. The most popular AB rhinestone is the crystal AB. This rhinestone is a base crystal with an AB coating. The crystal base matches any color it’s used with. In addition, this rhinestone picks up the color it’s paired with while reflecting a myriad of other colors. Swarovski Crystal AB Rhinestone There is a great variety of standard colors coated with the AB coating. Lighter AB colors such as Fuchsia AB reflect more of the rainbow effect and more colors. Darker colors such as Jet AB or reflect less. However, all AB colors reflect more than just their base color. Swarovski Fuchsia AB Rhinestone Swarovski Jet AB Rhinestones Swarovski has over 30 different AB colors as does Preciosa while Lux offers just under 30. These rhinestones offer you a wide selection of choices, so you are sure to find the color you need. If you need help choosing the right color for your project, just ask. We’re also happy to assist you! Do you need rhinestones? Rhinestones Etc. has great prices with excellent customer service! Rhinestones add that special touch of dazzling sparkle. You’ve seen them on dresses, boots, and sneakers. But the important question is can rhinestone stick to anything? Just about! You can stick rhinestones to virtually any surface: glass, metal, fabric, and leather to name a few. More precisely, the questions should be, what glue or adhesive is good for the surface I am working on. Different brand glues work better on some surfaces and some glues are just easier to work with. Once you know your adhesive, you can glue rhinestones to many, many surfaces. Best Rhinestones Adhesives for Fabrics Because the most common surface to glue rhinestone to is fabric, I’ll start with some good fabric adhesives. Beacon brand makes two different adhesives: Fabric-Tac and Gem-Tac. Fabric-Tac is solely for fabrics. Be careful as it is not recommended for use with acrylic rhinestones. Gem-tac is another one of Beacon’s adhesives and it bonds to more than just fabric. It also works on wood, suede, glass, vinyl and metal. Additionally, it is easy to apply and generally considered non-toxic. Dry cleaning is not recommended. Next up is an adhesive that is made specifically for stretchy surfaces. Aleene’s Flexible/Stretchable glue is specifically made for us on T-shirts, knits, dancewear and socks. Rhinestone Adhesives for other surfaces E6000 is another popular glue. It provides a strong bond for these surfaces: fabrics, wood glass, plastic, tile, metal, ceramic, rubber, vinyl, leather cement and styrofoam. Keep in mind that this glue must be used in a well-ventilated area. Many people don’t like E6000 because of potential toxicity. However, as long as you follow the manufacturer’s instructions, you should not experience any difficulties. If you prefer to avoid E6000 but want a strong glue, you may want to try Swarovski 2-part Epoxy Resin. This adhesive bonds to metal, rubbers, synthetics and glass. In keeping with Swarovski’s pledge for a healthy environment, it is not toxic, corrosive, hazardous or dangerous. So, the next time you are considering a bling project, think about rhinestone adhesives first. What surface you will be gluing to will determine which glue you should use. Thinking of starting a rhinestone project? Rhinestones Etc. has quality rhinestones while providing excellent customer service.
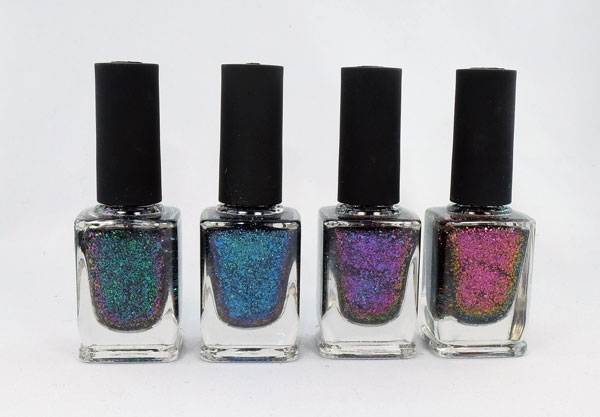
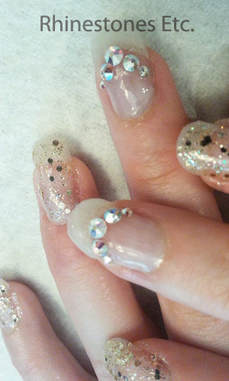
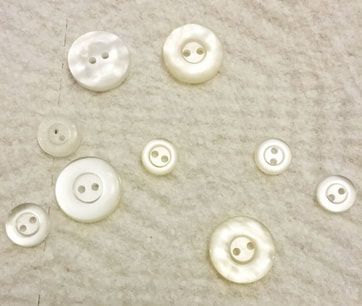
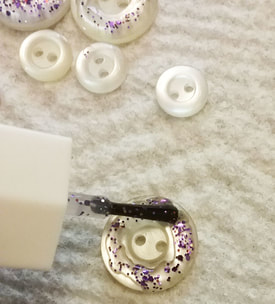
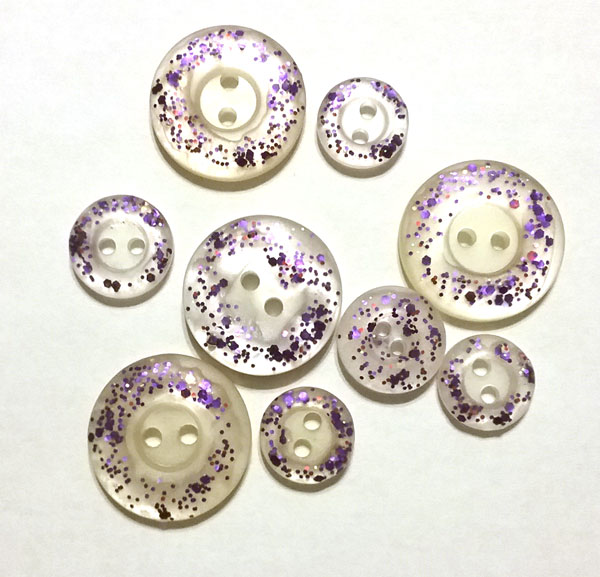
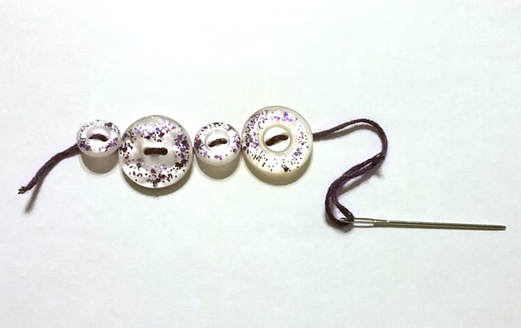
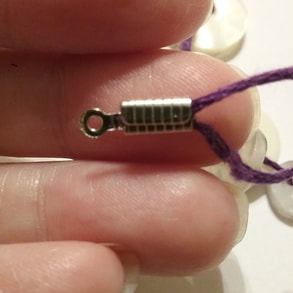
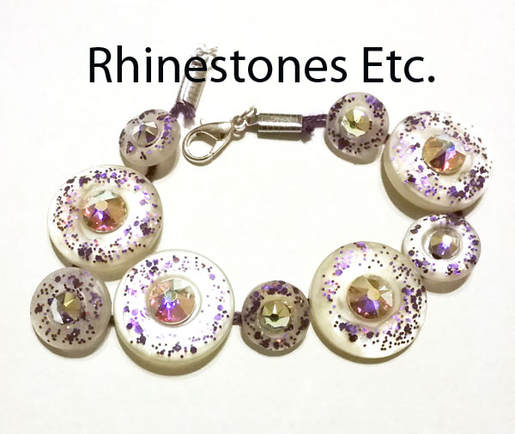
Nail designs with rhinestones are the new current rage. Beautifully polished nails embellished with dazzling rhinestones are sure to make a fashion statement. But have you checked out those salon prices? Yikes, definitely not in your budget! However, you’d still like to have the look of rhinestone nails for that upcoming party. But the question is, can you do it yourself? Supplies Needed for Rhinestone Nails Yes, you can for both regular nail polish and gel, although the methods are slightly different. For regular nail polish, you will need nail glue and a quality top coat. While using gel nail polish will require an LED light. Prices run anywhere from $10-$40 on Amazon. Of course, you’ll need some good quality rhinestones. Some nail technicians like to use flatback rhinestones while other use pointed back. Moreover, you can choose from a variety of rhinestone sizes and colors. How to Apply Rhinestones to Nails with Regular Nail Polish Let’s start with how to attach rhinestone to your nails with regular nail polish. First, make sure you use a good quality nail polish. Unfortunately, if you use a cheaper brand, the polish may chip causing the rhinestone to fall off. Furthermore, this can occur even if you glued it correctly. Begin by applying a base coat and then your favorite color and allow to dry completely between coats. With a toothpick, apply a small amount of nail glue to the nail where you want to place the rhinestone. Using a wax tipped tool or tweezer, pick up a rhinestone and gently press it into the nail glue. Next, using a small detailing brush, apply a top coat around the edges of the rhinestone. Do not apply the top coat over the top of the rhinestone, only the edges. This helps seal the rhinestone so that it doesn’t peel off. Using Gel Nail Polish to Attach Rhinestones Now let’s go over the method of creating rhinestone nails with gel polish. Apply the gel foundation and cure under your LED light. Then apply the gel color again curing under the LED light. In the area where you are applying the rhinestone, roughen lightly with an emery board. Wipe nails clean with rubbing alcohol using a lint free wipe. Next, apply a gel top coat over the entire nail. Pick up a rhinestone using a wax tipped tool or tweezers and apply the rhinestones to the nail. Then, cure under the LED light. Finally, using a small detailing brush, apply the gel top coat around the edges of the rhinestone. When you are finished, cure under the LED light one final time. With a little practice, you’ll be creating fabulous designs on your nails suitable for every occasion. Plus, you won’t pay those high prices at the nail salon. Practice enough times and you’ll be creating your very professional own one-of-a kind nail designs. Want to get started on your nail designs right away? Buy quality rhinestones from Rhinestones Etc. Sometimes, you can take simple components and make a truly stunning DIY creation. For example, take buttons: most people have some laying around and if not, they are inexpensive to buy. Simply, paint on glitter nail polish, string together with string or wire, glue on some rhinestones and just like that, you now have a very pretty bracelet perfect to add sparkle to your wrist. To do this project I used: Various size buttons Glitter nail polish Krylon acrylic coating Embroidery thread E6000 34ss and 20ss Crystal AB rhinestones 4 mm jump ring Lobster claps Cord end caps Jewelry pliers. Tweezers or wax tipped tool Instructions for a DIY button bracelet You can use all the same size buttons or vary the sizes, whichever style you prefer. I used purple glitter nail polish but there are many colors available at your local beauty supply store. Paint the tops of the buttons making sure you don’t paint over the button holes. Let the nail polish dry completely. To protect the nail polish from chipping off, spray a coating of Krylon Acrylic coating on the buttons. If you want, you can apply more than one coat, allowing to dry completely between coats. Cut a piece of complimentary embroidery thread about 12 inches long. Thread a sewing needle with all six strands. Starting underneath, sew the buttons together. Using a cord end cap, place one end of the thread in the cap leaving a one-inch tail. Fold over one side of the cap. Place the tail in the cap folding the thread and then folding over the other side of the cord end cap. Cut the excess tail thread. Measure your wrist to a comfortable fit. Cut the other end to this length and add the cord end cap to the other end. Add a jump ring and lobster clasp to one end and a jump ring to the other. Lay the bracelet flat. For the larger buttons, I used 34ss rhinestones and the smaller buttons I used size 20ss. Place a drop of glue smaller than the rhinestone on the middle of the button. Follow the glue manufacturer’s instructions. Using a wax tipped tool or tweezers, gently press the rhinestones into the glue drop. Continue gluing until all of the buttons have a rhinestone, then allow to dry flat for 24 hours. Buying new jewelry every season is expensive, but with this DIY button bracelet, you’ll have a sparkle bracelet perfect for the fall. Wear it for formal or casual occasions, either way, you’re sure to make a sparkly statement! Rhinestones Etc. want to be your source for bling supplies. Browse our selection to find your color.
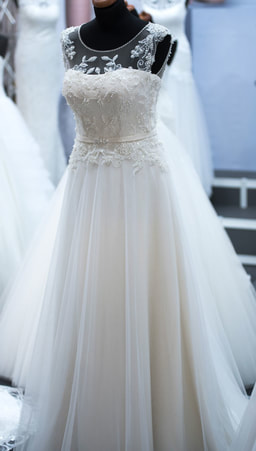
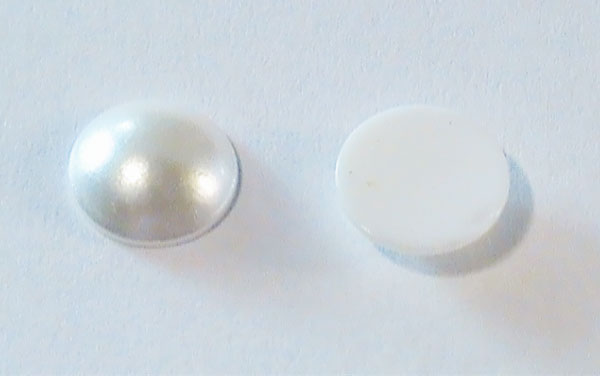
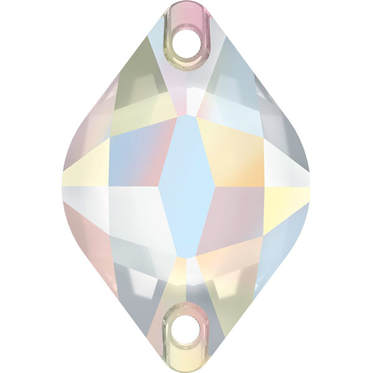
He’s popped the question, and you said Yes! And while you want the fairytale wedding of your dreams, reality has set in and you do have a budget. A wedding dress is one of the biggest expenses of your wedding, yet you only wear it one day. You could spend thousands of dollars on a dress with hand sewn bead work. Or you, could buy a plain one for a lot cheaper and embellish a wedding dress yourself. The money you save you can use to splurge on your honeymoon. Pearls or Rhinestones? First, you need to decide on what type of embellishment you are going to use. Pearls are one option that look fabulous with lace. Flat back pearls or half pearls have all the luster of real pearls but have a flat side so that they are easy to glue. In addition, pearls are sized the same as rhinestones using the “ss” system. They range as small as 10ss to as large as 34ss. These are easily glued to fabric the same as rhinestones. Rhinestones are another choice for enhancing wedding dresses. For rhinestones embellishment, you can choose the glue on method or sew-on. There are many shapes available both in the sew-on and glue on rhinestones. Sew-on rhinestones have predrilled holes at opposite ends enabling you to attach with a needle and thread. Non-hot fix flat back rhinestones can be attached with fabric glue. If you are unsure about how to glue, you can read our blog here about gluing rhinestones. So, which do you pick, rhinestones or pearls? Can’t decide? Well, you don’t have to pick one over the other, simply use both to accent different parts of your gown. Both are beautiful on formal gowns and will make your wedding gown the fairy tale you dreamed of. Save money and sparkle on your wedding day by embellishing a wedding dress. Rhinestones Etc. sells quality embellishments at competitive prices while providing excellent customer service.
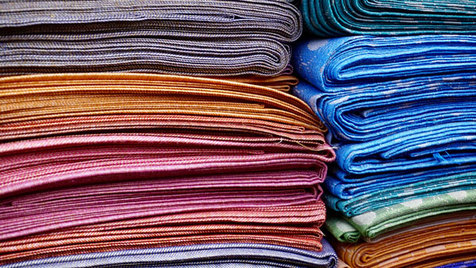
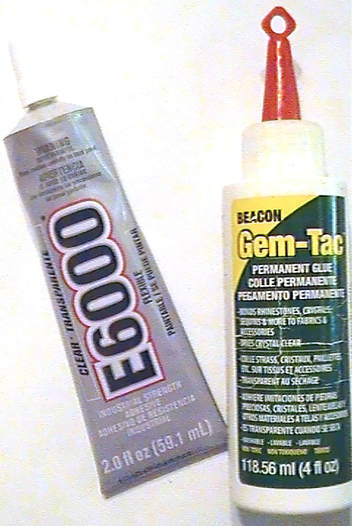
There are so many different types of fabrics available: velvet, polyester, tweed and silk, chiffon just to name a few. These range from light weight to medium weight and heavy weight woven fabrics. Some of these are sheer like chiffon, net or georgette. Others are very thick like velour or denim. With so many different choices, are all fabrics suitable for rhinestone embellishment? The short answer is yes. Certainly, there are some fabrics that you cannot embellish with hot fix rhinestones. Chiefly, these are fabrics that have low absorbency or have been chemically treated with water repellent treatments, easy to care treatments or softening agents and sheer fabrics. Glues for Attaching Rhinestones to Fabric However, providing you use the correct glue and technique, non-hot fix rhinestones can be used to embellish many more types of fabric. Glues such as super glues, hot glue and those containing acetone are NOT recommended. Two of the most popular glue for attaching rhinestones are E6000 and Gem-Tac. Gem-Tac is my favorite glue for using on fabrics for ease of use. You can squeeze it directly out of the bottle and easily control how much glue you apply. E6000 is gloppy and harder to control the flow. Technique for Gluing Rhinestones to Fabric Notably, most important aspect of gluing rhinestones is the amount of glue. Ultimately, the glue needs to seep out from the edges when the rhinestone is pressed into the glue drop. This provides a seal to protect the rhinestone and keep it from falling off. Adhesives tend to shrink when curing. If too little glue is used, there may be too much space between the rhinestone and the glue. As a result, this can cause the rhinestone to peel off. All suitable rhinestone fabric glue dries clear, so it will not be seen if you accidentally use too much. And it is preferable to use too much rather than too little and have your rhinestone peel off. Sheer fabrics can be embellished with rhinestones too. Place a piece of wax paper underneath when gluing. Then, glue as described above. When the glue is done curing, simply peel the was paper off from the underside of the fabric. Applying rhinestones to fabric seems daunting but is actually very easy. If you have any questions, feel free to contact Rhinestone Etc. We will be happy to answer your questions. Rhinestones Etc Storesells quality rhinestones while providing excellent customer service.
Have you checked the price of figure skating dresses which are embellished with rhinestones? Bargain prices can range up in the $300 range. If you shop around, you can find a plain skating dress for about $75. That is a big difference when you are paying for skates, lessons, testing and competitions. Do you want your skater to dazzle on the ice? Buy the cheaper figure skating dress, glue on rhinestone yourself and save yourself a pocketful of money. Even factoring the cost of rhinestones, you will not come close to paying $300. How to glue rhinestones to Figure Skating Dresses Interested in learning more but don’t know where to start? First learn the basics of finding quality rhinestones. You can read about the 4 C’s determining rhinestones quality here. Once you’ve decided on the brand of rhinestone, you’ll need to choose the color and size. Since you are new to gluing rhinestones to figure skating dresses, you many want to stick with either Crystal or Crystal AB. Both are popular colors which will enhance any dress. Crystal is a clear rhinestones and Crystal AB is the clear rhinestones with an iridescent coating on it. The size you choose is also a matter of preference and dependent on the type of design. Generally, most skating dresses are embellished with the larger size stones, 20ss and 30ss. How many you need depends again on the design and the size. Helpful tips on size are discussed here on this rhinestone sizing blog. Next, pick out your adhesive. Both E6000 and Gem Tac are widely used. I prefer Gem Tac for the ease of application. Whatever adhesive you choose, make sure it is suitable for gluing rhinestones to fabric, permanent, washable and dries clear. Follow the manufacturer’s guidelines. A pair of tweezers or wax tipped tool is essential for picking up rhinestones and pressing into the glue. Prewash the figure skating dress before beginning to glue. Additionally, if the material is thin, you may want to put a piece of wax paper between layers. When gluing rhinestones, use a drop of glue slightly smaller than the rhinestone. Some of the glue should seep out from the edges when you press the rhinestone into the glue drop. This is very important as it creates a seal to keep the rhinestone from peeling off. Allow the garment to dry flat for 24 hours.
After you start gluing rhinestones, you will see how easy it is! As you get more confident, you can experiment with different designs and color. With practice, you’ll be good enough to design those fancy skating dresses you see during the Winter Olympic Games. |
KarenI have been adding bling for over 20 years. Through my projects, I hope you find inspiration. Categories
All
Archives
July 2024
|
Home About Policies Return Shipping
Contact Us Size Chart Privacy Products Reviews
Copyright 2024 Rhinestones Etc. All rights reserved.
Contact Us Size Chart Privacy Products Reviews
Copyright 2024 Rhinestones Etc. All rights reserved.




 RSS Feed