|
Having a piece of jewelry that can take you from everyday to elegant is a great accessory. This easy to make bracelet can do just that. For this project I used: Black Accents Sculpey clay (Twinkle Twinkle) 14 – 12mm silver jump rings 1- 4 mm silver jump ring Silver bar and ring clasp 12ss and 30ss Crystal Rhinestones Gem tac Wax tipped tool or tweezers Exacto or plastic knife Poker tool or toothpick 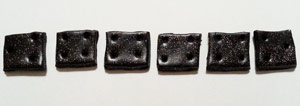 Begin by rolling out sculpey clay to 1/4 of an inch thickness. Using the exacto (or plastic) knife cut clay into 7 squares about 1 inch by 1 inch. Using the poker tool or toothpick, poke holes in each corner 1/8 – 1/4 of an inch from the end in 5 of the squares. In the other 2 squares, poke 2 holes in each corner and 1 hole into the middle of the opposite side. Place on a sheet of white paper and bake in a 275 degree preheated oven for 15 minutes. Remove and allow to cool. 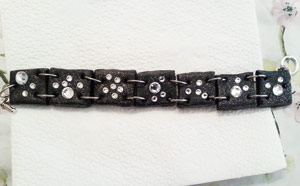 When cool, connect the square pieces together with the 12mm jump rings leaving the squares with 3 holes for the ends. Attach a 12mm jump ring to each of the squares on the ends. On one end attach the 4mm jump ring to the 12mm jump ring and on this end attach the bar. On the other end, attach the ring. Place a drop of glue about the size of the rhinestone on one of the squares and using the wax tipped tool or tweezers place the rhinestone in the glue and gently press down. Continue gluing rhinestones randomly on the black squares. Allow to dry flat for 24 hours. 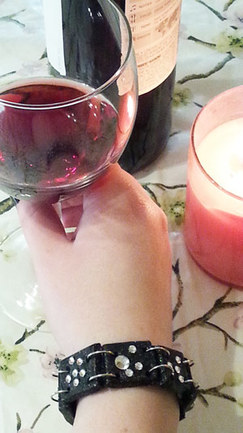 Fabulous with any outfit, your friends will be asking you about this bracelet.
Rhinestones and wax tipped tool can be purchase from: www.RhinestonesEtc.com Do you want to be notified of upcoming sales, new clearance, contests and giveaways? Would you like our free guide to gluing rhinestones without panic? Subscribe to our newsletter by clicking here.
0 Comments
St Patrick is the patron saint of Ireland but On St. Patrick’s Day, everyone is Irish. So cook up some corned beef and cabbage with Irish soda bread. Celebrate the luck of the Irish with this emerald shamrock pin. For this project I used: Green Sculpey clay Pin 12ss Emerald Rhinestones Gem Tac Wax tipped tool Shamrock template 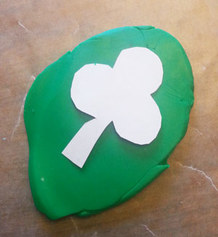 Roll out the green Sculpey clay to 1/4 of an inch thickness. Cut out shamrock shape using the template and an plastic knife. Place on a cookie sheet that has been lined with white paper. Bake in a preheated 275 degree oven for 15 minutes. Remove from the oven and allow to cool. 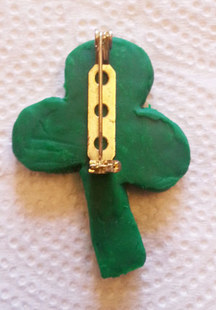 Once cool, place a drop of Gem Tac about the size of the rhinestone on the front of the shamrock. Using the wax tipped tool, pick up a rhinestone and place it in the drop of glue. Gently press down allowing the glue to cover the edges of the rhinestone. Continue placing glue drops and rhinestones until the shamrock is covered. Allow to dry for 24 hours. When the glue is completely dry, turn the shamrock over and using Gem Tac, glue the pin in place. Again, allow to dry for 24 hours. 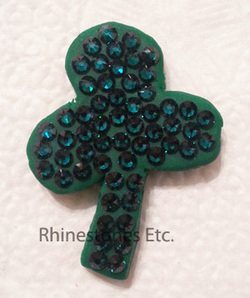 A beautiful glittering symbol of the Irish to help you celebrate!
Rhinestones and wax tipped tool are available from: www.RhinestonesEtc.com Do you want to be notified of upcoming sales, new clearance, contests and giveaways? Would you like our free guide to rhinestones? Subscribe to our newsletter by clicking here. My college attending daughter was in need of a dress for a solo in an upcoming concert. We headed over to Goodwill where we found an elegant but plain black velvet floor length gown (with the tags still on!) for $5. After some discussing several design ideas, we decided on a scatter pattern accentuating the keyhole in the bodice. For this project I used: Black dress 30ss Crystal Rhinestones flat back (approximately 15 pieces) 12ss Crystal Rhinestones flat back (approximately 5 gross) Gem-Tac adhesive Wax tipped tool or tweezers 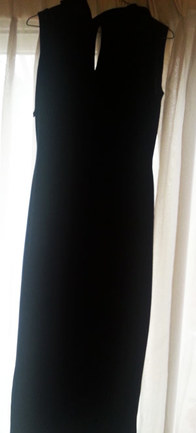 Begin by washing the dress to remove any chemical finish. When dry, lay dress as flat as possible on your work space. Pre-laying rhinestones out on the dress helps to determine the pattern. I began with outlining the keyhole and worked out from there. 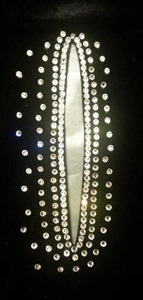 Place a drop of glue on the dress about the same size as the rhinestone. Using your wax tipped tool, pick up a rhinestone and place it in the center of the glue drop, gently pressing down. The glue should seep out a little covering the bottom sides of the rhinestone. Continue gluing in this manner until your pattern is complete.  From plain to spectacular you too can change any dress into a sparkling extravaganza! Feel free to send me pictures of your own masterpieces at [email protected]. I’d love to see them! Rhinestones are available from: www.RhinestonesEtc.com Do you want to be notified of upcoming sales, new clearance, contests and giveaways? Would you like our free guide to rhinestones? Subscribe to our newsletter by clicking here.  |
KarenI have been adding bling for over 20 years. Through my projects, I hope you find inspiration. Categories
All
Archives
July 2024
|

 RSS Feed
Home About Policies Return Shipping
Contact Us Size Chart Privacy Products Reviews
Copyright 2024 Rhinestones Etc. All rights reserved.
Contact Us Size Chart Privacy Products Reviews
Copyright 2024 Rhinestones Etc. All rights reserved.