|
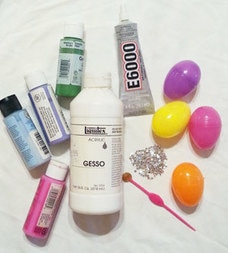
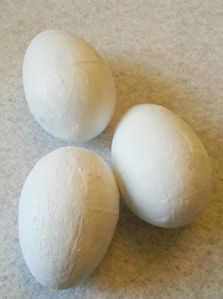
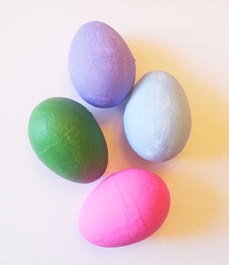
Easter Egg Craft My kids and I love to color Easter eggs, each of us trying to make the most artistic looking one. The trouble is our beautiful eggs will get eaten. These beautiful eggs are made from plastic eggs you can buy at the dollar store and can decorate your table for many years. For this project I used: Plastic eggs Acrylic Gesso (a paint primer) Acrylic craft paint E6000 Crystal rhinestones Wax tipped tool Paint the plastic eggs with Gesso and allow to dry completely. You may need to do several coats. Gesso is a paint primer prepares the surface for painting. It is available where ever art supplies are sold. When completely dry, paint the eggs with your favorite color using acrylic craft paint. Allow to dry completely. Decide on how you want to embellish your eggs. I chose several different patterns. You can use chalk to make marks to guide you as you glue your rhinestones. E6000 tends to be gloppy, so I like to squeeze the tube slightly over a paper plate and scrape the glue with a toothpick, applying it to the surface of the egg. E6000 provides a strong bond, so I use a drop of glue slightly smaller than the rhinestone. Using your wax tipped tool, pick up a rhinestone and place it in the glue, gently pressing down. Continue until your design is complete. Allow to dry for 24 hours. Easy to make and beautiful to look at, this striking table centerpiece will be the finishing touch to your Easter table.
Rhinestones and wax tipped tool are available from: www.RhinestonesEtc.com
0 Comments
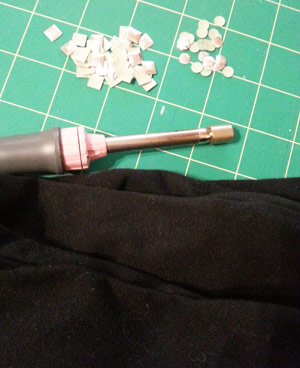
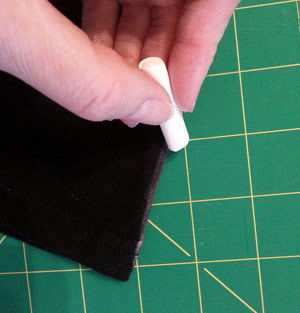
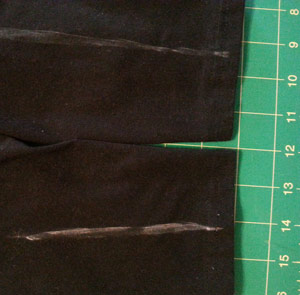
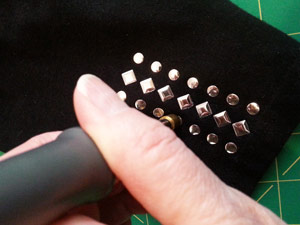
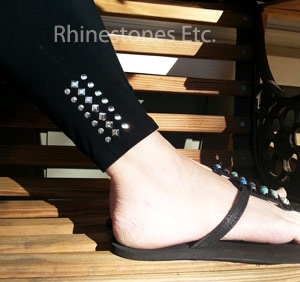
Hot Fix Metal Trim Embellished Leggings Comfortable and fashionable – leggings are the hot in item. And while they are a great fashion statement, you don’t want to look like everyone else. A great way to customize your leggings and have you stand out is to add metal studs. For this project I used: I pair of black leggings 14 - Square 7 mm silver hot fix metal studs 28 - Round 6 mm silver hot fix metal studs Hot fix tool Prewash your leggings before you start. If you leggings are made of a thinner material, place a piece of wax paper between layers to prevent gluing both sides of the legs together. Fold the bottom part of the legs in half so that the outside part of the legging, the part by your ankle, makes a fold. Use a piece of white chalk to mark the edge. This will serve as a guide line to keep your design straight. Unfold the legs and lay flat. Using the chalk lines as guides, lay out the metal studs to the design of your choice. I like just a little bit of bling so I embellished the bottom 3 inches. When you are happy with your layout, heat your hot fix tool. Gently press down on the metal studs for 12-15 seconds. Repeat process. If you are using an iron, set iron to the hottest setting without steam. Place a piece of white paper over design to prevent scorching. Gently press down for 10-15 seconds. DO NOT SLIDE the iron as this may move your metal studs. Allow to cool. Stunning eye catching leggings to wear at your next event and will guarantee that you to stand out.
Hot fix metal studs are available from: www.RhinestonesEtc.com |
KarenI have been adding bling for over 20 years. Through my projects, I hope you find inspiration. Categories
All
Archives
July 2024
|
Home About Policies Return Shipping
Contact Us Size Chart Privacy Products Reviews
Copyright 2024 Rhinestones Etc. All rights reserved.
Contact Us Size Chart Privacy Products Reviews
Copyright 2024 Rhinestones Etc. All rights reserved.


 RSS Feed