|
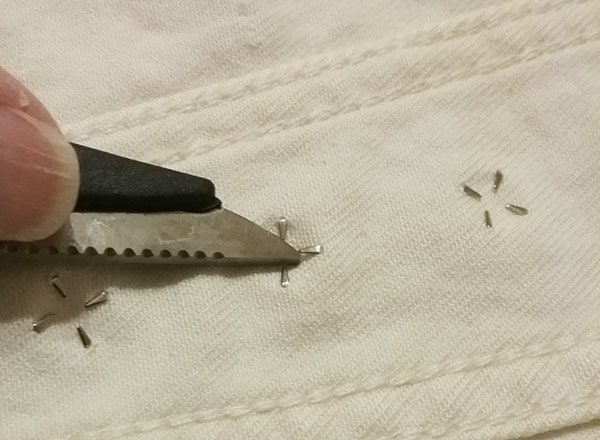
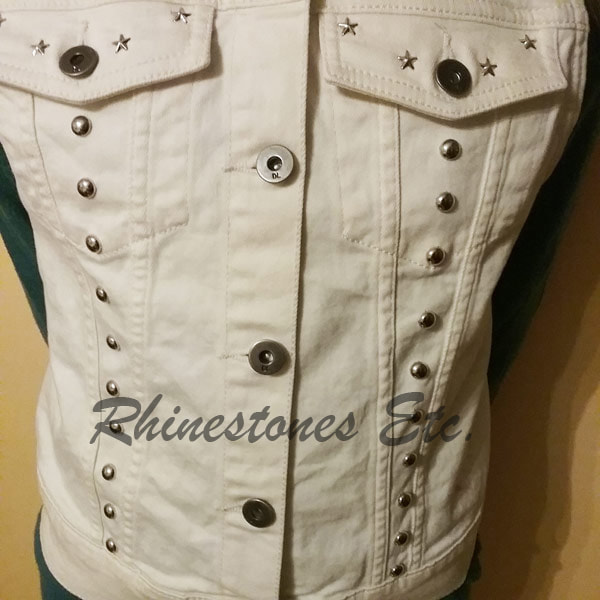
Denim vests can add that special touch to your casual outfit. While very cool looking, vests embellished with nailheads can break your budget. Afterall, you want to look fashionable without blowing your paycheck. What’s a girl to do? If you can find a vest on clearance you’ve won half the battle. Additionally, metal trim is relatively inexpensive and you can embellish the vest yourself. Then, you not only have fashionable clothing, you also save yourself a bundle of money. Read on to see how easy it is to do this yourself. For this project I used: 1 denim vest 6 silver star nailheads 20 Silver pearls nailheads Scissors/bedazzler Ruler 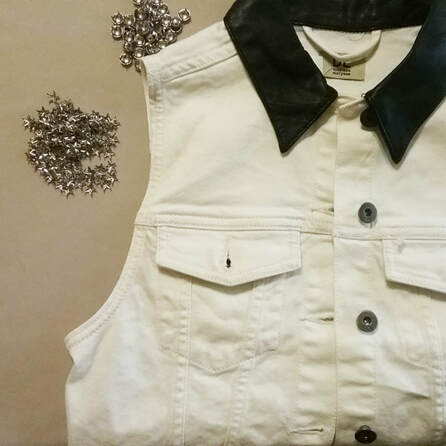 To Begin with, What Are Nailheads? Nailheads are decorative metal trim with metal prongs. Moreover, they are available in many shapes, colors, sizes and differ in the number of prongs. Originally made for the furniture business to attach upholstery to wood, these metal pieces migrated to the fashion industry. You can buy a bedazzler for about $20 to attach them to clothing. Similarly, you can also just use the flat blade of a scissor or flat head screwdriver to bend the prongs. 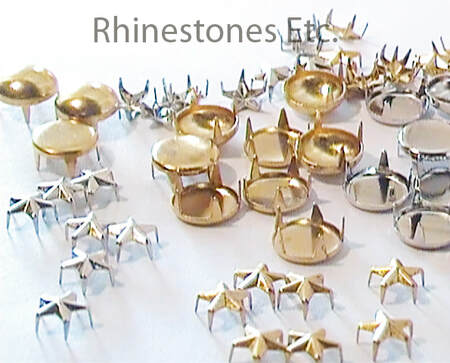 How to Use nailheads to Embellish a Denim Vest First, lay your vest out on a flat surface. Decide on how you want to arrange the nailheads on your garment. I put stars on the pocket flaps and I spaced the pearls 1 inch apart along the front. If you wish, you can measure and mark with chalk the placement of the trim. Now, pick up a nailhead and press it down so that the prongs penetrate the denim through to the other side. Flip your material over so that the prongs are facing up. Continue pressing from the front side so that the prongs have penetrated the material as far as possible. Next, bend the prongs using the flat end of the scissors. The prongs should lay flat and flush with the material. Continue adding the trim in this manner to your vest until you have completed your design.
Wow Your Friends Your denim vest is finished! Once you see how easy it is, you won’t want to stop. You can add nailheads to baseball caps, jeans, or anywhere else you need a little bling. Experiment with different shapes and sizes to make your wardrobe truly unique.
Do you need some metal trim to get started on bedazzling your wardrobe? Rhinestones Etc. has discount pricing on embellishments and excellent customer service. We love to help you sparkle!
0 Comments
Nailheads were originally used in the construction of furniture. Primarily, they were used to attach upholstery to the wooden frame. As time went on, they became more decorative. Today, nailheads can still be used in furniture as my friend, Julie, from Project Vintage shows in her re-imagined desk. To attach the nailheads to the desk, she simply tapped them in using a hammer. And while nailheads are still used as a decorative touch in furniture, they are also used to embellish clothing.  What Are Nailheads? Imagine a shiny decorative metal head with prongs underneath. The number of prongs varies from 2 to 8 based on the size, shape and manufacturer of the nailhead. In addition, the length of the prongs or legs varies as well from 1/16 to 3/16 of an inch. When you are bedazzling a thick material such as denim, or using the nailheads for furniture, you will want the longer leg (prong). You can use the shorter leg nai heads on thinner fabrics. Also, the size of the decorative head varies in size as well and is available in many different shapes. Browse the internet to find round flat, pearl (cone), star, square, dome, bar, flower or diamond shaped nailheads. Some of the colors are available are black, bronze, silver, gold, gunmetal, copper and antique finishes. You can mix and match shapes, sizes and colors to create your own unique look. 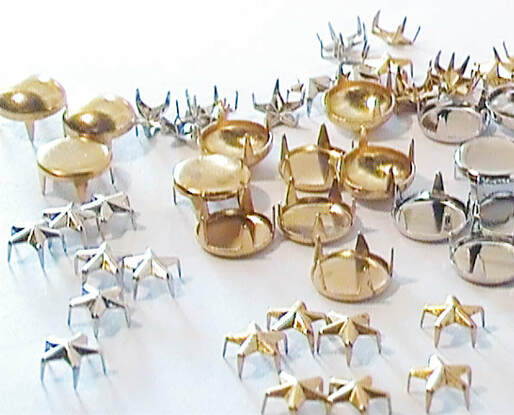 How are Nail heads Used in Clothing Denim looks especially fresh when embellished with nailheads. Try adding nailheads to jeans jacket for a bold fashion statement. Application of nailheads is easy. If you plan on applying a lot of nailheads, you may want to invest in a bedazzler. Prices start at about $20. However, nailheads can easily be applied by hand as well. Simply insert the prongs into the fabric. Using the flat end of a scissor, bend all the prongs to lay flat against the material. It’s that simple. 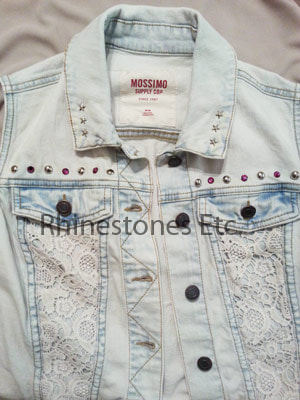 So, what are you waiting for to get started? How about free shipping on your first purchase of nail heads from Rhinestones Etc? Rhinestones Etc has discount pricing on all embellishments and fantastic customer service! Browse the store for the finest selection. Today, I have my good friend Julie Hickman of Project Vintage writing about her project using nailheads. Her project involves taking an old desk, painting and upholstering the seat to update it. Suspending Disbelief by Julie Hickman “Others have seen what is and asked why. I have seen what could be and asked why not. ” ― Pablo Picasso Part of what I love about finding vintage furniture is that I immediately look beyond what's in front of me. When I stumble across a piece that screams out for my attention, I recognize where it has been. It has most likely been passed down among various family members, given away to friends, survived many moves, sold at garage sales and flea markets until it finally arrives before my eyes. Everyone can see that it is worn. It has the visible scratches, nicks, and dents that come with years of use, but for me, that is only the beginning. The state that it comes in no longer has to be its reality. Suspending the belief that it has to keep its present appearance and imagining something no one else can see is pure fantasy, free from rules or guidelines. A place that only exists in the imagination where nothing is wrong, only different. I met Hope after several exchanges regarding the antique school desk she had listed for sale online. I had seen desks like this one many, many times before, but for some reason, something was telling me to it was the right time to take this one on as a project. There are times when the people selling these items are happy and eager to tell you the history of the piece and other times not. Luckily, Hope was the former and not the latter. It so happened that her husband had kept the desk that was given to him by his father, which was most likely was passed down to him. This desk is in wonderful condition which is always great to see and good to know that it was taken such good care of. That being said, there is no reason why it must stay the same. Opening up to new ideas of what it can be and creating a new reality for this desk is what I love to do. Looking past what I see and replacing it with a dream is an ability I never want to lose. This particular project included some beautiful nailheads that I purchased from Rhinestones Etc., one of my favorite people and favorite shops. Below, I am going to show you just how easy it is to incorporate in any décor. 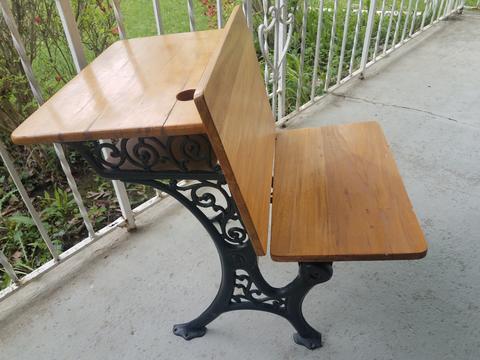 Items you will need: Standard staple gun 5/16" 8mm Universal Fit Staples Acid-Free, High Tack, Multi-purpose Spray Adhesive Quilt batting available at any craft store API's Crafter's Pick Glue 8.54 mm Gold Pearl 4 prong Nailheads (from Rhinestones Etc.) Hammer Scissors 1 yard of fabric of your choice 2 yards of fabric trim 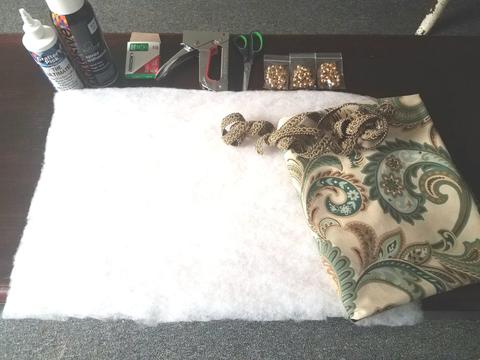 Upholstering A Desk Seat After I disassembled the desk, I took the existing backboard and glued on some loose quilt batting to the front using some spray adhesive. I then cut the fabric to surround one side of the backboard. I make sure to cut the fabric a little larger than needed to give myself plenty to work with. Making the fabric taut around all sides is necessary to then staple the fabric in place on the backboard. 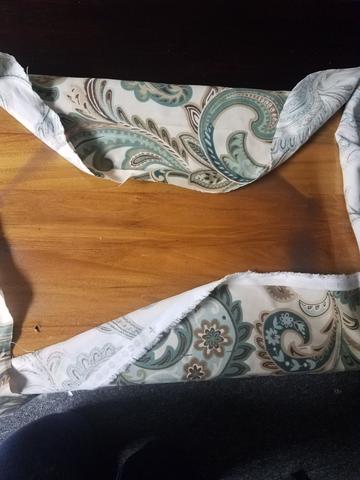 Once the fabric is stapled in place I then glued the fabric trim completely around the backboard using API's crafter's pick glue. After the trim had adhered to the fabric, which was pretty immediate, I then went to the fun part! Putting on the beautiful gold nailheads I picked up from Karen at Rhinestones Etc.  These nailheads were extremely easy to use precisely because they are 4 pronged. These prongs made them steady while reaching for the hammer to tap into the backboard.  After putting the first nailhead in place, I then continued tapping in the nailheads at one-inch intervals until I completely surrounded the backboard. 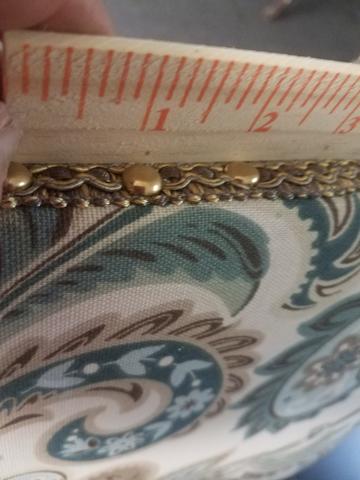 Well, there you have it! Using these gold nailheads was just what my project needed to give it that extra sparkle and shine. I'm sure you can find endless ways to incorporate them into your home's decor. This is how my desk project turned out and I couldn't be more pleased to give it a whole new reality. 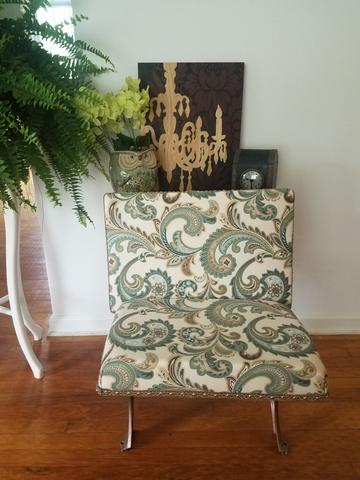 I'll never be able to express all that goes on in my head about the creative process piece by piece, but that's what makes it magic! 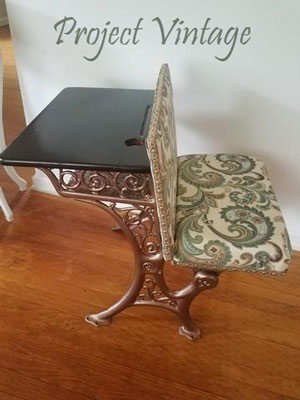 Julie has this re-imagined desk with new paint and upholstery for sale in her shop along with many other beauties. To see more of Julie's upholstering work or some of her other beautiful creations, visit her shop at: https://projectvintageus.com
Nailheads are available from: www.RhinestonesEtc.com. |
KarenI have been adding bling for over 20 years. Through my projects, I hope you find inspiration. Categories
All
Archives
July 2024
|


 RSS Feed
Home About Policies Return Shipping
Contact Us Size Chart Privacy Products Reviews
Copyright 2024 Rhinestones Etc. All rights reserved.
Contact Us Size Chart Privacy Products Reviews
Copyright 2024 Rhinestones Etc. All rights reserved.