|
How to make your own festive Christmas tags Wrapping presents is fun so why not go full out with special, personalized DIY Christmas tags? Easy to make, these tags are festive and embody every aspect of the Christmas season! For this project I used: Green card stock Music sheet Glue (glue stick and craft glue) Instant coffee Silver ribbon Silver or gold metal studs (stars and 4 mm round studs) 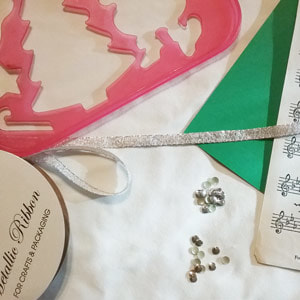 First, I made copies of some music sheets I had. If you don’t have any you can probably find some sheet music at your local library and make copies. Next, I stained them with coffee to give the music sheets an old time look. To stain with coffee, place about ¼ cup of instant coffee on a cookie sheet. (I used fresh ground coffee and that worked as well). Pour boiling water into cookie sheet about halfway to the top edge of cookie sheet. Allow to cool to lukewarm. Place your music sheets into the coffee water making sure to coat both sides with coffee water. Remove and place on a clean cookie sheet. To dry, you can use 1 of 2 methods. You can dry with a hair dryer or like I did place in the oven. Watch your papers carefully as you do not want to start a fire. Place in a preheated 200 degree oven for 5 -10 minutes, again watching carefully and removing as soon as dry. 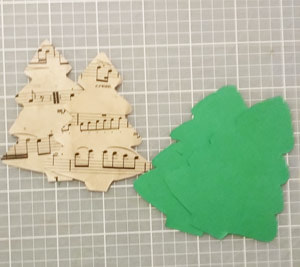 Cut out Christmas tree shapes from the music sheets and then slightly larger Christmas tree shapes from the green card stock.  Glue the silver ribbon to the top using a glue stick and then glue the music sheet Christmas tree on top. 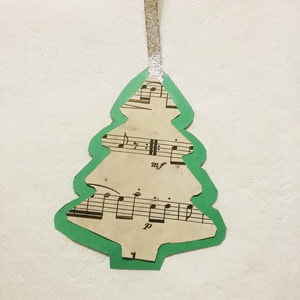 Embellish the tag with the metal studs gluing a star at the top and scattering the 4 mm circles using craft glue. 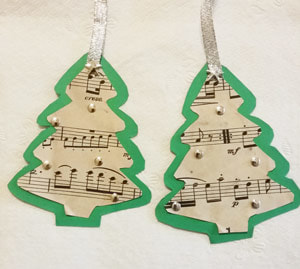 Don't just stop with the fancy wrapping paper; create these DIY Christmas tags as a final touch to any gift. Your recipient will love it! 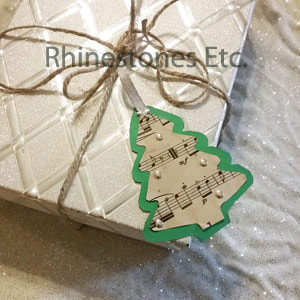 Aren't these tags cute? Need some bling to make your own? You can get free shipping off your first purchase from Rhinestones Etc. by clicking the button above.
0 Comments
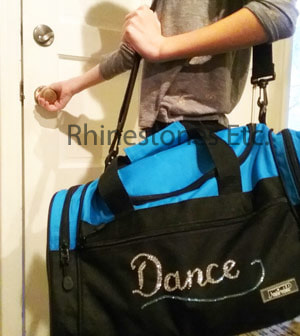
Your daughter loves to dance but has outgrown the first dance bag you bought her when she was 4. However, you can take an ordinary duffle bag and bling it out to turn it into something special. Use our rhinestone template and follow our step-by-step instructions to create a bag to match her personality. Using A Rhinestone Template Makes Blinging Easier Blinging out an item by spelling out a word can seem intimidating. Some fonts like script can be especially challenging. For example, it can be difficult to keep all the letters the same size and arrayed in a straight line. However, using a rhinestone template can save you time and produce satisfying results. Many people invest in professional tools like software and cutting machines. If you plan on selling bedazzled clothing, this may be the route to go. Yet, if you only need to bling out one item, this can be an expensive project. Instead, you can create a template using a few simple tools. Supplies Needed For this rhinestone project I used:
Generally, beginners have questions about the best rhinestone and glue for a project. Usually, the amount of sparkle you want will usually dictate the type of rhinestone. Some manufacturers make rhinestones from acrylic, others from glass or crystal. Consequently, each material has a different amount of brilliance. Ultimately, the best glue for your rhinestone project depends on the surface of the item you’re blinging. Typically, a fabric with a rougher surface will create a stronger bond than a smooth material. Furthermore, manufacturers use a variety of fabrics to construct duffel bags including leather, canvas, and nylon. Thus, check the rhinestone glue manufacturer’s recommendations for suitable fabrics. Typically, you want a glue that dries clear, is washable, and is good for rhinestones. 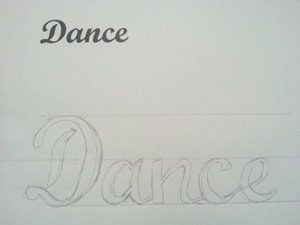
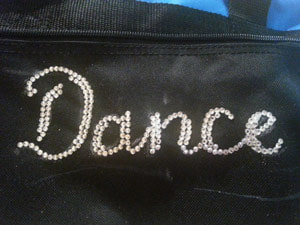
Instructions To Bling Out A Dance Bag Start by downloading the rhinestone template. You may need to adjust the size of the lettering depending on the size of the bag you’re blinging. I created a template spelling out the word “Dance”. The word measures 8.5 inches in length with the capital letter 2.875 inches, and lowercase letters 1.25 inches in width. Cut out the darkened areas of the template using scissors and/or an X-Acto knife and cutting mat.
Next, lay the duffel bag on your work surface, getting it as flat as possible. Using a ruler, mark the side of the bag with chalk both horizontally and vertically. With these marks, position the template in the center of the side of the bag. Then, using the chalk, trace the word “Dance” and the swirl underneath. Once you remove the template, check your markings to ensure you have it centered. 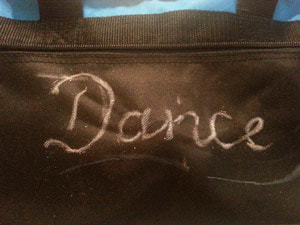
Beginning with the capital letter, place a drop of glue slightly smaller than the rhinestone on the chalk mark. Then, using your wax-tipped tool, pick up a rhinestone and gently press it into the glue. Some of the glue should seep out from the sides to prevent the rhinestones from peeling off. Gem-Tac dries clear so don’t worry if you accidentally use too much. Continue gluing using the chalk marks and the smaller word “Dance” as a guide. Allow to dry for 24 hours. Once the glue has cured, you can use a little bit of water to remove the chalk guideline marks. 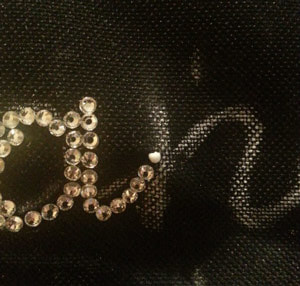
Typically, dance bags like these are costly, but you can make yours for a small fraction of the cost. Your daughter will love her new dance bag and you will love how easy it was to make.
Best Place to Buy Rhinestones
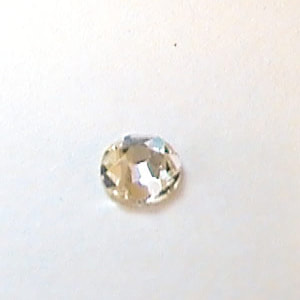
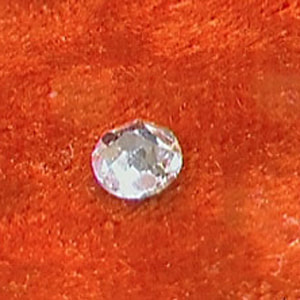
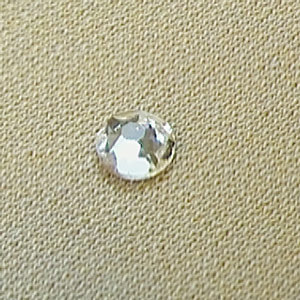
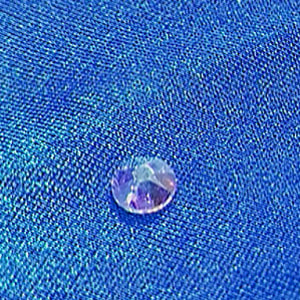
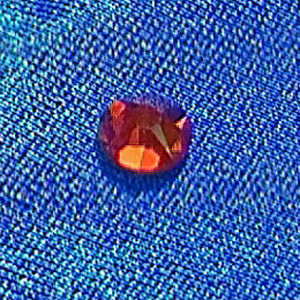
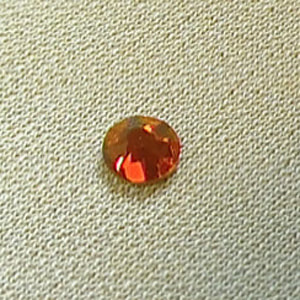
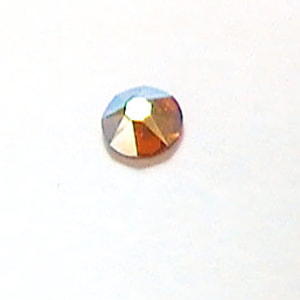
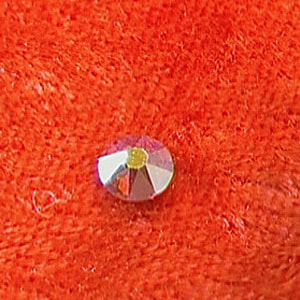
Since 2011, Rhinestones Etc. has been selling quality embellishments. We have excellent customer service and fast processing times. Plus, we have a huge inventory of rhinestones in every color imaginable. We want to be your source for bling! Browse our online store to find your color! Which rhinestone color should I use? I sometimes get questions about selecting the perfect color for specific projects. Generally, it’s more of a preference of how you want your piece to look, but there are a few things to consider when selecting your color. If possible, use a rhinestone color chart to help you with your choice. All rhinestones provide sparkle but choosing the color will determine whether the rhinestone will stand out or blend in with the surrounding color. Crystal is a clear rhinestone that will look great with any color. Here, crystal is shown on different color backgrounds.
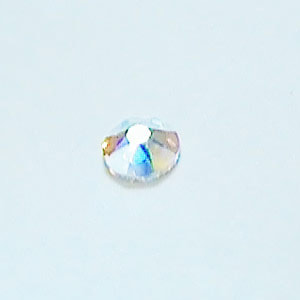
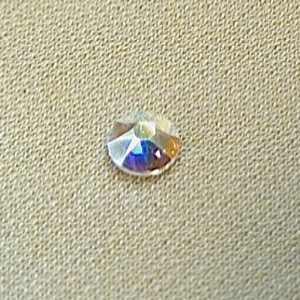
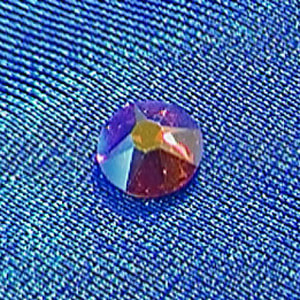
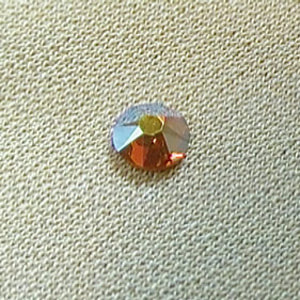
Crystal AB is a clear rhinestone with an Aurore Boreale (AB) coating that gives the rhinestone a rainbow look. AB rhinestones are great at reflecting off the surrounding color.
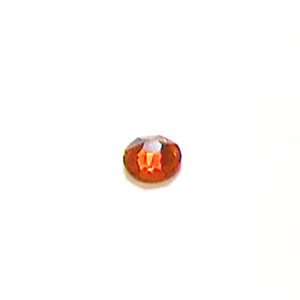
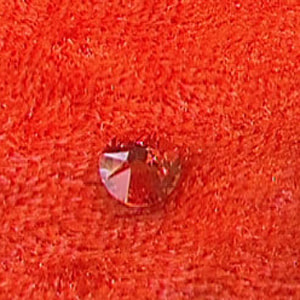
Choosing a rhinestone the same color as the background will provide sparkle while blending in. A contrasting color will stand out while providing sparkle.
AB colors are the original color with the AB coating and this adds a bit of pop to the rhinestone so that how the light hits the rhinestone will depend on whether it stands out or blends in.
I hope my brief explanation of colors helps you with your next project. If you still have questions, feel free to email us at [email protected]
|
KarenI have been adding bling for over 20 years. Through my projects, I hope you find inspiration. Categories
All
Archives
July 2024
|


 RSS Feed
Home About Policies Return Shipping
Contact Us Size Chart Privacy Products Reviews
Copyright 2024 Rhinestones Etc. All rights reserved.
Contact Us Size Chart Privacy Products Reviews
Copyright 2024 Rhinestones Etc. All rights reserved.