|
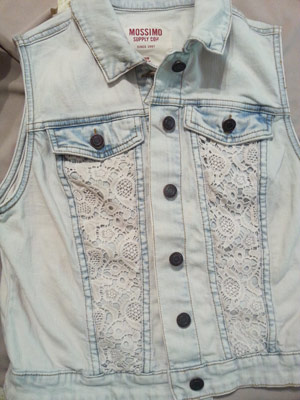
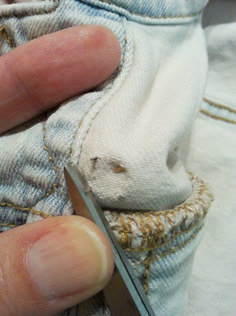
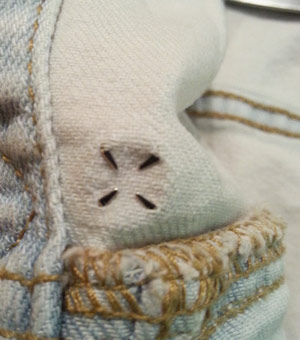
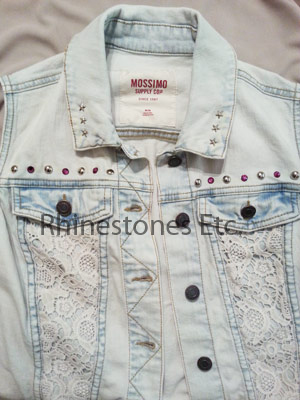
Using Nailheads on Denim I love a great bargain and was very excited when I snagged this denim vest for less than $6 at Target. Although already decorated with lace inserts, I still wanted more bling. For this project you need: 6 - 34ss Fuchsia Rose Pins 6 - 8.5 mm silver star nailheads 8 - 8.54 mm silver pearl nailheads Pair of scissors Rose Pins feature a Swarovski Elements Rhinestone attached to a stainless steel nailhead back. They work great with thicker denim material. I decided upon a simple straight line design and drew a chalk line as a guide to keep the embellishments on an even line. Then simply take a nailhead and press the prongs through the material so that the prongs are on the inside of your garment. Using the flat blade of a pair of scissors, bend the prongs towards the center of the nailhead. Continue adding rose pins and nailheads until your design is completed. This is how my vest looks. How would you have embellished it? Drop me a line and tell me what you did.
Nailheads and rose pins are available at: www.RhinestonesEtc.com Do you want to be notified of upcoming sales, new clearance, contests and giveaways? Would you like our free guide to rhinestoning? Subscribe to our newsletter by clicking here.
0 Comments
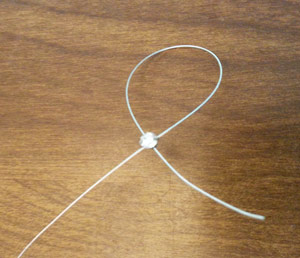
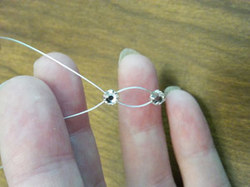
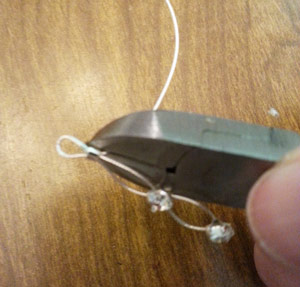
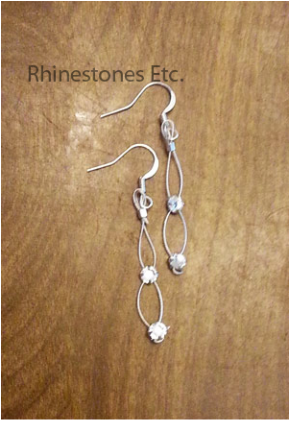
Who doesn’t love sparkly, dangling earrings? These are simple earrings to make for a beginner because I was able to make them and I know very little about jewelry making. For this project you need: Flexible jewelry wire (I used silver 7 strand) 4 Crystal 16ss Swarovski Elements Rose Montees 2 silver crimp beads 2 silver fish hook earrings Wire cutters Crimping tool Rose Montees are rhinestones with channels in the back for stringing. Begin by cutting a piece of wire about 6 inches long. Thread one end of the wire through one of the channels then take the other end of the wire and thread it through the cross channel so that your wire crosses and looks like the picture above. Pull the wire ends through until you can no longer see the bottom loop and the wire fits flush with the rose montee. Take another rose montee and thread it through following the same method stopping about ¾ of an inch from the bottom rose montee so that there is a small loop showing between both rose montees. Thread a crimping bead through both wires and then your fish hook earring. Thread your wire back through your crimping bead and pull these 2 wire ends until your loop and fish hook are about ¾ of an inch from the middle rose montee. Crimp your bead and cut off the excess wire. Repeat these steps with the other earring. When you are finished, you have a light, sparkly pair of earrings for everyday or that special occasion!
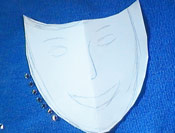
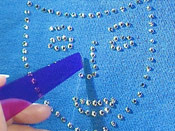
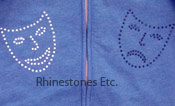
Swarovski Rose Montees are available at: www.RhinestonesEtc.com Do you want to be notified of upcoming sales, new clearance, contests and giveaways? Would you like our free guide to rhinestoning? Subscribe to our newsletter by clicking here. One of my daughters loves theater and she participates in many community theater productions. To reflect her love, she wanted me to put rhinestones in the shape of theater masks on a jacket for her birthday. For this project I used: One jacket 12ss Crystal Rhinestones 88 pieces 12ss Jet Rhinestones 88 pieces Gem-Tac Pick n Stick tool or tweezers Before I begin, let me say that all the pictures are of the same jacket. I worked on this in different rooms and the lighting was brighter in one room and so the color looks off. To begin, I sketched out a template of a theater mask on white copy and positioned this on the jacket. I placed the rhinestones along the outside of the template using a spacing of ¼ of an inch. I removed the template, adjusted the spacing and alignment of stones and then began gluing using Gem Tac. First, I removed stone and placed a drop of glue about the same size as the rhinestone in its spot. Then using the Pick n Stick tool (you can use a tweezer), I placed the rhinestone in the drop of glue and gently pressed down. I continued all the way around until the outside of the mask was done. I did the same for the other side of the jacket using the Jet rhinestones. Then I positioned rhinestones on inside of the masks outlining the eyes, nose and mouth. These too were glued down using the same technique as described above. Let the jacket dry flat for 24 hours. There you have it – a one of a kind dazzling jacket. My daughter loved her jacket and you will too!
Rhinestones and Pick n Stick tool are available from www.RhinestonesEtc.com Do you want to be notified of upcoming sales, new clearance, contests and giveaways? Would you like our free guide to rhinestoning? Subscribe to our newsletter by clicking here. |
KarenI have been adding bling for over 20 years. Through my projects, I hope you find inspiration. Categories
All
Archives
July 2024
|
Home About Policies Return Shipping
Contact Us Size Chart Privacy Products Reviews
Copyright 2024 Rhinestones Etc. All rights reserved.
Contact Us Size Chart Privacy Products Reviews
Copyright 2024 Rhinestones Etc. All rights reserved.

 RSS Feed