|
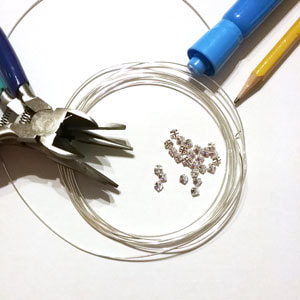
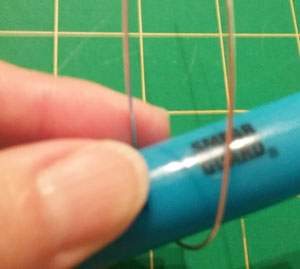
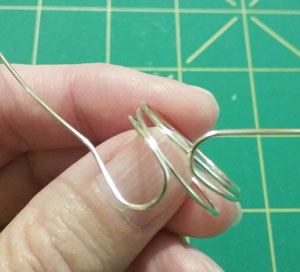
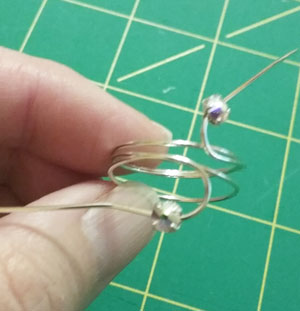
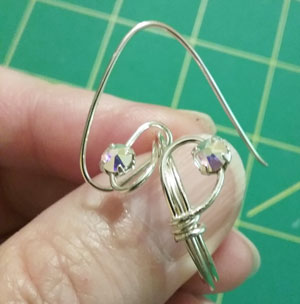
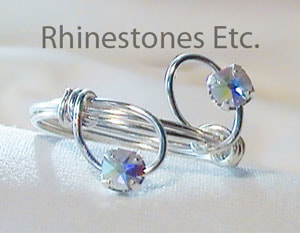
If you’ve been following my blogs, you know I love jewelry. However, I can’t afford to buy most of the pieces I love as there are way too many of them. Recently, I’ve unleashed a new love for rings and this DIY ring is a variation on a previous blog tutorial. Sometimes working with wire can take a little practice, so don’t get discouraged. I usually have to try the ring twice before I am happy with the finished project. For this project I used: 22 gauge silver wire Jewelry pliers (needle nose, wire cutters) Highlighter Pencil 2 Crystal AB 16ss Rose Montee How to Make a DIY Ring Begin by cutting a piece of 22 gauge wire 12 inches in length. Take your highlighter (or any other household item the equals the circumference on your finger). Wrap the wire around the highlighter twice. Once you’ve wrapped it twice, remove it from the highlighter. Then take a pencil and bend the wire into a loop. Slide a Crystal AB 16ss Rose Montee onto the end of each wire and slide to the curve in the wire. Using your jewelry pliers, bend the end of the wire to begin wrapping the ends around the base of the ring, without losing the loop shape holding the Rose Montees. Continue wrapping, tightening the coils as you go. Wrap the wire about 3 or 4 times around and cut the end if necessary. Squeeze the ends with the pliers, tucking them in. Repeat for the other side. Try different variations of size of the Rose Montees and wrapping techniques to create new and beautiful jewelry. Once you’ve made a few DIY rings, you’ll get the hang of it and see how easy and pretty they turn out.
Rose Montees are available from: www.RhinestonesEtc.com
0 Comments
Your comment will be posted after it is approved.
Leave a Reply. |
KarenI have been adding bling for over 20 years. Through my projects, I hope you find inspiration. Categories
All
Archives
July 2024
|
Home About Policies Return Shipping
Contact Us Size Chart Privacy Products Reviews
Copyright 2024 Rhinestones Etc. All rights reserved.
Contact Us Size Chart Privacy Products Reviews
Copyright 2024 Rhinestones Etc. All rights reserved.

 RSS Feed