|
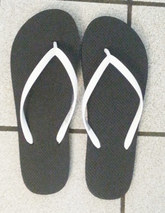
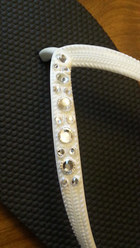
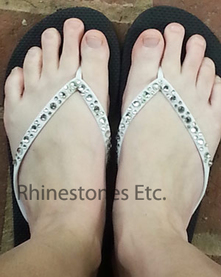
Warm weather is just around the corner and it would not be summer without flip flops. But why settle for plain boring flip flops when you can sparkle in the sunshine? Rhinestone flip flops would even be great for beach weddings. For this project I used: 1 pair of flip flops 30ss and 12ss crystal rhinestones E6000 Wax tipped tool After deciding on your pattern, place a drop of glue on the band on the flip flops. E6000 tends to be a bit gloppy. So I like to squeeze some glue over a paper plate and use a toothpick to place the glue. Us a drop of glue slightly smaller than the rhinestone. Using the wax tipped tool, pick up a rhinestone and gently press it into the glue. My pattern is 1- 30ss, 2- 12ss side by side, 1-30ss and so on. Continue gluing in this manner. I stopped about 2 inches from the bottom of the strap. Allow to dry for 24 hours. Wow! You will certainly attract attention with every step you take!
Rhinestones and wax tipped tool are available from www. RhinestonesEtc.com Do you want to be notified of upcoming sales, new clearance, contests and giveaways? Would you like our guide to Gluing Rhinestones Without Panic? Subscribe to our newsletter by clicking here.
0 Comments
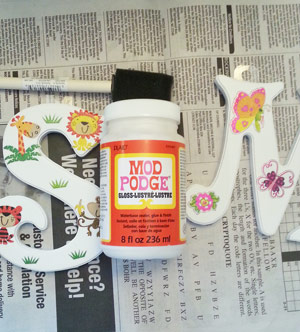
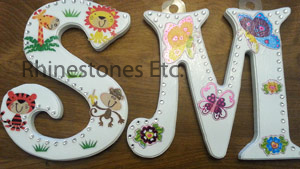
Your daughter is your princess and you want her bedroom to reflect that. One way to do that is to decorate her room with a sparkly personalized initial. For this project I used: 5 inch wooden pre-painted white wooden letter Mod Podge Sponge brush Stickers 12ss crystal rhinestones Gem tac Wax tipped tool or tweezers Begin by applying the stickers to the letter. After applying stickers, apply a coat of Mod Podge using the sponge brush and allow to dry completely. Mod Podge will seal the stickers as well as providing a finish. Apply several coats according to your preference, allowing to dry completely between coats. Once you have finished applying Mod Podge, you can lay out your rhinestones to decide how you want to accentuate the letters. I like the look of a line of rhinestones along one side of the letter. Apply a drop of glue on the letter about the same size as the rhinestone and using your wax tipped tool, pick up the rhinestone and place it in the glue, gently pressing it down. Continue gluing rhinestones until your letter is embellished. Allow to dry flat for 24 hours. A beautiful, personalized letter that your daughter will love!
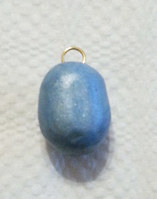
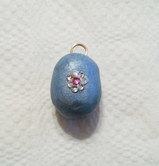
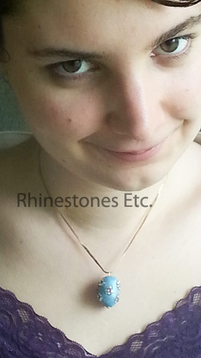
Rhinestones and wax tipped too are available from: www.RhinestonesEtc.com Do you want to be notified of upcoming sales, new clearance, contests and giveaways? Would you like our guide to Gluing Rhinestones Without Panic? Subscribe to our newsletter by clicking here. In 1885, Russian Emperor Alexander III commissioned Faberge to craft a jeweled egg for his wife as an Easter gift. Alexander’s delight of Faberge’s work was the starting point of a tradition that scanned 32 years. You can create your own smaller version of a jeweled egg that will be the pendant and focal point of any outfit. For this project I used: Light blue sclupey clay 4 mmJump ring Varnish Paint brush 6ss crystal rhinestones 9ss Sapphire, tanzanite and rose rhinestones Gem tac Wax tipped tool or tweezers Begin with a small ball of scupley clay about 3/4 inch in diameter. Shape it into an oval or egg shape. Press a jump ring into the top of the egg about halfway up the jump ring. Bake in a preheated 275 degree oven for 15 minutes. Remove from the oven and allow to cool. When cool, paint a coat of varnish on the egg and allow to dry. When dry, place a drop of glue about the size of the rhinestone and gently press a rhinestone into the drop of glue. Continue gluing rhinestones on one side of the egg. Allow to dry for 24 hours and then glue rhinestones on the other side. Allow to dry for 24 hours. Thread a chain through the jump ring and your necklace is complete. Wear this anytime you want to add some sparkle.
Rhinestones and wax tipped tool are available from: www.RhinestonesEtc.com Do you want to be notified of upcoming sales, new clearance, contests and giveaways? Would you like our free guide to gluing rhinestones without panic? Subscribe to our newsletter by clicking here. |
KarenI have been adding bling for over 20 years. Through my projects, I hope you find inspiration. Categories
All
Archives
July 2024
|
Home About Policies Return Shipping
Contact Us Size Chart Privacy Products Reviews
Copyright 2024 Rhinestones Etc. All rights reserved.
Contact Us Size Chart Privacy Products Reviews
Copyright 2024 Rhinestones Etc. All rights reserved.

 RSS Feed