|
While your wedding day is a big event to plan, you also have some smaller events to organize. There’s the bridesmaid luncheon, bachelorette party, and rehearsal dinner. And for each of these events, you need something to wear. What better way to announce to the world the upcoming event than by wearing a blinged-out “bride” shirt. Perhaps you’ve seen these shirts in major retailers. Generally, they are expensive and made with cheaper rhinestones without much sparkle. However, you can make your own using our rhinestone template and your choice of rhinestones. 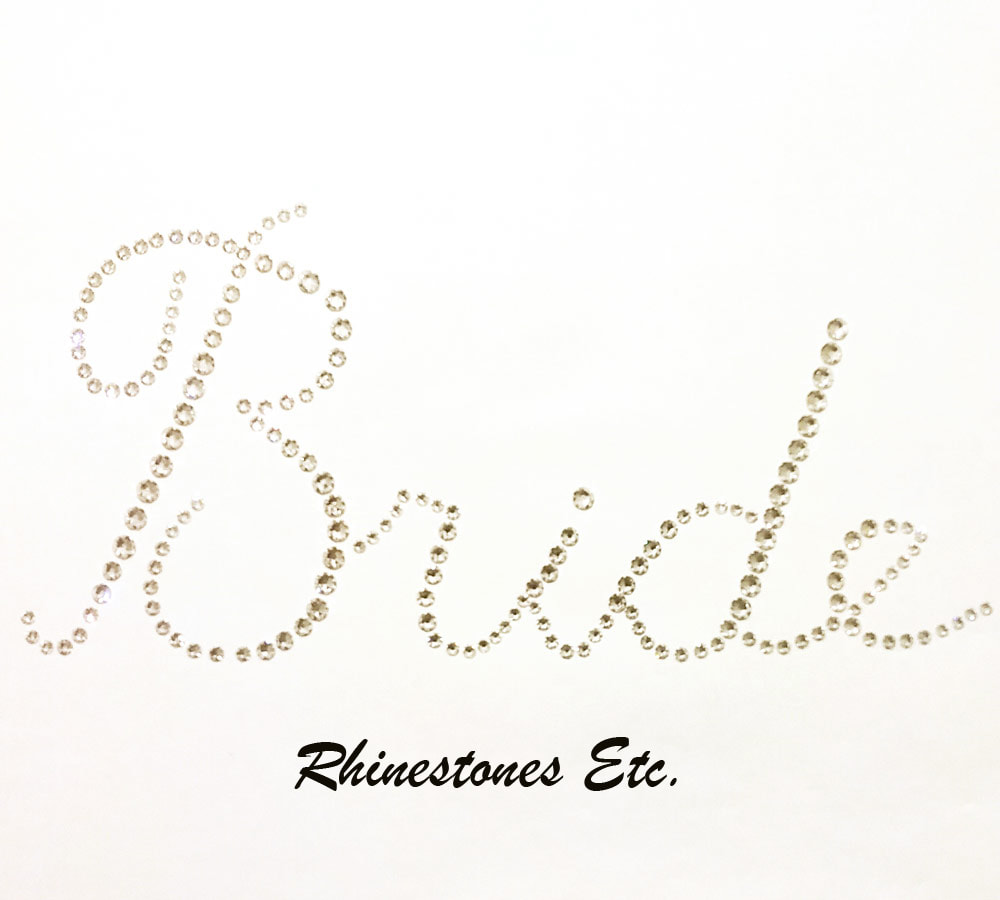 How to Use Our Rhinestone Template Simply go to our website and download the template. Our design has all the size rhinestones listed so you know exactly what you need and how many. Moreover, you can experiment by using all the same size or different sizes. Generally, these bride shirts use crystal rhinestones, but you can choose any color you want. Next, decide on whether you want to use hot fix or flat back (glue-on) rhinestones. Hot fix rhinestones have glue already on them while flat backs require glue. Both of these types of rhinestones work great for this type of project. Even if you’ve never undertaken this type of project before, you can do this easily with our instructions. Finally, always make sure to pre-wash your garment before adding rhinestones. Using Hot Fix Rhinestones To start with, you’ll need some transfer paper if you’re going to use hot fix rhinestones. Peel the opaque piece off of the transfer paper and put it aside. Lay the clear paper, sticky side up on top of the template. Now lay the rhinestones, facet side down, on the sticky paper, placing the rhinestones as indicated. Once you have all the rhinestones placed, you can iron it on to your t-shirt. Heat your iron to the hottest setting without steam. Lay your shirt flat on the ironing boards. Position the rhinestone transfer on the shirt, the flat side of the rhinestone touching the shirt. With the iron, press down on rhinestone transfer, holding for 12-17 seconds. Lift the iron up and if necessary, press down on another part of the transfer. DO NOT slide the iron as this may dislodge and move the rhinestones. Once you’ve done this for the entire transfer, allow to cool completely. Then peel off the clear sticky part and you have your finished shirt. 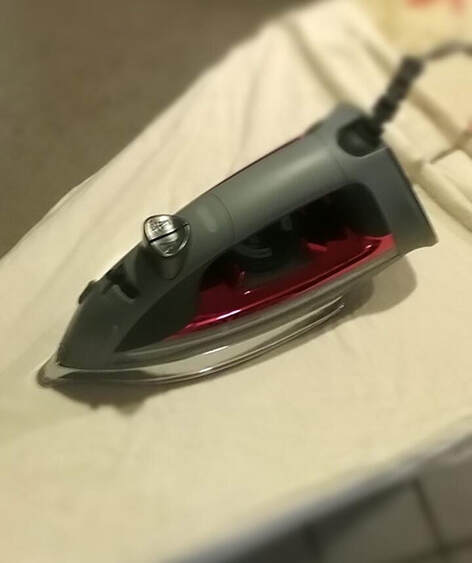 Flat Back Rhinestones On the other hand, flat back rhinestones require an adhesive. You can find several at your local craft store. My favorite fabric glue for rhinestones is Gem-Tac. It dries clear, is washable and is easy to apply. The technique for flat back rhinestones is different. First, lay the shirt as flat as possible on your work surface. Using the template as a guide, lay all the rhinestones on the shirt. Then, one at a time, pick up a rhinestone placing a drop of glue in its place. Next, gently press the rhinestone into the glue drop, allowing some of the glue to seep out the sides. This “extra” glue forms a seal which helps protect the rhinestones from peeling off. Continue removing one rhinestone at a time and gluing into place until your design is complete. Allow to dry flat for 24 hours. 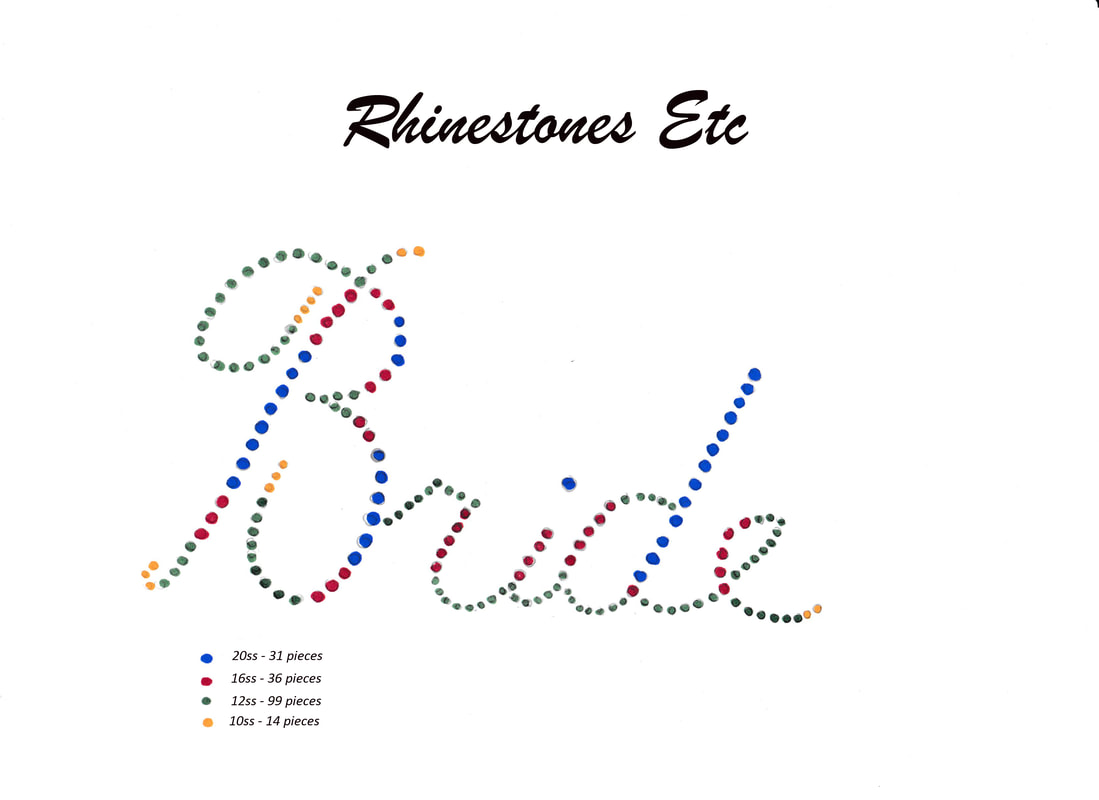 You’ve just saved yourself some money by making your own blinged-out bride shirt. Best of all, our rhinestone template is free! And if you need rhinestones, check out Rhinestones Etc. competitive pricing on rhinestones! We have excellent customer service and want your complete satisfaction with each purchase. Browse our online store to find your color!
0 Comments
Your comment will be posted after it is approved.
Leave a Reply. |
KarenI have been adding bling for over 20 years. Through my projects, I hope you find inspiration. Categories
All
Archives
July 2024
|

 RSS Feed
Home About Policies Return Shipping
Contact Us Size Chart Privacy Products Reviews
Copyright 2024 Rhinestones Etc. All rights reserved.
Contact Us Size Chart Privacy Products Reviews
Copyright 2024 Rhinestones Etc. All rights reserved.