|
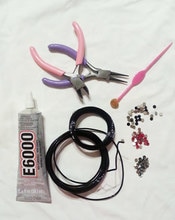
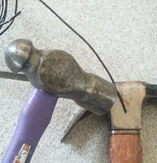
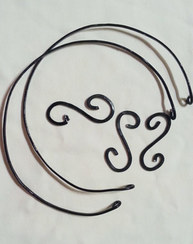
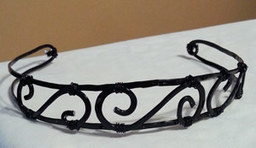
Do it yourself jewelry Feeling a little edgy and bold? Want to turn heads at your next event while still displaying a bit of sparkle? For this project I used: 12 and 24 gauge black wire Amethyst and Crystal 12ss rhinestones Hammer Wire cutters Jewelry pliers E6000 Ribbon Begin by cutting two pieces of the 12 gauge wire about 12 inches long. Cut 3 smaller pieces about 3 ½ -4 inches long. Jewelry makers will use a steel bench block for hammering the wire which I do not have. I used a DIY hack which worked for my purpose. I took 2 hammers, using the head of one as the bench block on which I hammered the wire. Using the needle nose jewelry pliers, bend the ends of the longer pieces to form a small semicircle facing back to the wire so that the ends are tucked under. Hammer these longer pieces until flat. Then shape into a circle about 5 inches in diameter. Shape the shorter pieces into “s” shapes and then hammer them flat. Cut pieces of the 24 gauge wire about 2 inches in length. Attach one of the “s” shapes to one of the longer wires placing it at of the center and wrapping the 24 gauge wire around the 12 gauge wire. Do the same for the other pieces. Then attach the “s” shapes to the remaining 12 gauge wire. Finally, wire wrap the ends together of the longer pieces. Place a drop of E6000 about the size of the rhinestone on the flattened wire. Using a wax tipped tool, place a rhinestone in the drop of glue, gently pressing the rhinestone into the glue drop. Continue gluing. Allow to dry for 24 hours. Slip a ribbon in the ends of the choker to be able to tie around the neck. And there you have it! A sophisticated, yet edgy look! Go ahead try this idea and make your fashion statement today!
Rhinestones and wax tipped tool are available from: www.RhinestonesEtc.com
0 Comments
Your comment will be posted after it is approved.
Leave a Reply. |
KarenI have been adding bling for over 20 years. Through my projects, I hope you find inspiration. Categories
All
Archives
July 2024
|
Home About Policies Return Shipping
Contact Us Size Chart Privacy Products Reviews
Copyright 2024 Rhinestones Etc. All rights reserved.
Contact Us Size Chart Privacy Products Reviews
Copyright 2024 Rhinestones Etc. All rights reserved.


 RSS Feed