|
You’ve got that special occasion coming up and you want everything to be just right. Need the perfect nails to match your dress or just to add some eye-catching sparkle? Follow our easy steps for DIY nails with rhinestones. Steps For DIY Nails with Rhinestones First, you’ll need to gather a few supplies:
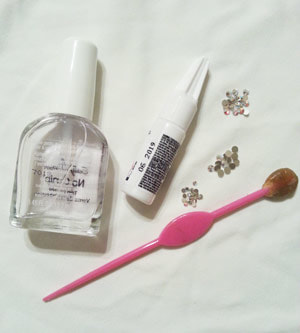 Always, begin with clean, unpolished nails. Furthermore, use a good, chip-free nail polish as a base coat. If you choose to use a cheaper product, the polish may chip underneath the rhinestone. Thus, you may lose your rhinestone even if you use strong nail glue. 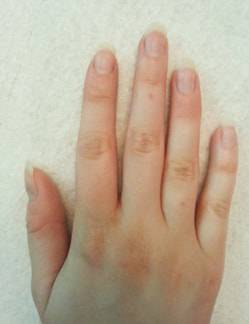 Apply your base coat allowing it to dry completely. When the nail polish is completely dry, place a drop of nail glue on your nail. You may want to use a toothpick to apply the glue to the nail. The nail glue I used was the glue thin and watery making it difficult to apply directly from the bottle. 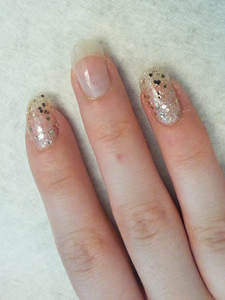 Then, using a wax-tipped tool, pick up a rhinestone and gently press it into the glue. Continue applying glue and rhinestones until you finish your design. After you have finished applying the rhinestones, allow the glue to dry. 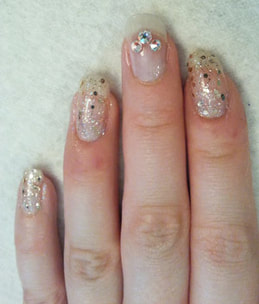 Now, you’ll need to use a top coat to seal the edges to help prevent the rhinestones from peeling off. You may want to use a small detailing brush to do this. Apply the top coat just around all the edges of the rhinestones. Avoid applying the top coat over the top of the rhinestones as this may dull them. Allow to dry. 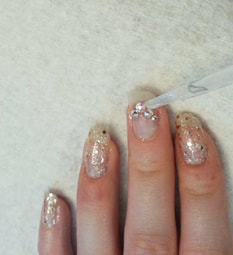 Simple and easy to do, yet, the results are stunning. You will look like a nail pro without even trying! 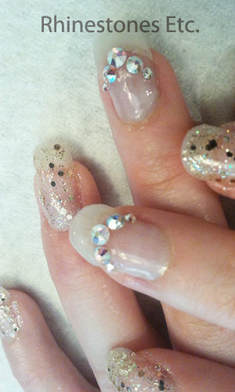
1 Comment
6/3/2018 04:03:13 pm
love this will have to try it and see if I am as skilled as you are. I would add a base coat color and then the sparkles. Your comment will be posted after it is approved.
Leave a Reply. |
KarenI have been adding bling for over 20 years. Through my projects, I hope you find inspiration. Categories
All
Archives
July 2024
|

 RSS Feed
Home About Policies Return Shipping
Contact Us Size Chart Privacy Products Reviews
Copyright 2024 Rhinestones Etc. All rights reserved.
Contact Us Size Chart Privacy Products Reviews
Copyright 2024 Rhinestones Etc. All rights reserved.