|
With the harvesting of pumpkins falling in the fall, this fruit has become an iconic image of autumn. Moreover, you can proclaim your love for pumpkins by blinging out a shirt during this season. Our pumpkin rhinestone template makes embellishing a shirt with rhinestones easy. 
Steps to Create A Bedazzled Shirt 1. Download Our Free Rhinestone Template First, download our rhinestone template. Our template shows the position, size, and quantity of the rhinestones you’ll need. You can use it exactly as is or experiment with different sizes or colors. 2. Prewash Your Garment Typically, clothing manufacturers treat garments with chemicals to protect them during transportation. Sometimes, these chemicals can prevent rhinestone glues from making a good bond. Additionally, some fibers tend to shrink when you wash them. Thus, it’s important you pre-wash and dry your shirt before you begin your bling project. 3. Choose Your Rhinestone Type Finally, pick the brand and what kind of rhinestone you want to use, hot fix or flat back. You’ll find many manufacturers making both kinds. Either are suitable although you use different techniques for each one. Hot fix rhinestones have glue already on them and need heat to activate the glue. Flat backs require an adhesive like Gem-Tac or E6000. 4. Lay Your Garment Flat Make sure you lay your garment as flat as possible on your work surface. If the shirt material is thin, you may want to put wax paper between the layers. This will keep the glue from seeping through layers and sticking together. 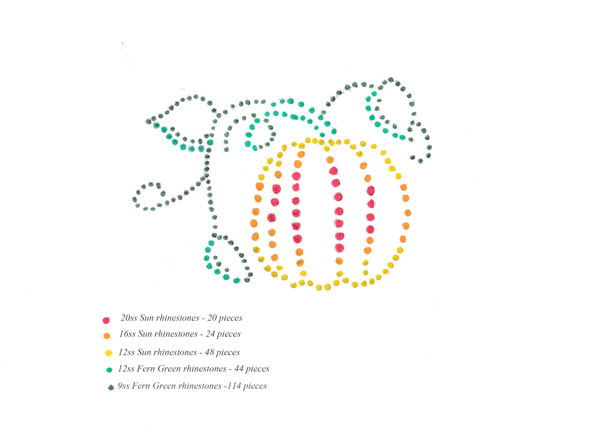
Hot Fix Rhinestones Probably the easiest way to bedazzle a shirt is to create a rhinestone iron on. In addition to our template, you’ll need transfer paper and hot fix rhinestones. Transfer paper has a clear sticky piece and an opaque non-sticky piece. After downloading the rhinestone template, position a piece of wax paper over the template before laying out the rhinestones. This step will keep the transfer paper from sticking to the template. Then, lay the rhinestones on the template as indicated, facet side up. Separate your transfer paper and lay the sticky side on top of the rhinestones. Gently press on the transfer paper to ensure all the rhinestones stick to it. Then, simply lift the sticky piece of transfer paper and you’ve created a rhinestone iron on. When you’re ready to embellish your shirt, heat an iron to its highest setting. Hot fix rhinestone manufacturers don’t recommend steam irons because the steam and the steam vents interfere with glue activation. Next, lay your shirt out flat and position your rhinestone transfer on your shirt. Press down with the iron and hold for about 12-18 seconds. Lift the iron straight up and repeat on another part of the transfer. Do not slide the iron as this may move the rhinestones. Once you’ve activated the glue on all the rhinestones, allow a few minutes for the rhinestones to cool. Then, simply peel off your transfer paper. Flat Back Rhinestones Alternatively, you can also use non-hot fix or flat back rhinestones. This type of embellishment requires an adhesive. Your local craft store will have different types of popular rhinestone glues:
Just make sure your adhesive dries clear, is washable, and is suitable for your type of embellishment. For example, a popular glue is E-6000. However, the manufacturer doesn’t recommend this adhesive for use with acrylic rhinestones. Moreover, this glue can be difficult to work with on fabric. First, download and print out the template. You can use an awl or punch set with a piece of wood to mark the placement of stones. Next, lay your shirt as flat as possible and position the template in the middle. Then, you can choose one of two methods. Either lay the stones in the holes or use chalk to mark the placement. Before gluing, you can adjust the rhinestone spacing to be closer or farther apart. When you’re ready to glue, place a glue drop slightly smaller than the rhinestone on the shirt. Gently press the embellishment into the glue. Some of the glue should seep out from the sides. This is very important as it forms a seal that helps prevent the rhinestone from peeling off. Once you’ve glued on all the rhinestones, allow them to dry flat for 24 hours. 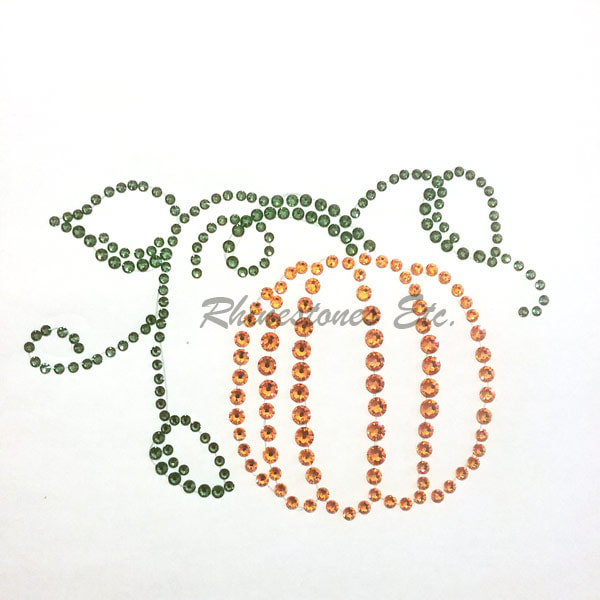
Download Our Pumpkin Rhinestones Template Creating your rhinestone design is easy with our downloadable free rhinestone template. Simply click here to begin your bling project. If you have any questions about how to use the template, you can contactus here. And if you’re looking for fast and friendly service on your rhinestone purchase, shop Rhinestones Etc. We have a huge selection of crystal rhinestones at competitive prices. Plus, most of our orders ship within 24 hours. Browse our online store to find your size and color!
0 Comments
Your comment will be posted after it is approved.
Leave a Reply. |
KarenI have been adding bling for over 20 years. Through my projects, I hope you find inspiration. Categories
All
Archives
July 2024
|

 RSS Feed
Home About Policies Return Shipping
Contact Us Size Chart Privacy Products Reviews
Copyright 2024 Rhinestones Etc. All rights reserved.
Contact Us Size Chart Privacy Products Reviews
Copyright 2024 Rhinestones Etc. All rights reserved.