|
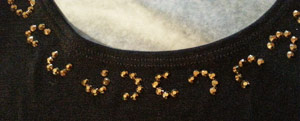
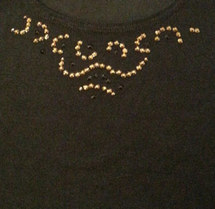
How to rhinestone a dress I had given up all hope of finding the perfect dress and that’s when it caught my eye. I liked this dress but I wanted to turn it into something that I would love. For this project I used: 1 black and gold dress 20ss Dorado rhinestones 20ss Jet rhinestones Gem tac Wax tipped tool Wax paper Prewash your garment before starting. Since the top of this dress was on the thin side, I placed a sheet of wax paper inside to prevent the back and front from gluing together. I also like to lay out the rhinestones before gluing to get an idea of how it will look. I wanted to incorporate the colors and designs of the bottom on the top so I chose to use the colors Dorado and Jet. The Jet blends in with the black top so that they are not as noticeable, but will give off shimmers of light when you move. I started by copying the circular pattern around the neckline. In the middle of these circular designs, I placed a Jet rhinestone. I also incorporated the wavy pattern so that my neckline looked like this: From this picture, you can barely see the Jet rhinestones placed in among the gold, but they add additional sparkle. Once you are happy with your design, remove a rhinestone at a time and place a drop of glue about the size of the rhinestone in its place. The glue should seep slightly out at the sides to create a seal to prevent the rhinestones from peeling off. If you accidentally use too much glue, the glue dries clear and cannot be seen at a distance. Continue gluing and allow to dry flat for 24 hours. And just like that any ordinary dress can be turned into something special that you will wear for years to come.
Rhinestones and wax tipped tool are available from: www.RhinestonesEtc.com
0 Comments
Your comment will be posted after it is approved.
Leave a Reply. |
KarenI have been adding bling for over 20 years. Through my projects, I hope you find inspiration. Categories
All
Archives
July 2024
|
Home About Policies Return Shipping
Contact Us Size Chart Privacy Products Reviews
Copyright 2024 Rhinestones Etc. All rights reserved.
Contact Us Size Chart Privacy Products Reviews
Copyright 2024 Rhinestones Etc. All rights reserved.


 RSS Feed