|
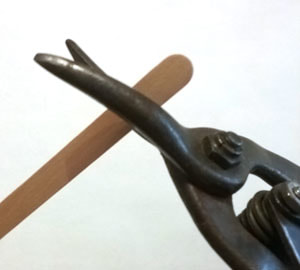
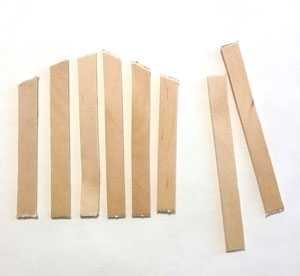
Instructions for a diy rhinestone magnet This Mother’s Days don’t go overboard with an expensive gift she’s never going to use. Why not put yourself into it and make a special handmade gift for her? This simple DIY magnet with rhinestone embellishments is an easy Mother’s Day craft that is sure to put a smile on her face. For this project I used: 8 wooden Craft sticks Hot glue gun White craft paint and paintbrush 39 Fern green 9ss rhinestones, other assorted colors and sizes Gem-Ttac wax tipped tool or tweezers Scotch tape Wax paper Felt (various colors) Magnet Large wire cutters Sandpaper 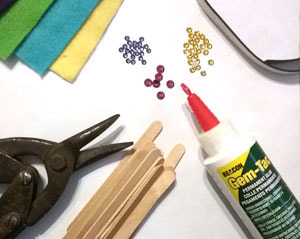 I found that using large wire cutters does a good job of cutting wooden craft sticks. Begin by cutting the sticks in the following lengths: 3.75 inches – 2 sticks. 3.5 inches 2 sticks, 3.25 – 2 sticks. 2.75 – 2 sticks. Take the 3 smaller lengths of wooden sticks and cut one end at an angle to form ascending slats. If you wish, you may sand the edges.
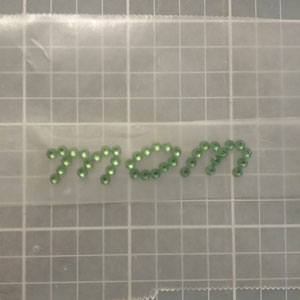
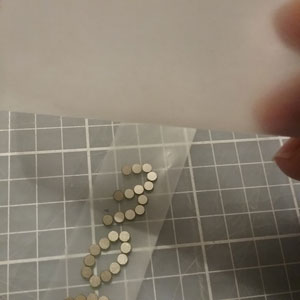
Paint the wooden craft sticks with the white craft paint and allow to dry. 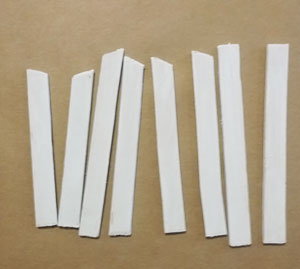 Lay the craft sticks out so that the sticks peak in the center. Using a hot glue gun, glue the 2 longest craft sticks across the others near the top and the bottom. In order to get the spacing and size right on the rhinestone “Mom” I laid out the rhinestones on a piece of wax paper. Once I got my size and spacing correct, I took a piece of scotch tape and pressed down over the tops of the rhinestones. Peel away from the wax paper. The rhinestones will stick to the tape.
Squeeze glue onto the bottom of each of the rhinestones on the tape, just slightly smaller than the rhinestones and tape this to the top horizontal craft stick. DO NOT use a hot glue gun to adhere rhinestones. Use a recommended adhesive such as E6000 or Gem-Tac. Allow to dry for 24 hours. 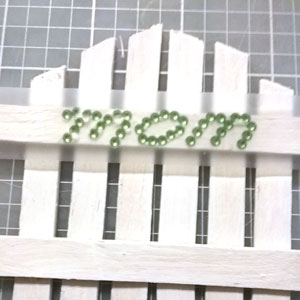 In the meantime, cut out flower and leaf shapes out of felt. 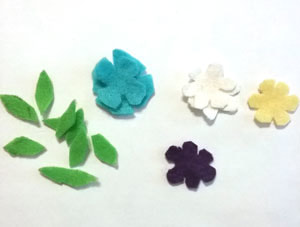 Glue different size and color rhinestones to the center of the flowers. Place a drop of glue (E6000 or Gem-Tac) about the same size as the rhinestone and using the wax tipped tool or tweezers, pick up a rhinestone and gently press it into the glue drop. Allow to dry. After 24 hours, peel the tape off the rhinestones. Hot glue the flowers to the craft sticks in varying positions around the rhinestone “Mom”. Hot glue a magnet to the back of the craft sticks. 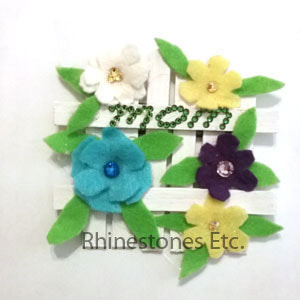 With rhinestones and a few other easy to get supplies you too can make your mother a special gift that she’ll always treasure. The sparkle of the rhinestones will catch your mother’s eye each time she sees this beautiful DIY magnet, putting a smile on her face as she thinks of you.
Rhinestones and wax tipped tool are available from: www.RhinestonesEtc.com
0 Comments
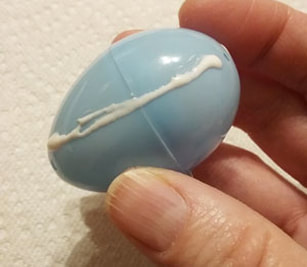
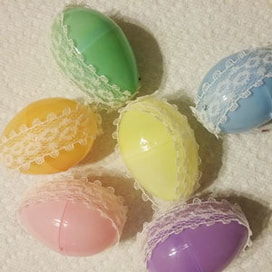
How to make a Rhinestone Easter Egg Door Decoration I love springtime with the warmer weather, longer daylight hours, arrival of robins and Easter eggs! Your door is the first thing that visitors see when they home to your house so why not make a cheerful first impression with a do it yourself Easter door hanging! For this project I used: Small plastic eggs (approximately 2 inches long) White lace Assorted colors 12ss rhinestones Gem tac Wax tipped tool or tweezers Craft wire 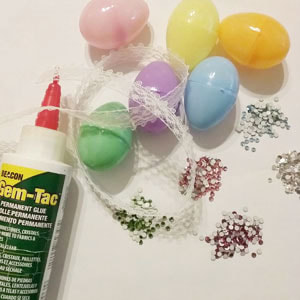 I used 6 little plastic eggs (approximately 2 inches in length) in assorted colors. Cut a piece of lace 5 ½ inches long for each egg you plan on using. Cut 6 more pieces if lace in the following lengths: 9, 10, 11, 12, 13 and 14 inches. 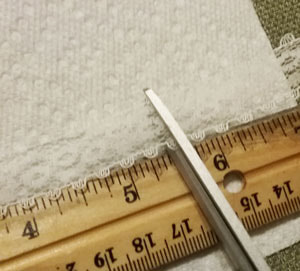 You can use a hot glue gun for adhering the lace if you wish but then use Gem Tac for gluing the rhinestones. Do not use a hot glue gun for gluing rhinestones. I used Gem Tac for gluing the lace. Glue the 5 ½ piece of lace the length of the egg on both sides. Do this for all the eggs and allow to dry.
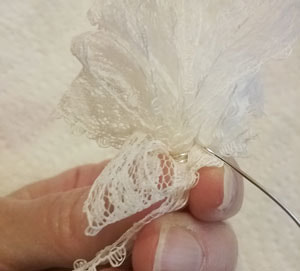
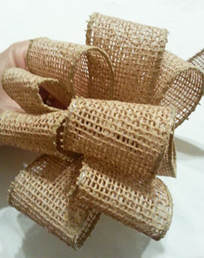
Glue the other piece of lace on the opposite side down the length and up the other side leaving a tail of lace at the top of the egg. Do this for all the eggs and allow to dry completely. 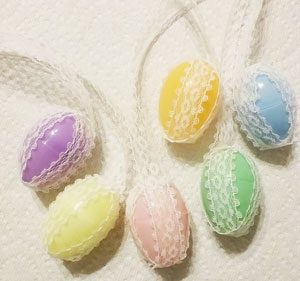 Embellish the eggs along the length of the lace using rhinestones. Place a drop of glue about the size of the rhinestone on the lace and using the wax tipped tool or tweezers pick up a rhinestone and gently press it into the glue. Glue should seep out the sides to form a seal. Continue gluing until all the eggs are embellished. Allow to dry for 24 hours. 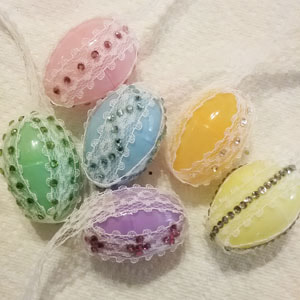 To make a bow, cut a piece of lace about 36 inches in length (if you like more loops in your bow, cut a longer piece). Leaving a tail of about 1 ½ inches, gather the ribbon into loops about 3 inches in length leaving a tail at the other end. Wrap the base of the bow with craft wire (about 5 inches in length) to secure leaving a “tail” of about 1 ½ inches of wire.
Starting with the egg with the longest lace tail, lay the lace pieces on top of one another from longest to shortest 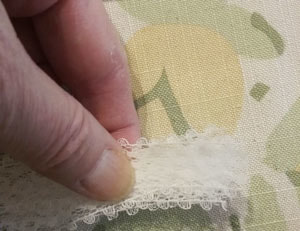 Secure the pieces together and to the bow using the tail of the wire on the bow. Wrap the wire around and tuck the ends in. 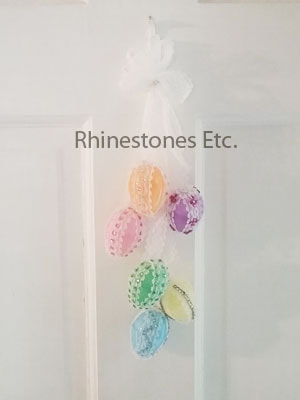 You now have the perfect ornament to welcome both visitors and Spring!
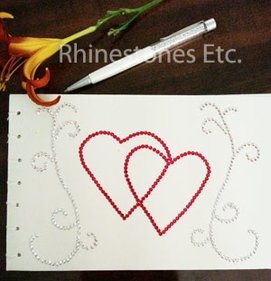
Rhinestones and wax tipped tool are available from: www.RhinestonesEtc.com DIY Valentine's Day Rhinestone Ceramic Tile Plaque Known as the holiday of love, Valentine’s day is the perfect time to tell someone you love them. However, Valentine’s day is often only considered to be a day for romantic love but there are plenty other relationships to celebrate. I like to celebrate with my children, friends, and family as well as my husband. Whatever the relationship, a handmade Valentine’s gift is the perfect way to show your family and friends how much you love to them! Creating a ceramic tile plaque is a beautiful way to express your love. For this project I used: 1 ceramic tile (a wooden plaque works just as well) Red acrylic craft paint Paint brush Stencil (you can download a free template here) Clear Acrylic coating (to seal) E6000 12ss Light Siam (red) rhinestones Wax embellishment tool Craft glue Clear glitter 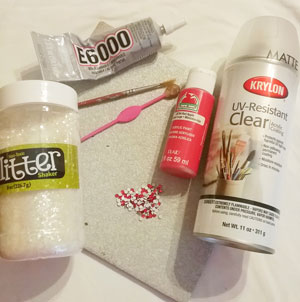 heart template opt inI always like to work with a template and you can download the one I used for this project here. Cut out the darkened areas on the template using an X acto knife and cutting mat or a pair of cheap embroidery scissors leaving small areas uncut to leave the inside of the heart intact. 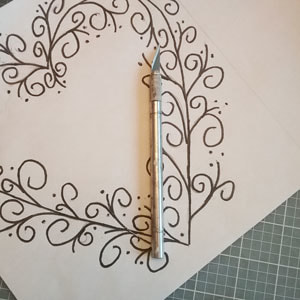 Tape this to your tile. 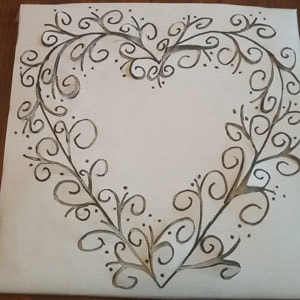 Paint in the cut areas with a paint brush and red acrylic craft paint. Gently remove the template and paint in the missing areas. Allow to dry. 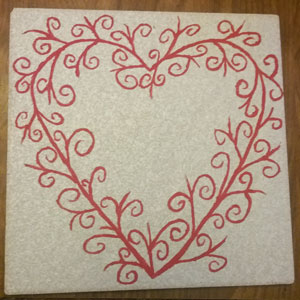 When dry, spray with a clear acrylic coating (I used Krylon brand). This keeps the paint from any damage. Allow to dry. I liked the idea of adding some clear glitter, so using a craft glue that dries clear, I mixed a generous amount of clear glitter with the glue. Paint on around the pattern using a paint brush. Allow to dry and then spray with another coat of clear acrylic coating. 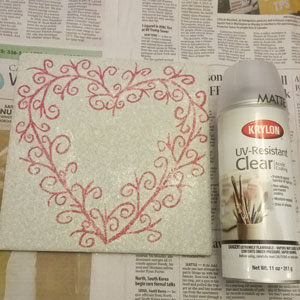 When completely dry, glue on rhinestones using E6000. You can use the template as a guide for placement of rhinestones. The dots on the template are the places I glued the rhinestones. Squeezing the E6000 over a paper plate, use a toothpick to apply an amount of E6000 to the tile just slightly smaller than the rhinestone. Using a wax tipped tool or tweezers, pick up a rhinestone and gently press it into the glue. Continue gluing until your pattern is complete and allow to dry flat for 24 hours. 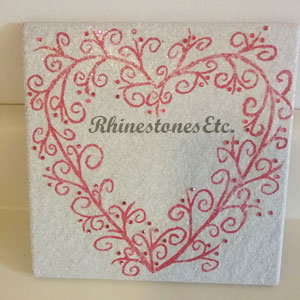 The clear glitter and rhinestones give this hand-painted ceramic tile the perfect amount of sparkle. Have a specific person in mind? Try personalizing this gift by adding their name or a date in the middle.
Rhinestones and wax tipped tool are available from: www.RhinestonesEtc.com How to make you own rhinestone Christmas tree ornament Old fashioned Christmas ornaments evoke a certain nostalgia as they bring together our past and present. This DIY Christmas tree ornament is easy and perfect for crafters of all skill levels. For this project I used: 1 miniature straw hat Gem tac White lace 12ss Rose rhinestones (about 100) Gold sting Hot glue gun Wax tipped tool 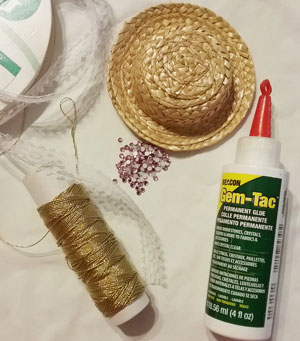 Using the hot glue gun, attach the string to the back of the hat.  Cut a piece of lace to fit the crown (about 8.5 inches) and a piece about 12 inches. Glue the smaller piece around the crown of the hat using Gem Tac. Tie a bow in the 12 inch piece of lace and if you want, place a drop of glue on the knot to secure it. Set aside.  To glue the rhinestones along the brim, place a drop of glue slightly smaller than the rhinestone on the brim. Using the wax tipped tool, pick up a rhinestone and gently press it into the glue drop. Continue gluing a single line of rhinestones around the brim. Allow glue to set.  Glue the lace bow where the crown meets the brim opposite the string for hanging. Allow to dry to 24 hours. 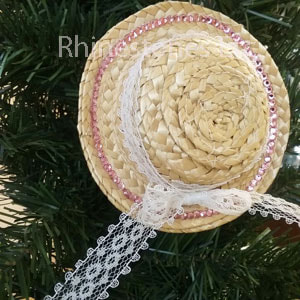 Stirring up memories of the past, this rustic DIY ornament is perfect for any Christmas tree. Rhinestones and wax tipped tool are available from: www.RhinestonesEtc.com Want to make your own bling ornaments? You can get free shipping off your first purchase from Rhinestones Etc by clicking the above button.
How to make your own festive Christmas tags Wrapping presents is fun so why not go full out with special, personalized DIY Christmas tags? Easy to make, these tags are festive and embody every aspect of the Christmas season! For this project I used: Green card stock Music sheet Glue (glue stick and craft glue) Instant coffee Silver ribbon Silver or gold metal studs (stars and 4 mm round studs) 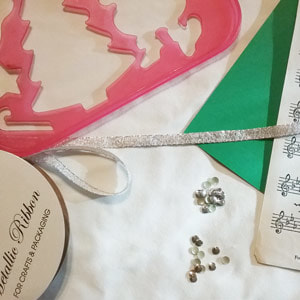 First, I made copies of some music sheets I had. If you don’t have any you can probably find some sheet music at your local library and make copies. Next, I stained them with coffee to give the music sheets an old time look. To stain with coffee, place about ¼ cup of instant coffee on a cookie sheet. (I used fresh ground coffee and that worked as well). Pour boiling water into cookie sheet about halfway to the top edge of cookie sheet. Allow to cool to lukewarm. Place your music sheets into the coffee water making sure to coat both sides with coffee water. Remove and place on a clean cookie sheet. To dry, you can use 1 of 2 methods. You can dry with a hair dryer or like I did place in the oven. Watch your papers carefully as you do not want to start a fire. Place in a preheated 200 degree oven for 5 -10 minutes, again watching carefully and removing as soon as dry. 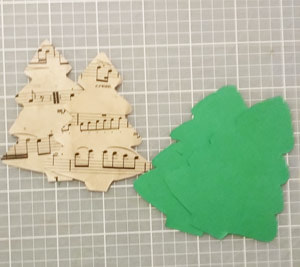 Cut out Christmas tree shapes from the music sheets and then slightly larger Christmas tree shapes from the green card stock.  Glue the silver ribbon to the top using a glue stick and then glue the music sheet Christmas tree on top. 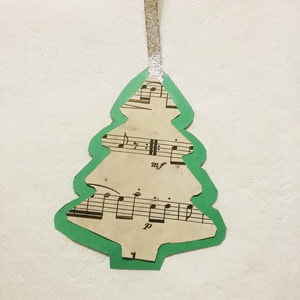 Embellish the tag with the metal studs gluing a star at the top and scattering the 4 mm circles using craft glue. 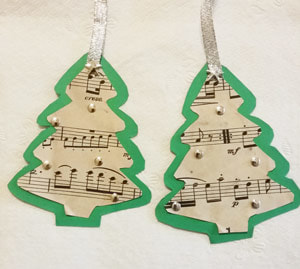 Don't just stop with the fancy wrapping paper; create these DIY Christmas tags as a final touch to any gift. Your recipient will love it! 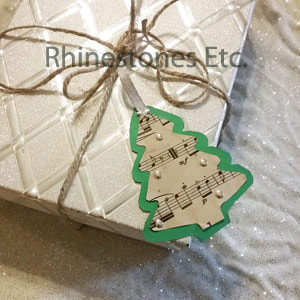 Aren't these tags cute? Need some bling to make your own? You can get free shipping off your first purchase from Rhinestones Etc. by clicking the button above.
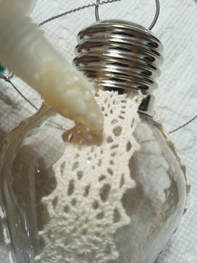
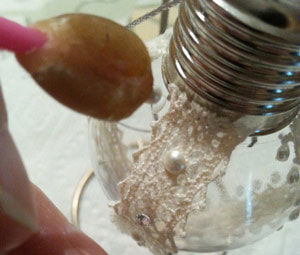
DIY Christmas Tree Ornament Sometimes all it takes is some odds and ends, a bit of lace and some pearls to make something striking. This rustic Christmas tree ornament is effortless to make and perfect for decorating. For this project I used: 1 clear plastic ornament Lace E6000 or Gem Tac Flat back pearls size 10ss Crystal 12ss rhinestones Wax tipped tool  Begin by measuring the length of the ornament from top to down around the bottom and up to the other side. Cut 2 pieces of lace this length. I used E6000 to glue the lace into place and then Gem tac to glue the pearls. I generally prefer to use Gem Tac, but last time I used Gem tac on lace it yellowed. Glue lace onto the ornament and allow to dry. 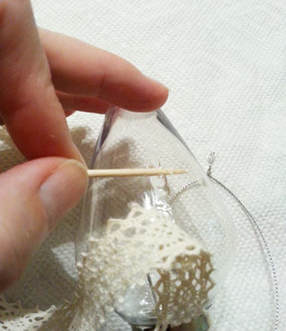 Although you can’t see very clearly from the picture, I alternated between pearls and crystal 12ss rhinestones on the lace and used just pearls alongside the lace.
Please a drop of glue slightly smaller than the pearl on the ornament. With your wax tipped tool, pick up a pearl and gently press it into the glue drop. Repeat the process until your ornament is embellished. Allow to dry for 24 hours. Tie a piece of jute string along the top. 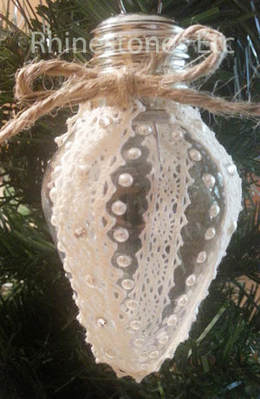 Classic DIY rustic Christmas ornament that is simple to make. Pearls, rhinestones and wax tipped tool are available from: www.RhinestonesEtc.com Need some pearls to make this ornament? You can get free shipping off your first purchase with Rhinestones Etc. by clicking on the above button.
How to create your very own rhinestone decorations These beautiful do it yourself rhinestone ornaments add that extra sparkle to any tree. These ornaments are special because you create them yourself! Take a plain ornament, add some bling and watch as your ornament is transformed before your eyes! For this project I used: 1 silver ball ornament 12ss rhinestones in rose and peridot E6000 Wax tipped tool Chalk Tape measure  I chose a scatter pattern for this tree ornament beginning at the center and scattering outward. Using your tape measure, mark a line with the chalk around the middle of the ball ornament. This will be your guide when gluing rhinestones. 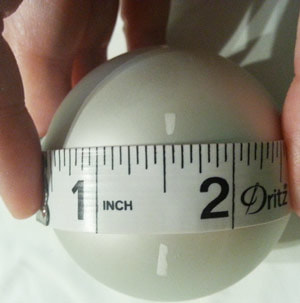 Most of the rhinestones will be the color peridot with the rose colored rhinestones sprinkled among the green. 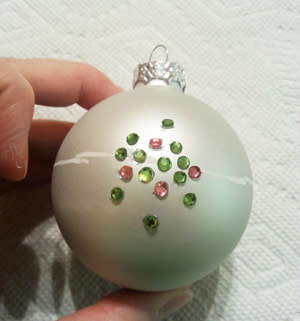 When using E600, make sure you are in a well ventilated area. I like to squeeze a bit over a paper plate and scrape up a small amount of glue with a toothpick and apply it to the ornament. Use a drop of glue slightly smaller than the rhinestone. 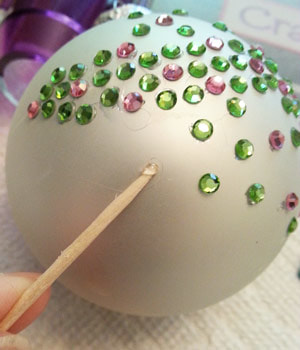 Pick up a rhinestone using your wax tipped tool and gently press it into the glue. Continue gluing rhinestones keeping the rhinestones near the middle closer to each other while spacing the rhinestones away from the center farther apart. Since this is a scattering of rhinestones, there is no real pattern and no way to do it wrong. Allow 24 hours to completely dry. 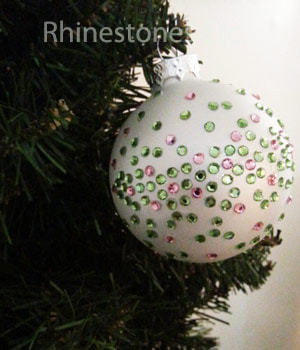 Just like that, you add sparkle and festivity to any Christmas tree!
Rhinestones and wax tipped tool are available from: www.RhinestonesEtc.com How to make an autumn wreath Your front door says a lot about you. Show off your personality with a simple, do it yourself wreath. Get ready for the upcoming holidays with this easy festive personalized wreath! For this project I used: Dollar tree leaves Glue gun Styrofoam ring about 8 inches in diameter 16ss rhinestones in colors Topaz and Sunflower AB E6000 Burlap ribbon Assorted fall floral and craft small craft pumpkins 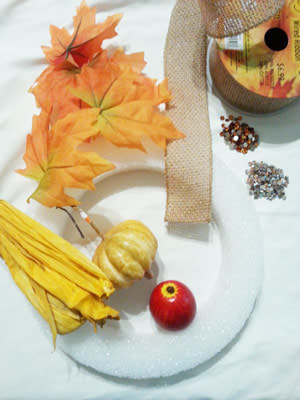 This wreath begins the same as my previous post, Rhinestone Autumn Leaf Table Centerpiece. Begin by cutting the leaves off the plastic vine. Decide on a circular arrangement and the size of your centerpiece: I put bigger leaves on the bottom and smaller leaves on top overlapping each other and kept the circumference to about 9 inches around the outside and about 2 inches on the inside. Using a hot glue gun, glue the leaves together beginning with the bottom leaves. 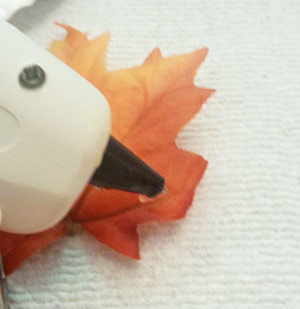 Once the leaves are glued together, decide on how you want the rhinestones. I used Topaz and Sunflower AB which complimented the colors of the leaves. I used the darker color of Topaz on the inside leaves and along the darker colors of the leaves and the Sunflower AB along the lighter. 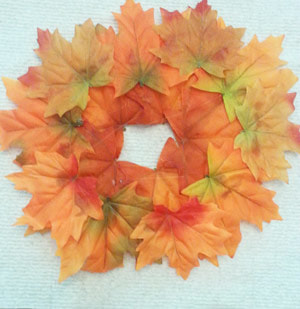 Following the veins in the leaves, place a drop of glue about the size of the rhinestone on a leaf and pick up a rhinestone with tweezers or a wax tipped tool. Gently press a rhinestone into the glue drop. When using E6000, I like to squeeze a bit over a paper plate and use a toothpick to scrape up a bit of glue and apply it. Continue gluing and then let dry flat for 24 hours. 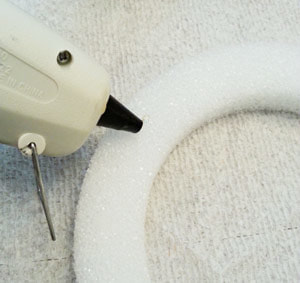 Using the hot glue gun, squeeze hot glue around the Styrofoam ring and press the leaf ring on. Allow to cool.
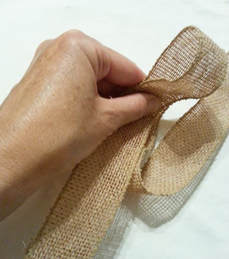
To make the bow, leave about 2 inches of ribbon on the one end and make a loop. While holding the end of this loop, continue making loops, bunching the bottom of the loops together until you have 8 loops. Take your craft wire, leaving about 2 inches on the end, and begin wrapping it tightly around the bottom leaving. Cut the wire again leaving about 2 inches of wire. Cut the ribbon leaving about 2 inches on each end. 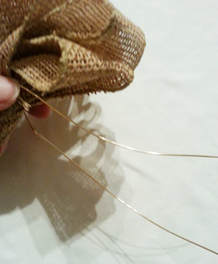 Attach the bow to the wreath by slipping one end of the wire between the leaves and Styrofoam and the other end around the back twisting both ends of the wire together to secure and tucking the wire ends into the Styrofoam. 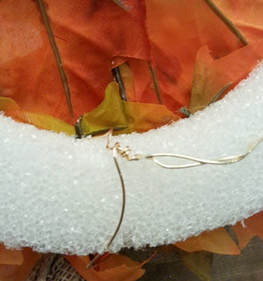 If any of your fall floral or pumpkins has wire attached to them, you can slip the wire between the leaves and Styrofoam and secure the end of the wire into the Styrofoam. Any fall craft décor without wires can be attached using a hot glue gun. 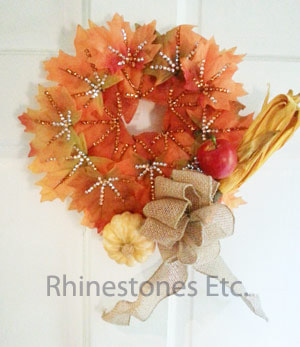 Trim your door with this easy to make dazzling autumn wreath throughout the fall season.
Rhinestones are available from: www.RhinestonesEtc.com How to make an easy Fall table decoration Do you love to entertain family and friends? Do you like to have the table set just so? This easy candle table centerpiece will make any table glow with the colors of the season. For this project I used: Autumn leaves from the dollar store Hot glue gun Scissors E6000 16ss rhinestones in colors of Sunflower AB and Topaz Wax tipped tool or tweezers Pillar candle  Begin by cutting the leaves off the plastic vine. Decide on a circular arrangement and the size of your centerpiece: I put bigger leaves on the bottom and smaller leaves on top overlapping each other and kept the circumference to about 12 inches. 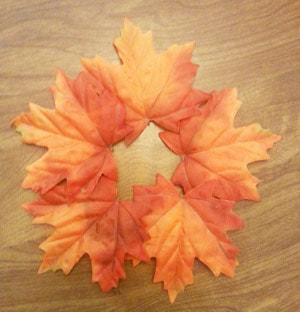 Using a hot glue gun, glue the leaves together beginning with the bottom leaves. 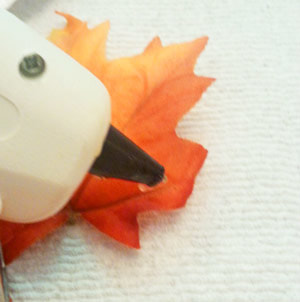 Once the leaves are glued together, decide on how you want the rhinestones. I used Topaz and Sunflower AB which complimented the colors of the leaves. I used the darker color of Topaz on the inside leaves and along the darker colors of the leaves and the Sunflower AB along the lighter. Following the veins in the leaves, place a drop of glue about the size of the rhinestone on a leaf and pick up a rhinestone with tweezers or a wax tipped tool. Gently press a rhinestone into the glue drop. When using E6000, I like to squeeze a bit over a paper plate and use a toothpick to scrape up a bit of glue and apply it. 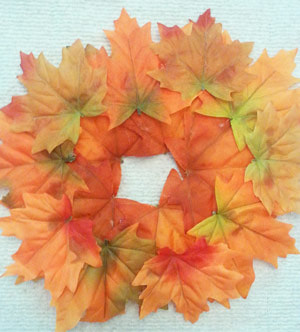 Continue gluing and then let dry flat for 24 hours. Place a pillar candle in the middle and your centerpiece is finished.  Super easy and yet strikingly beautiful! This center piece will have any table ready for fall!
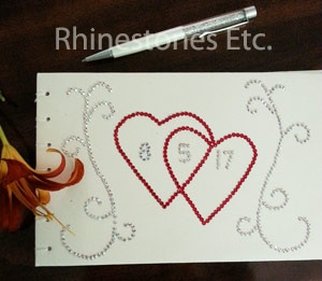
Rhinestones and wax tipped tool are available from: www.RhinestonesEtc.com Your wedding is such a special occasion but very often passes by in a blur. Did you say hello to Aunt Sophie? Chat with your friends from college? A guest book is a great way to help preserve those memories. For this project I used: A watercolor book Cream colored card stock White card stock Glue White embroidery thread 12ss Light Siam rhinestones 10ss Crystal AB rhinestones Gem tack 1/8 inch hole punch I previously bound a book using a much simpler book binding method and you can view that here. The book binding method I used here turned out much more complicated but I chose it because I wanted a book that would sit flat when opened. You may want the easier method or you can even purchase a plain journal and decorate it with rhinestones as I show you below. 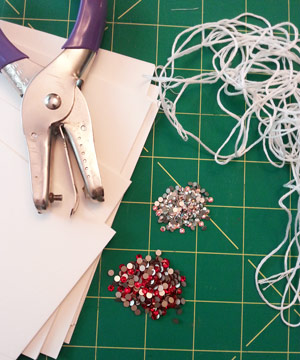 I purchased a watercolor book at my local craft store. And cut the pages down to 9 x 5.75 inches. You may want to purchase a smaller watercolor book and leave the pages uncut. Separate the pages. You will want to save both the cover and back for your book. 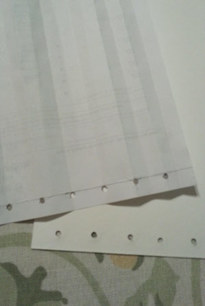 Take a plain piece of paper the same size as your watercolor sheets and fold it in half 3 times. On the short edge, measure ¾ of an inch and mark. Starting with the second fold, hole punch at the line. Continue punching holes at every other fold. Use this as a template and punch holes in your water color paper. 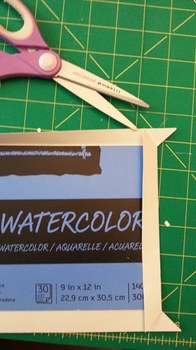 Cut a piece of the cream colored card stock 1 inch larger on each side than your cover. Glue the cover to the center of the card stock. Cut the corners on the diagonal, fold the corners to the inside and glue. Cut a piece of white card stock slightly smaller than the cover for the end paper and glue to the inside of the cover. 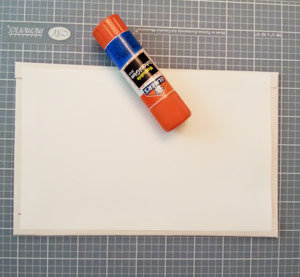 Let the glue dry and then punch holes in the front and end covers. The actual binding of the book is complicated so you may want to watch this youtube video which explains the process: https://youtu.be/04vt8YfT7XM I suggest using embroidery thread that is about 18 inches long, and I used short straight needles rather than the curved needles. 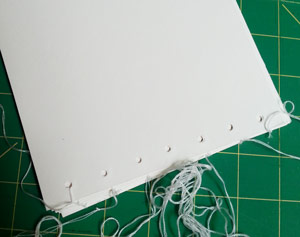 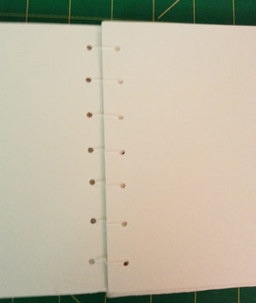 Once you are done with book binding, you can add your rhinestones. I like to use a template which I cut out of plain white paper. You can lay the template on the cover and with a pencil, lightly mark the design. When you lift off the template, you can see where to glue the rhinestones. Place a drop of glue slightly smaller than the rhinestone on the marking and using a wax tipped too, gently press the rhinestone into the glue drop. Continue gluing until your design is complete and let dry for 24 hours.
I have shown 2 different designs, one without a wedding date and one with. Either one makes a beautiful keepsake that keep those memories of that special day alive.
Rhinestones and wax tipped tool are available from: www.RhinestnesEtc.com |
KarenI have been adding bling for over 20 years. Through my projects, I hope you find inspiration. Categories
All
Archives
February 2024
|


 RSS Feed
Home About Policies Return Shipping
Contact Us Size Chart Privacy Products Reviews
Copyright 2024 Rhinestones Etc. All rights reserved.
Contact Us Size Chart Privacy Products Reviews
Copyright 2024 Rhinestones Etc. All rights reserved.