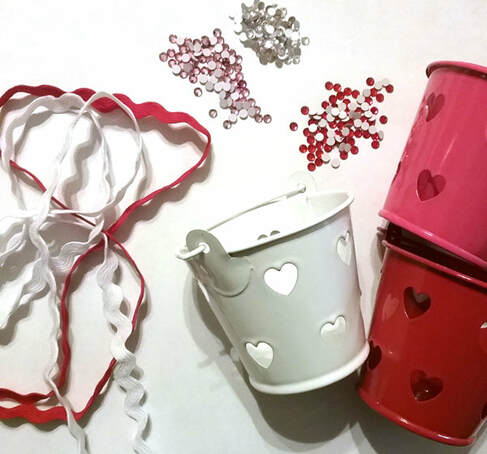
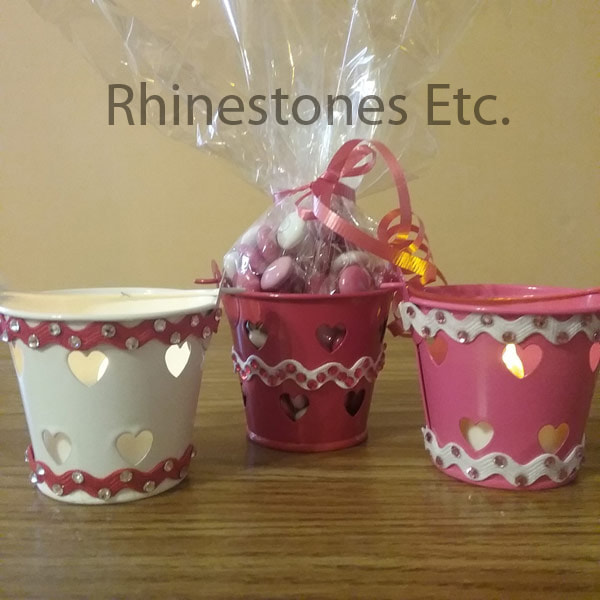
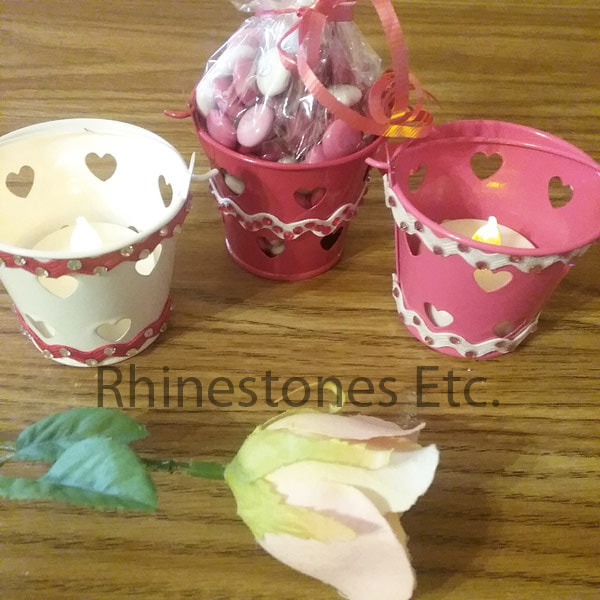
 DIY: A Cute Yet Inexpensive Bedazzled Valentine GiftValentine’s Day is just around the corner. Perhaps you are having a party with some of your children’s friends, or maybe you need something to hand out at your child’s school. These cute little buckets embellished with rhinestones, are easy to make. Plus, they are an inexpensive DIY bedazzled Valentine's Day gift. This makes a great gift for children filled with small candies. Additionally, place a battery- operated votive candle inside for a unique table setting. Either one of these would also make great wedding favors. I picked these buckets up on clearance a few years ago at my local craft store. However, colored buckets without the heart cutouts are available at Amazon for about 50 cents each.(https://www.amazon.com/Juvale-2-Inch-Small-Metal-Buckets/dp/B076D6XQKD/ref=sr_1_1?ie=UTF8&qid=1547210452&sr=8-1&keywords=craft+2+inch+diameter+metal+buckets). The rick rack trim I picked up at Walmart for $1 for each color. Most likely, you can purchase this in bulk for a lower price. Another idea is to use lace as trim instead of rick-rack. Depending on the brand and the design, rhinestones may cost you between $2 and $5 per bucket. The total cost may run you between $3.50 - $8.00 per bucket. How to DIY Valentine GiftGlue the trim to the buckets. You can glue the trim along the top and bottom edges or along the middle. For this project, I used Gem-Tac. Gem-Tac dries clear and is easy to apply. Although not specifically recommended for metal, it does adhere fabric to metal nicely. And the rhinestones will be applied to the trim, which is fabric. If you decide to apply bedazzling gems directly to the metal, I recommend using E6000 for a stronger bond. 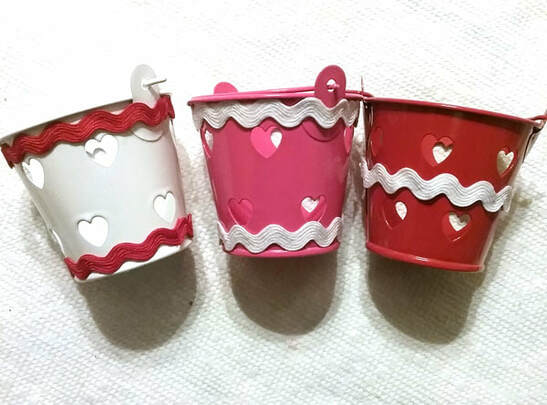 Once dry, glue 12ss rhinestone along the trim, again using a color contrasting to the trim, but complementary to the bucket color. Place a drop of glue slightly smaller that the crystal on the trim. Using a wax tipped tool or tweezers, pick up a flatback jewel and gently press it onto the glue drop. Allow to dry for 24 hours. To make a sweet treat, wrap candies in plastic wrap and tie with curling ribbon. Pop in a battery- operated tea light for a table setting (do not use real tealight candles as the flame will scorch the inside of the bucket). Both variations make great party favors.
So, go ahead and throw a party for Valentine’s Day. Make this easy, inexpensive DIY Valentine gift hand out in celebration of love. Need rhinestones to get started on your Valentine's Day gift? Rhinestones Etc. has discount pricing and excellent customer service.
Explore our extensive collection of bedazzling jewels to find the perfect one for your bling project.
0 Comments
Blinged Out Wedding Ideas To Sparkle On Your Special Day
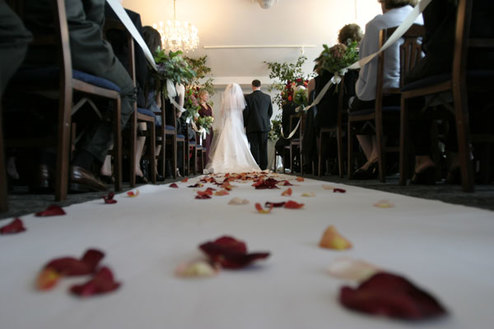
Usually, glitz and glamor are a fundamental part of most weddings. One way to add sparkle to many wedding items is to use crystal faux gems. While bedazzled items are expensive, you can DIY. Moreover, gluing rhinestones is simple and easy to do. We’ve got some great blinged out wedding suggestions so you can sparkle on your special day.
Blinged Out Wedding Dress and Shoes
Typically, most couples have a budget to work within when planning their wedding. However, one place a bride wants to splurge is with her dress. Every bride wants the perfect wedding dress and to feel beautiful. Yet, elaborately embellished wedding gowns may cost several thousand dollars.
Instead, you can buy a plain dress and create a blinged out wedding dress. Many simple, but elegant gowns are available for a few hundred dollars. Depending on the manufacturer, size, and quantity, rhinestones may only cost you an additional $10-$100. Moreover, it’s easy to glue rhinestones! First, you need to choose a bedazzling glue for fabric. When gluing, use enough adhesive to allow a bit to seep out to the edges of the crystal. This creates a seal that helps to keep the bedazzling gem firmly attached. Another place to save money is to rhinestone your shoes. Why spend a lot of money on an expensive pair of shoes you’ll only wear once? Once again, buy yourself a plain pair and plan to add crystals. 
Rhinestones Nails
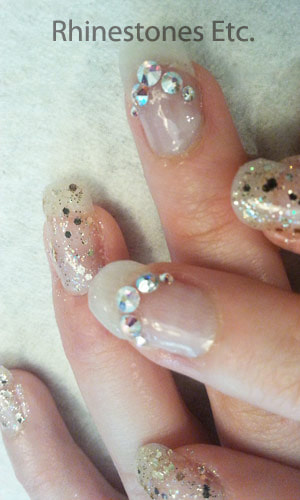
Complete your wedding look with a rhinestone nail design. While a French Manicure is pretty, adding jewels gives you extra twinkle and shimmer. You can choose a neutral look with a hint of sparkle or a bold color with lots of glitz. Of course, you may prefer a manicurist to paint your nails, but it’s easy to DIY bedazzled nails.
A Few Other Ideas to Create a Blinged Out Wedding
Often, the wedding cake is the centerpiece at the reception. You can make your cake impressive with a sparkly cake topper using some card stock, wooden skewers, and rhinestones.
Begin by searching the internet to find a free downloadable template or design one yourself. Although not necessary, a digital die-cutting machine, like Cricut, can cut your design with precision. Alternatively, you can use scissors or an X-Acto knife. Then, glue small rhinestones to your topper design. You can choose to add a few or cover your topper completely with crystals. Additionally, you can embellish toasting glasses, wedding favors, or table centerpieces. For example, a votive candle holder covered with rhinestones makes a nice favor. Moreover, you can add a little bling to invitations, menus, and seating cards. Of course, these are just a few ideas to make your wedding sparkle. Rhinestones are extremely versatile, allowing plenty of creativity. Be inventive and see what other ideas you can come up with to make the wedding of your dreams. 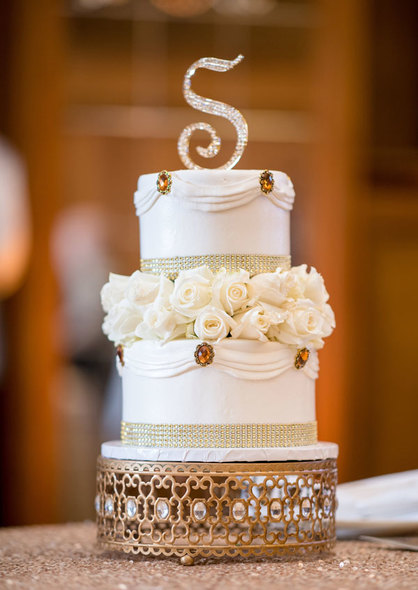
FAQs About Rhinestones
Ready to create the blinged out wedding of your dreams, but still have questions? Below, we answer a few commonly asked questions about rhinestones.
What’s the Best Rhinestone Size For My Wedding Dress?
Really, there’s no right or wrong answer here. The answer depends on how much flash you want. Typically, the bigger rhinestones add a flashier sparkle while small stones add a subtle twinkle. Or, you may also want to consider using different sizes to add texture and visual interest.
Should I Buy Glass or Crystal Rhinestones?
Your wedding day is a once-in-a-lifetime, special day. So, why skimp to save yourself a few dollars by buying cheap gems lacking sparkle? Crystal rhinestones offer several important advantages over glass:
Which Rhinestones Color Should I Buy?
Manufacturers offer plenty of choices from neutrals to bold hues. While brands offer many different shades, most create the 2 most popular colors crystal and crystal AB. The crystal is clear stone designed to mimic a diamond While the crystal AB stone is clear with an iridescent coating to reflect the colors of the rainbow.
Preciosa has a large collection of rhinestone colors with several neutral hues:
If you want to add a little color, you may want one of these shades:
Of course, you can always go bold and choose any color you like. Ultimately, choosing a color is a personal choice.
Where Can I Buy Rhinestones Online?
Of course, to create your blinged out wedding, you’ll need quality embellishments. Since 2011, Rhinestones Etc. has been selling high quality rhinestones online. With fast shipping, competitive pricing, and great customer service, we want to be your source for bling! Browse our online store to find your bedazzling crystals.
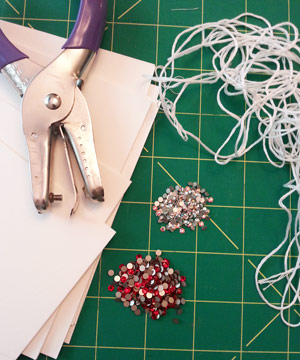 DIY: How to Make a Rhinestone Decorated Wedding Guest BookYour wedding is such a special occasion, but very often passes by in a blur. Did you say hello to Aunt Sophie? Chat with your friends from college? A rhinestone decorated guest book is a great way to help preserve those memories. For this project, I used:
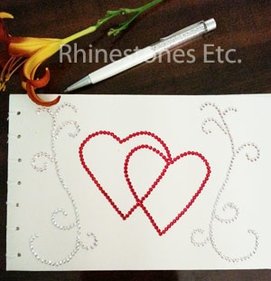
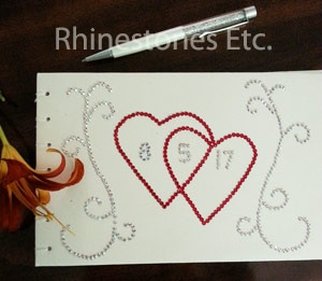
I previously bound a book using a much simpler book binding method. The book binding method I used here turned out much more complicated, but I chose it because I wanted a book that would sit flat when opened. You may want the easier method, or you can even purchase a plain journal and decorate it with rhinestones, as I show you below. I purchased a watercolor book at my local craft store. And cut the pages down to 9 x 5.75 inches. You may want to purchase a smaller watercolor book and leave the pages uncut. Separate the pages. You will want to save both the cover and back for your book. 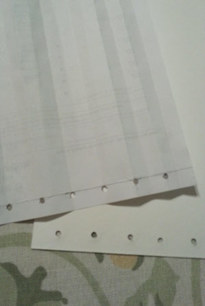 Take a plain piece of paper the same size as your watercolor sheets and fold it in half 3 times. On the short edge, measure ¾ of an inch and mark. Starting with the second fold, hole punch at the line. Continue punching holes at every other fold. Use this as a template and punch holes in your water color paper. 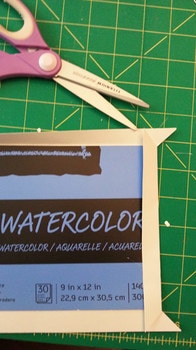 Cut a piece of the cream colored card stock 1 inch larger on each side than your cover. Glue the cover to the center of the card stock. Cut the corners on the diagonal, fold the corners to the inside and glue. Cut a piece of white card stock slightly smaller than the cover for the end paper and glue to the inside of the cover. 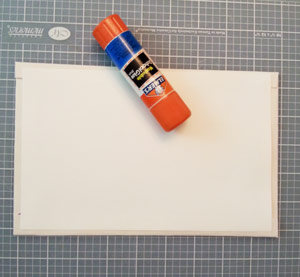 Let the glue dry and then punch holes in the front and end covers. The actual binding of the book is complicated so you may want to watch this youtube video which explains the process: https://youtu.be/04vt8YfT7XM I suggest using embroidery thread that is about 18 inches long, and I used short straight needles rather than the curved needles. 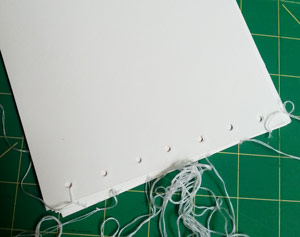 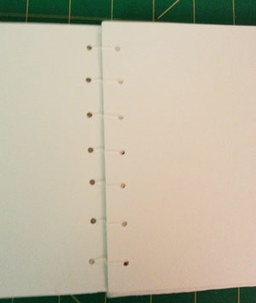 Once you are done with book binding, you can add your rhinestones. I like to use a template which I cut out of plain white paper. You can lay the template on the cover and with a pencil, lightly mark the design. When you lift off the template, you can see where to glue the bedazzling gems. Place a drop of glue slightly smaller than the crystal rhinestone on the marking and using a wax tipped too, gently press the jewel into the glue drop. Continue gluing until your design is complete, and let it dry for 24 hours.
I have shown 2 different designs, one without a wedding date and one with. Either one makes a beautiful keepsake that keep those memories of that special day alive.
Shop Rhinestones Etc. for all your bling needs. We offer competitive pricing on crystal gems and same-day shipping on most orders. 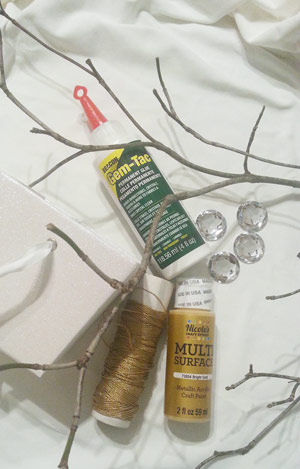 How to Make a Table Centerpiece with Acrylic RhinestonesPlanning a wedding or family gathering? Looking for something as special as the special occasion? Look no further than this majestic tree. Adorned with gold paint and glittering stones, this tree is the perfect table centerpiece, and lights up any table. See below for our easy-to-follow instructions. For this project I used:
I looked around the yard for a twig that had lots of small branches but ended up cutting one off a tree and removing all of the leaves. Paint the twig with gold paint. You may need to do two coats. Let dry completely between coats. 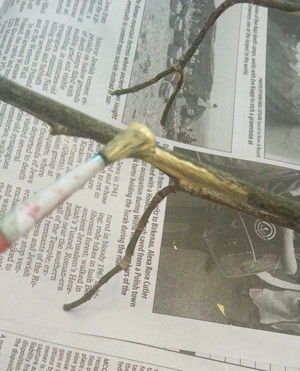 Take a small piece of Styrofoam and place it in your box. Make sure it sits flat. 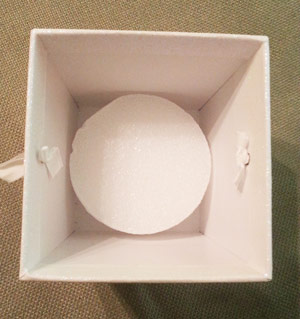 Wind your lights around the branches of your painted twig. There are battery operated lights available so that you can hide the battery case inside the box and cover it with crafting moss. Press the end of your twig into the Styrofoam piece in the box so that your twig stands upright. 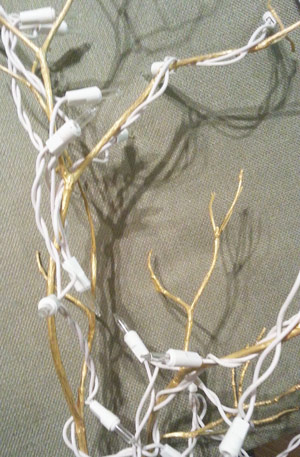 Spread Gem Tac on the backside of a 25 mm clear Acrylic rhinestones. Place the ends of a piece of gold string, 4 inches long in the glue to form a loop and place another rhinestone on top. Make several of these ornaments. 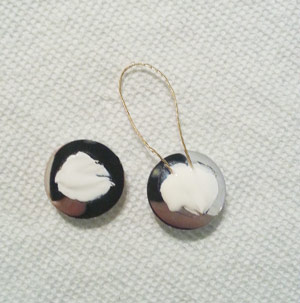 Allow to dry for 24 hours. When dry, hang the rhinestone ornaments on the branches to catch the light to create a romantic, sparkly ambience. 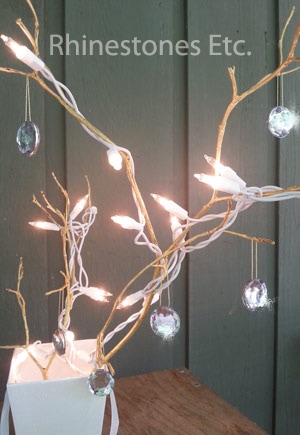 You now have your very own elegant centerpiece you can use whenever you want. Dazzle up a wedding or simply spice up your table at your next party. This tree is perfect for any event.
While we no longer carry this product, we have other bedazzling gems in stock. Rhinestones Etc. offers great prices and fast processing times. Browse our inventory to find your size and color. 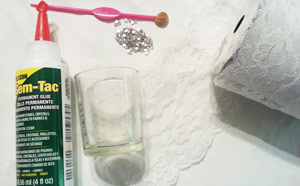 Lace and Rhinestone Glass Candle Holder DecorationThe glow of a candle creates an ambiance of warmth and coziness. Why not take it up a notch and add bedazzling gems? This beautiful lace and rhinestone candle holder is the perfect gift to give to someone or keep for that special occasion centerpiece. With just a few simple things, you can turn something plain into something elegant and special. For this project I used:
Begin by cutting a piece of lace that will fit around the glass votive with a slight overlapping. Using Gem Tac, glue the lace into place lining the lace up against the bottom edge. Allow to dry for 24 hours. 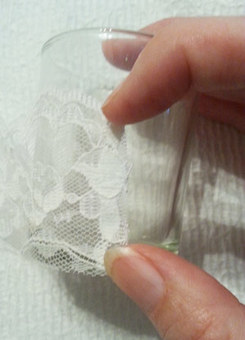 I liked the look of the rhinestones along the top edge of the lace, but you can experiment and see what you like. Place a drop of glue about the size of the rhinestone along the top edge of the lace. Using the wax tipped tool, pick up a rhinestone and gently press it into the glue drop. 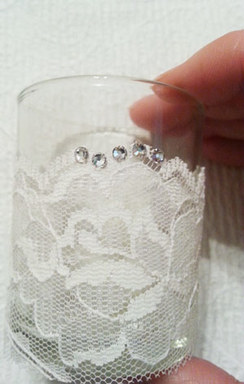 Continue gluing rhinestones until the upper edge is lined with rhinestones. Allow to dry for 24 hours. 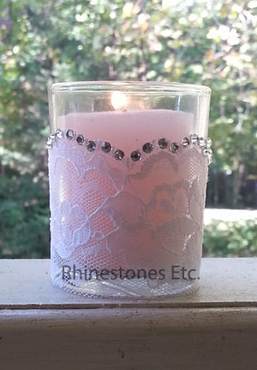 Perfect for any season or occasion, this lace and rhinestone glass votive holder is easy to make and pretty to look at.
For all your bling needs, shop Rhinestones Etc. We have many different colors and sizes of bedazzling gems in stock and ready to ship.  Make It Yourself Special Occasion Rhinestone Guest BookDo-it-yourself weddings can save money and also let your personality shine through your handmade items. Moreover, you can tailor items to fit your specific theme. This rhinestone guest book is easy to make, especially if you buy a premade book. For this project, I used:
I purchased this 9 x 12 watercolor book at my local craft store. You can use this size, buy a smaller watercolor book or cut the pages down as I did. You will want to save both the cover and back for your book. Separate the pages. Using one of the sheets, fold in half lengthwise 3 times to make a template for your binding holes. Draw a line 1 inch from the short end and starting with the first fold make a mark and skip to every other fold marking your template like the picture below. You should have 4 dots drawn. 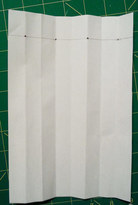 Using this template, punch holes in the covers and all pages. 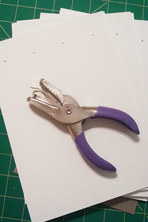 Next, cut a piece of card stock about 1 inch larger around all edges than your cover. Center the cover on the card stock and glue in place. Cut the corners on the diagonal, fold the corners to the inside and glue down. Then glue the sides down to the inside of the cover. 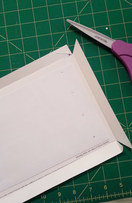 Cut a piece of white card stock slightly smaller than the cover and glue to the inside for the end paper. You are now ready to bind your book. There are several great videos on Youtube showing several different types of binding. I followed this one: https://youtu.be/j-r6c_trSxY. I used white embroidery thread. Measure the thread about 5 times the short length of the book. Thread a sewing needle (I used all 6 strands) and beginning in the middle of the book, sew from the inside to the front leaving a tail of about 5 inches. 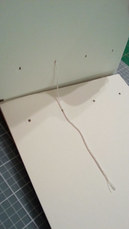 Sew up to the front of the book and then come around to the bottom and come up through the same hole. Sew to the hole on the bottom right down through the book, around the edge, and back through the same hole. This time, go around the long edge down through the front to the back. Sew across to the top left, coming up the first hole you started in. Sew to the top left, go around the edge, and back into the hole. Sew to the left, coming up to the front around the edge, and up through the topmost hole. Go around the longest edge and sew down into the topmost hole. Come up through the bottom and sew across to the second hole from the top. Sew from the bottom up through the hole you started in, bringing the needle to the middle to where your beginning end is. Make sure your binding is tight and then tie the two ends together. 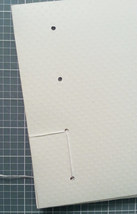 Using a ruler on the top and bottom as a guide, I glued 6ss crystal along the bottom front with a wedding date. Place a drop of Gem Tac about the size of the rhinestone on the cover, and using the wax tipped tool, pick up a rhinestone and gently press it into the glue drop. You can also put your names, initials, or hearts to personalize it. 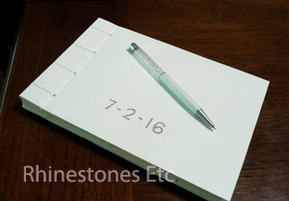 Now you have a unique, one-of-a-kind memento to remember your special day.
For all your bling needs, shop Rhinestones Etc. We have a large selection of beautiful crystal rhinestones at competitive prices. We offer fast processing times, with many orders shipping the same day. 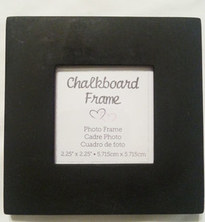 You Can Create A Bedazzled Rhinestone Picture FrameFor this project, I used:
Rhinestone a picture frame to create a unique, one-of-a-kind gift for a wedding, birthday, or Valentine’s gift. Our instructions help you make a symmetrical crystal design. I used a 2.25 x 2.25 inch picture frame, but any size will work. 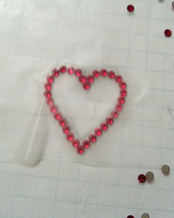 I placed a small piece of wax paper over a piece of graph paper. The graph paper will help keep the symmetry of the design. Using 9ss Light Siam rhinestones, I made a small heart shape. 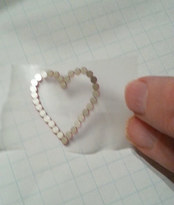 I taped 2 pieces of Scotch tape together and then placed the sticky side down on the heart shape. I then peeled the tape off of the wax paper so that the heart shape stuck to the tape. Next I applied Gem Tac to the area of the picture frame I wanted to put the rhinestones on. I applied the heart to the frame in the glue area, leaving the tape intact for 24 hours. Then I gently peeled off the tape. 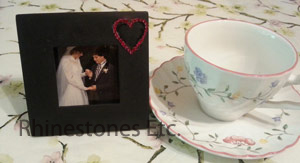 A perfect way to remember that special moment!
For all your bling projects, shop Rhinestones Etc. for the finest crystal components. You'll love our fast processing times with many orders shipping the same day! 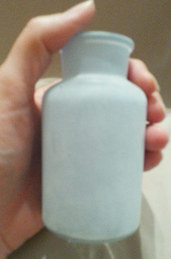 Plain to Dazzling - DIY Bedazzled Vase InstructionsSometimes the simplest of things can be turned into works of wonder. If you are looking for something fun and unique for that special occasion, look no further! This bedazzled vase is perfect for any occasion! For this project, I used:
I found this cute little vase on clearance at my local craft store, but this idea can work with another shape or color. First, I drew a straight line from top to bottom using chalk (which will easily rub away). 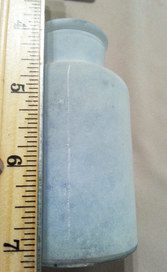 Next, I measured and marked the dimensions of the area of the vase I wanted to cover on graph paper and arranged the rhinestones in a pattern. Then placing a drop of glue on the vase about the size of the rhinestone, pick up a rhinestone and gently place into the glue drop, copying the design from the graph paper onto the vase. Allow to dry for 24 hours. I tied a bow using lace ribbon around the neck for a finishing touch. 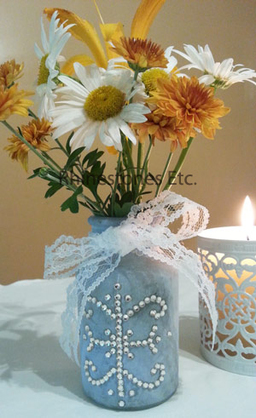 Now you have everything you need to brighten up any table for any occasion! These also make a great table centerpiece for your wedding.
When searching for the finest crystal components, shop Rhinestones Etc. Our fast processing times mean many orders ship the same day of purchase! We also offer competitive pricing and great customer service. 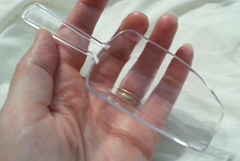 Add Sparkle to Your Nuptials with Bedazzled Wedding FavorsRomance is in the air, and your wedding is just around the corner! These easy-to-make bedazzled wedding favors are quick to make. Your guests will love this adorable candy scoop with its sparkling glamour. For this project, I used:
I purchased this plastic candy scoop for about 75 cents at my local craft store and a google search showed several places you can purchase them online for slightly less. 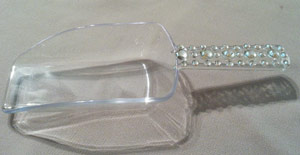 I used 5 – 30ss crystals alternating with 5 -12ss rhinestones in the middle of the handle and then the remaining 12ss crystals along the outside of the handle. Place a drop of Gem Tac about the size of the rhinestone on the handle and using the wax tipped tool, pick up a rhinestone and gently press it into the glue drop. Continue gluing rhinestones until the handle Is covered. Allow to dry for 24 hours. Place the candy in the scoop and wrap tightly with plastic wrap. This helps secure the candy and keep it from falling out. Cut a piece of 6 inch tulle about 16 inches long. Wrap this around the scoop and secure with the silver ribbon. 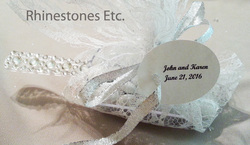 Breathtaking elegance that will wow your guests!
Since 2011, Rhinestones Etc. has been selling quality bedazzling jewels at competitive prices. Browse our online store to find the perfect stone for your bling project.  Make This Sparkling Crystal Bedazzled Candle HolderAs DIY wedding favors or gift giving, our crystal bedazzled candle holder is sure to please! For today’s project you need: Glass candle holder Gem Tac adhesive 12ss Rhinestones - approximately 95 (for this project I used Price Less brand) Tweezers or Pick n Stick tool Make sure the surface of your votive is clean. For this project, I used Price Less brand of rhinestones. Normally, I am a Swarovski only girl, but to keep the cost down on some projects, I really like the Price Less brand. It is AAAA crystal (the highest grade in the industry) and costs about 33% less than Swarovski. The pattern I used here is a simple scattered pattern. It really makes no difference how you place the rhinestones, so be creative! Begin by placing a drop of glue on the votive. Using the Pick n Stick tool or tweezers, pick up a crystal and place it in the glue drop. Gently press the bedazzling jewel down, allowing the glue to cover the edges of the rhinestone. Gem Tac dries clear, so do not worry if you accidentally use too much glue. Continue adding gems until you are happy with the coverage. Allow to dry for 24 hours.  When you are finished, you have a beautiful, sparkly creation ready for gift giving!
Do you want to be notified of upcoming sales, new clearance, contests and giveaways? Would you like our free guide to rhinestoning? Subscribe to our newsletter by clicking here. PriceLess brand meets the highest in quality standard and is rated AAA. They are made from crystal not glass and are available in a variety of colors and sizes. Shop Rhinestones Etc. for high-quality embellishments. We offer competitive pricing and fast processing times. Browse our extensive collection of bedazzling jewels before starting your next bling project. |
Categories
All
Archives
August 2026
|

 RSS Feed
|
Home About Policies Returns Shipping Contact Us Size Chart Privacy
Products Reviews [email protected] Copyright 2014 - 2026 Rhinestones Etc. All rights reserved. |