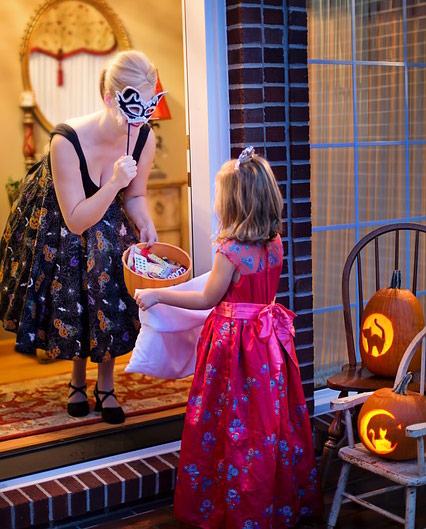
 Trick or Treat Halloween Rhinestone Template DownloadKids and adults alike love Halloween for a chance to dress up and pretend to be someone else. Children especially love to go door to door trick-or-treating to collect lots of delicious candy. While adults love to throw costume parties to celebrate, too. Our Trick or Treat Halloween rhinestone template makes it easy to bling out a t-shirt in celebration of Halloween. A Brief History of HalloweenMost people know that Halloween originated with a Celtic pagan festival. Participants would dress up in costumes to ward off ghosts. But how and when did the iconic saying “Trick or treat” enter American culture? Unfortunately, no one knows the coining of the phrase. What is known is that Charles M. Schulz used the phrase trick or treating in a 1951 Peanuts comic strip. Moreover, in 1952, Disney produced a cartoon entitled “Trick or Treat” featuring Donald Duck with Huey, Dewey, and Louie. This cartoon short visualized for children how to participate in this holiday activity. With these two influencers, this term became cemented into our culture.  How to Use the Trick or Treat Halloween Rhinestone TemplateIt’s so easy to bling out your T-shirt using our template. First, download the free rhinestone pattern. You’ll be able to see the exact position and the sizes of the crystals we used. Of course, prewash your shirt before you start to attach bedazzling jewels. Next, decide whether you want to use glue on (flatback) rhinestones or hotfix. If you choose glue on crystals, you’ll need a quality adhesive like Gem-Tac. Whichever glue you choose, make sure it is safe to glue embellishments on fabric, dries clear, and is washable. On the other hand, if you choose to use hotfix gems, transfer paper can make embellishing super easy. Transfer paper has 2 pieces, a clear piece sticky on one side and an opaque non-sticky piece. How to Use Flat Back Rhinestones with the TemplateAfter prewashing your shirt, lay it out as flat as possible. Then, using the template as a guide, place the rhinestones as indicated. Removing 1 flatback gem at a time, place a drop of glue slightly smaller than the crystal in its place. Gently press the bedazzling jewel into the glue drop. Some adhesive should seep out from the sides of the gem. This is very important as this creates a seal that helps prevent the flatback jewels from falling off. When you’ve finished gluing, let the glue dry on a flat surface for 24 hours. Make a Crystal Transfer with Hotfix RhinestonesOnce you’ve downloaded the template, place it on your work surface. You may want to place a piece of wax paper on top of the template. This will keep the sticky part of the transfer paper from sticking to your design. Lay the hotfix rhinestones out on the template (or wax paper) as indicated, facet side up. Then remove the opaque piece of transfer paper and lay the sticky, clear piece on top of the heat-activated crystals. When you’re ready to embellish your shirt, heat a non-steam iron to its hottest setting. Lay the rhinestone iron on transfer on your shirt. Press down on the design transfer for 10-15 seconds. Pick the iron up and press down on another part of the transfer. Do not slide the iron as this may move the crystals. After heating all parts of the transfer, remove the sticky part and let it cool. 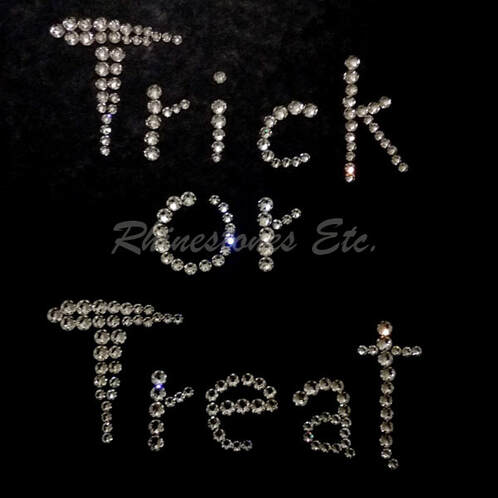 Halloween Rhinestone Template Download to Bling Our Your ShirtSo, what are you waiting for? You can begin blinging out your shirt with our Trick or Treat Halloween rhinestone template by downloading it today. And if you need rhinestones, check out the discount pricing offered by Rhinestones Etc. Selling online for over 10 years, we ship fast and have excellent customer service.
Browse our extensive collection of bedazzling jewels and find the perfect color for your next bling project!
0 Comments
Create A Bedazzled Shirt with our Free Rhinestone Template
With the harvesting of pumpkins falling in the fall, this fruit has become an iconic image of autumn. Moreover, you can proclaim your love for pumpkins by blinging out a shirt during this season. Our pumpkin rhinestone template makes embellishing a shirt with bedazzling gems easy.
Steps to Create A Bedazzled Shirt1. Download Our Free Rhinestone Template
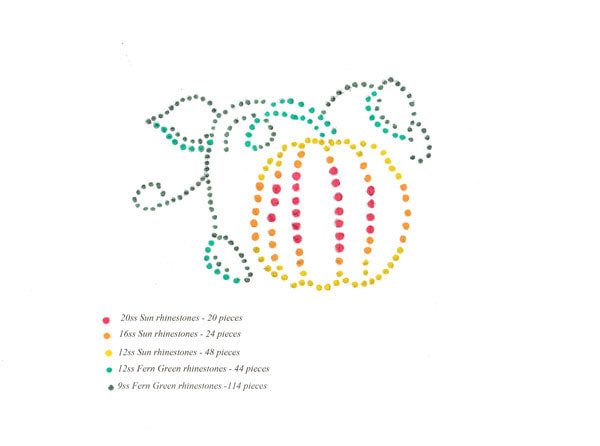
First, download our printable rhinestone template. Our pattern shows the position, size, and quantity of the flatback jewels you’ll need. You can use it exactly as is or experiment with different sizes or colors.
2. Prewash Your Garment
Typically, clothing manufacturers treat garments with chemicals to protect them during transportation. Sometimes, these chemicals can prevent rhinestone glues from making a good bond. Additionally, some fibers tend to shrink when you wash them. Thus, it’s important you pre-wash and dry your shirt before you begin your bling project.
3. Choose Your Rhinestone Type
Finally, pick the brand and what kind of rhinestone you want to use, hot fix or flat back. You’ll find many manufacturers making both kinds. Both are suitable although you use different techniques for each one. Hotfix crystal gems have glue already on them and need heat to activate the glue. Flatbacks require an adhesive like Gem-Tac or E6000.
4. Lay Your Garment Flat
Make sure you lay your garment as flat as possible on your work surface. If the shirt material is thin, you may want to put wax paper between the layers. This will keep the glue from seeping through layers and sticking together.
Hotfix Rhinestones
Most likely, the easiest way to bedazzle a shirt is to create a rhinestone iron on. In addition to our template, you’ll need transfer paper and heat activated crystals. Transfer paper has a clear sticky piece and an opaque non-sticky piece.
After downloading the rhinestone template, position a piece of wax paper over the design before laying out the bedazzling gems. This step will keep the transfer paper from sticking to the template. Then, lay the jewels on the template as indicated, facet side up. Separate your transfer paper and lay the sticky side on top of the iron in jewels. Gently press on the transfer paper to ensure all the crystals stick to it. Then, simply lift the sticky piece of transfer paper, and you’ve created a rhinestone iron on. When you’re ready to embellish your shirt, heat an iron to its highest setting. Hotfix rhinestone manufacturers don’t recommend steam irons because the steam and the steam vents interfere with glue activation. Next, lay your shirt out flat and position your rhinestone transfer on your shirt. Press down with the iron and hold for about 12-18 seconds. Lift the iron straight up and repeat on another part of the transfer. Do not slide the iron as this may move the crystals. Once you’ve activated the glue on all the bedazzling jewels, allow a few minutes for them to cool. Then, simply peel off your transfer paper. Flatback Rhinestones
Alternatively, you can also use non-hot fix or flatback gems. This type of embellishment requires an adhesive. Your local craft store will have different types of popular rhinestone glues:
Just make sure your adhesive dries clear, is washable, and is suitable for your type of embellishment. For example, a popular glue is E-6000. However, the manufacturer doesn’t recommend this adhesive for use with acrylic rhinestones. Moreover, this glue can be difficult to work with on fabric. First, download and print out the template. You can use an awl or punch set with a piece of wood to mark the placement of stones. Next, lay your shirt as flat as possible and position the template in the middle. Then, you can choose one of two methods. Either lay the stones in the holes or use chalk to mark the placement. Before gluing, you can adjust the rhinestone spacing to be closer or farther apart. When you’re ready to glue, place a glue drop slightly smaller than the bedazzling gem on the shirt. Gently press the embellishment into the glue. Some of the glue should seep out from the sides. This is very important as it forms a seal that helps prevent the crystal from peeling off. Once you’ve glued on all the flatback jewels, allow them to dry flat for 24 hours. 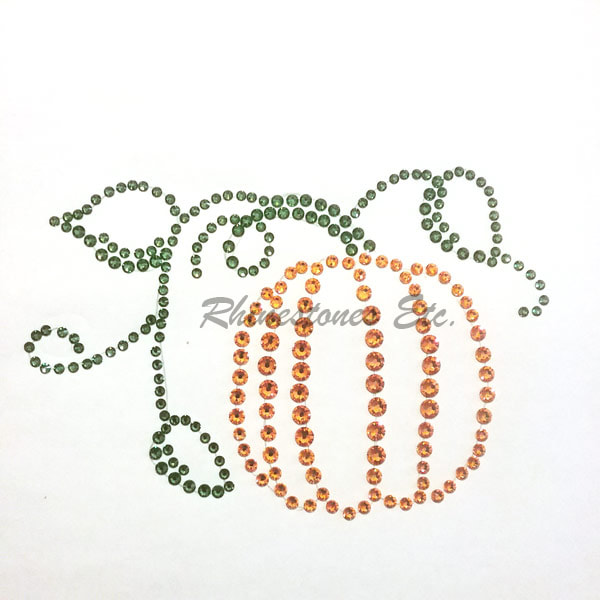
Download Our Pumpkin Rhinestones Template
Creating your bedazzling design is easy with our downloadable free rhinestone template. If you have any questions about how to use the template, contact us.
And if you’re looking for fast and friendly service on your rhinestone purchase, shop Rhinestones Etc. We have a huge selection of bedazzling jewels at competitive prices. Plus, most of our orders ship within 24 hours. Browse our online store to find your size and color! 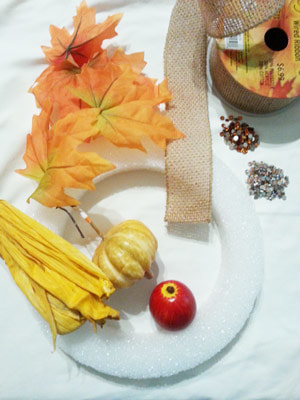 DIY: How to Make a Rhinestone Bedazzled Autumn WreathYour front door says a lot about you. Show off your personality with a simple, do-it-yourself rhinestone bedazzled wreath. Get ready for the upcoming holidays with this easy festive personalized wreath! For this project I used:
This wreath begins the same as my previous post, Rhinestone Autumn Leaf Table Centerpiece. Begin by cutting the leaves off the plastic vine. Decide on a circular arrangement and the size of your centerpiece: I put bigger leaves on the bottom and smaller leaves on top overlapping each other and kept the circumference to about 9 inches around the outside and about 2 inches on the inside. Using a hot glue gun, glue the leaves together beginning with the bottom leaves. 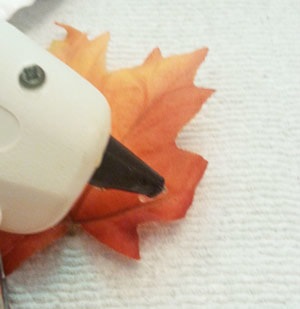 Once the leaves are glued together, decide on how you want the rhinestones. I used Topaz and Sunflower AB which complimented the colors of the leaves. I used the darker color of Topaz on the inside leaves and along the darker colors of the leaves and the Sunflower AB along the lighter. 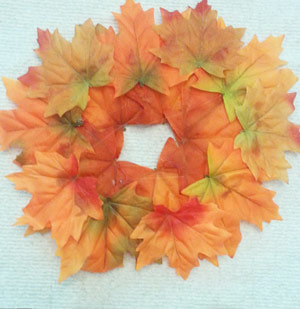 Following the veins in the leaves, place a drop of glue about the size of the rhinestone on a leaf and pick up a rhinestone with tweezers or a wax tipped tool. Gently press a rhinestone into the glue drop. When using E6000, I like to squeeze a bit over a paper plate and use a toothpick to scrape up a bit of glue and apply it. Continue gluing and then let dry flat for 24 hours. 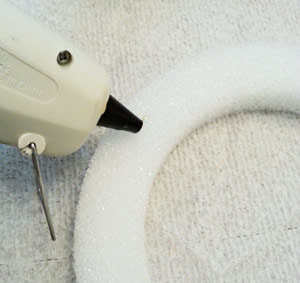 Using the hot glue gun, squeeze hot glue around the Styrofoam ring and press the leaf ring on. Allow to cool.
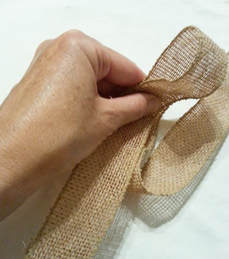
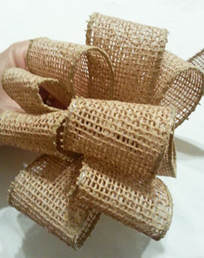
To make the bow, leave about 2 inches of ribbon on the one end and make a loop. While holding the end of this loop, continue making loops, bunching the bottom of the loops together until you have 8 loops. Take your craft wire, leaving about 2 inches on the end, and begin wrapping it tightly around the bottom leaving. Cut the wire again leaving about 2 inches of wire. Cut the ribbon leaving about 2 inches on each end. 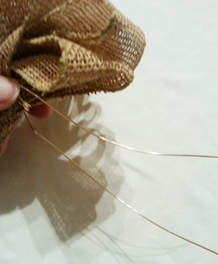 Attach the bow to the wreath by slipping one end of the wire between the leaves and Styrofoam and the other end around the back twisting both ends of the wire together to secure and tucking the wire ends into the Styrofoam. 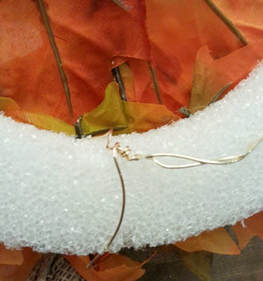 If any of your fall floral or pumpkins has wire attached to them, you can slip the wire between the leaves and Styrofoam and secure the end of the wire into the Styrofoam. Any fall craft décor without wires can be attached using a hot glue gun. 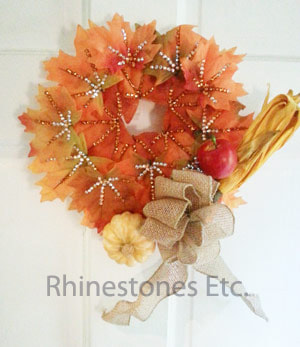 Trim your door with this easy-to-make, dazzling autumn wreath throughout the fall season.
For all your bedazzling needs, shop Rhinestones Etc. We have a large inventory of quality crystal gems in stock. Additionally, many orders ship the same day. 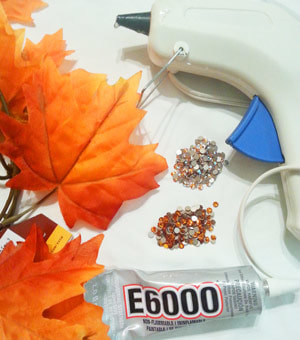 How to Make an Easy Bedazzled Fall Table CenterpieceDo you love entertaining with family and friends and having the table set just so? This candle bedazzled fall table centerpiece will make any table glow with the colors of the season. For this project I used:
Begin by cutting the leaves off the plastic vine. Decide on a circular arrangement and the size of your centerpiece: I put bigger leaves on the bottom and smaller leaves on top overlapping each other and kept the circumference to about 12 inches. 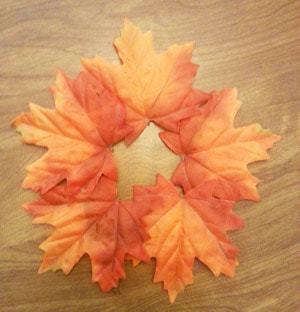 Using a hot glue gun, glue the leaves together beginning with the bottom leaves. 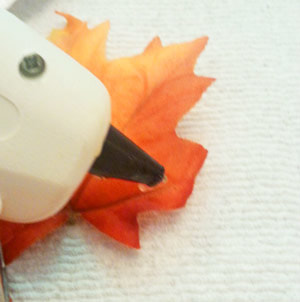 Once the leaves are glued together, decide on how you want the rhinestones. I used Topaz and Sunflower AB, which complemented the colors of the leaves. I used the darker color of Topaz on the inside leaves and along the darker colors of the leaves, and the Sunflower AB along the lighter parts. Following the veins in the leaves, place a drop of glue about the size of the crystal on a leaf and pick up a bedazzling gem with tweezers or a wax-tipped tool. Gently press a rhinestone into the glue drop. When using E6000, I like to squeeze a bit over a paper plate and use a toothpick to scrape up a bit of glue and apply it. 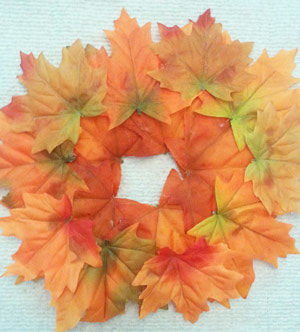 Continue gluing and then let dry flat for 24 hours. Place a pillar candle in the middle and your centerpiece is finished. 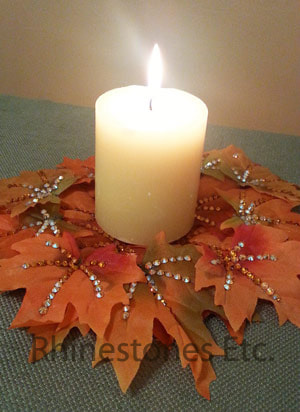 Super easy and yet strikingly beautiful! This table centerpiece will have any table ready for fall!
Rhinestones Etc. has a large inventory of flatback crystal gems for all your bling projects. We offer competitive pricing and fast processing, with many orders shipping the same day. 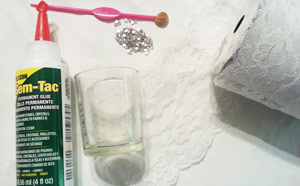 Lace and Rhinestone Glass Candle Holder DecorationThe glow of a candle creates an ambiance of warmth and coziness. Why not take it up a notch and add bedazzling gems? This beautiful lace and rhinestone candle holder is the perfect gift to give to someone or keep for that special occasion centerpiece. With just a few simple things, you can turn something plain into something elegant and special. For this project I used:
Begin by cutting a piece of lace that will fit around the glass votive with a slight overlapping. Using Gem Tac, glue the lace into place lining the lace up against the bottom edge. Allow to dry for 24 hours. 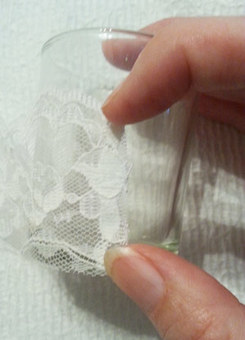 I liked the look of the rhinestones along the top edge of the lace, but you can experiment and see what you like. Place a drop of glue about the size of the rhinestone along the top edge of the lace. Using the wax tipped tool, pick up a rhinestone and gently press it into the glue drop. 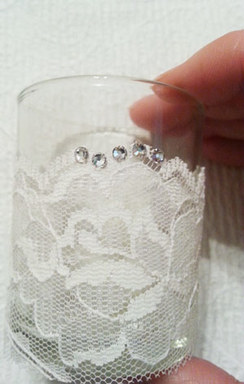 Continue gluing rhinestones until the upper edge is lined with rhinestones. Allow to dry for 24 hours. 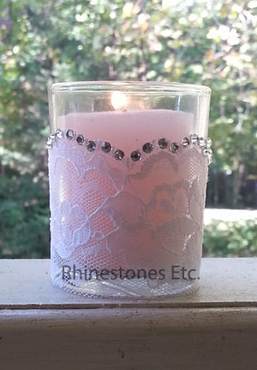 Perfect for any season or occasion, this lace and rhinestone glass votive holder is easy to make and pretty to look at.
For all your bling needs, shop Rhinestones Etc. We have many different colors and sizes of bedazzling gems in stock and ready to ship. 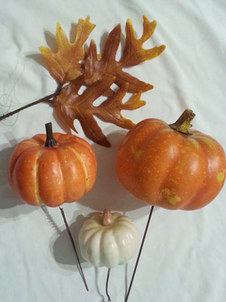 Create This Dazzling Rhinestone Autumn Table CenterpieceThe aroma of delicious food wafts in from the kitchen. The table is set with fine china, silverware, and wine goblets, but something is missing. A beautiful centerpiece will add elegance to any table. This rhinestone Autumn table centerpiece is simple to make and will add that extra sparkle. For this project, I used:
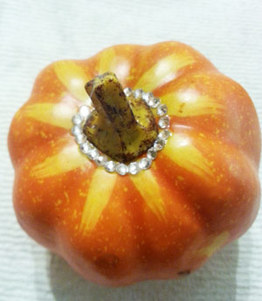
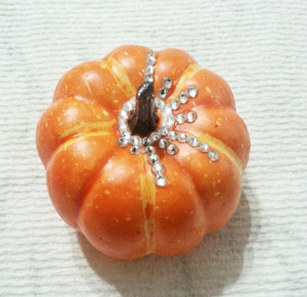
Using a wire cutter, cut the bottom wires off the pumpkins so that they will sit flat. There are many different designs you can do on these small pumpkins and I did them all the same to keep the look unified. Decide on the pattern you would like and when ready, place a drop of glue about the size of the rhinestone on the pumpkin and using the wax tipped tool, pick up a rhinestone and gently press it into the glue drop. 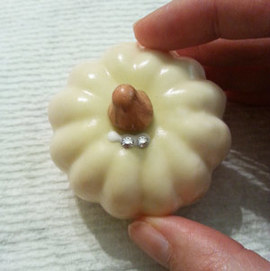 I glued rhinestones around the top of the pumpkins, with the rhinestones coming down the sides. I will be showing you the different pumpkins in varying stages of gluing.
Continue gluing and let dry for 24 hours. 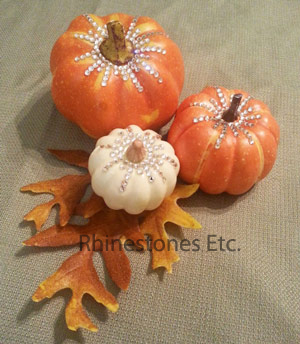 Your centerpiece will be the focal point of the celebration, and you don’t have to tell your guests how easy it was to make. Perfect for Halloween, Thanksgiving, or any other Autumn celebration!
Rhinestones Etc. carries Preciosa, the finest European crystal, and PriceLess, an economically priced flatback gem. Browse our inventory of bedazzling gems to find your bling.  Make This Sparkling Crystal Bedazzled Candle HolderAs DIY wedding favors or gift giving, our crystal bedazzled candle holder is sure to please! For today’s project you need: Glass candle holder Gem Tac adhesive 12ss Rhinestones - approximately 95 (for this project I used Price Less brand) Tweezers or Pick n Stick tool Make sure the surface of your votive is clean. For this project, I used Price Less brand of rhinestones. Normally, I am a Swarovski only girl, but to keep the cost down on some projects, I really like the Price Less brand. It is AAAA crystal (the highest grade in the industry) and costs about 33% less than Swarovski. The pattern I used here is a simple scattered pattern. It really makes no difference how you place the rhinestones, so be creative! Begin by placing a drop of glue on the votive. Using the Pick n Stick tool or tweezers, pick up a crystal and place it in the glue drop. Gently press the bedazzling jewel down, allowing the glue to cover the edges of the rhinestone. Gem Tac dries clear, so do not worry if you accidentally use too much glue. Continue adding gems until you are happy with the coverage. Allow to dry for 24 hours.  When you are finished, you have a beautiful, sparkly creation ready for gift giving!
Do you want to be notified of upcoming sales, new clearance, contests and giveaways? Would you like our free guide to rhinestoning? Subscribe to our newsletter by clicking here. PriceLess brand meets the highest in quality standard and is rated AAA. They are made from crystal not glass and are available in a variety of colors and sizes. Shop Rhinestones Etc. for high-quality embellishments. We offer competitive pricing and fast processing times. Browse our extensive collection of bedazzling jewels before starting your next bling project. |
Categories
All
Archives
August 2026
|

 RSS Feed
|
Home About Policies Returns Shipping Contact Us Size Chart Privacy
Products Reviews [email protected] Copyright 2014 - 2026 Rhinestones Etc. All rights reserved. |